


3-17
Chapter 3: Table
Table Functions
TagPrint Pro offers a number of features designed to make entering and editing data easier.
Adding Fixed and Variable Text to Label -
sequences
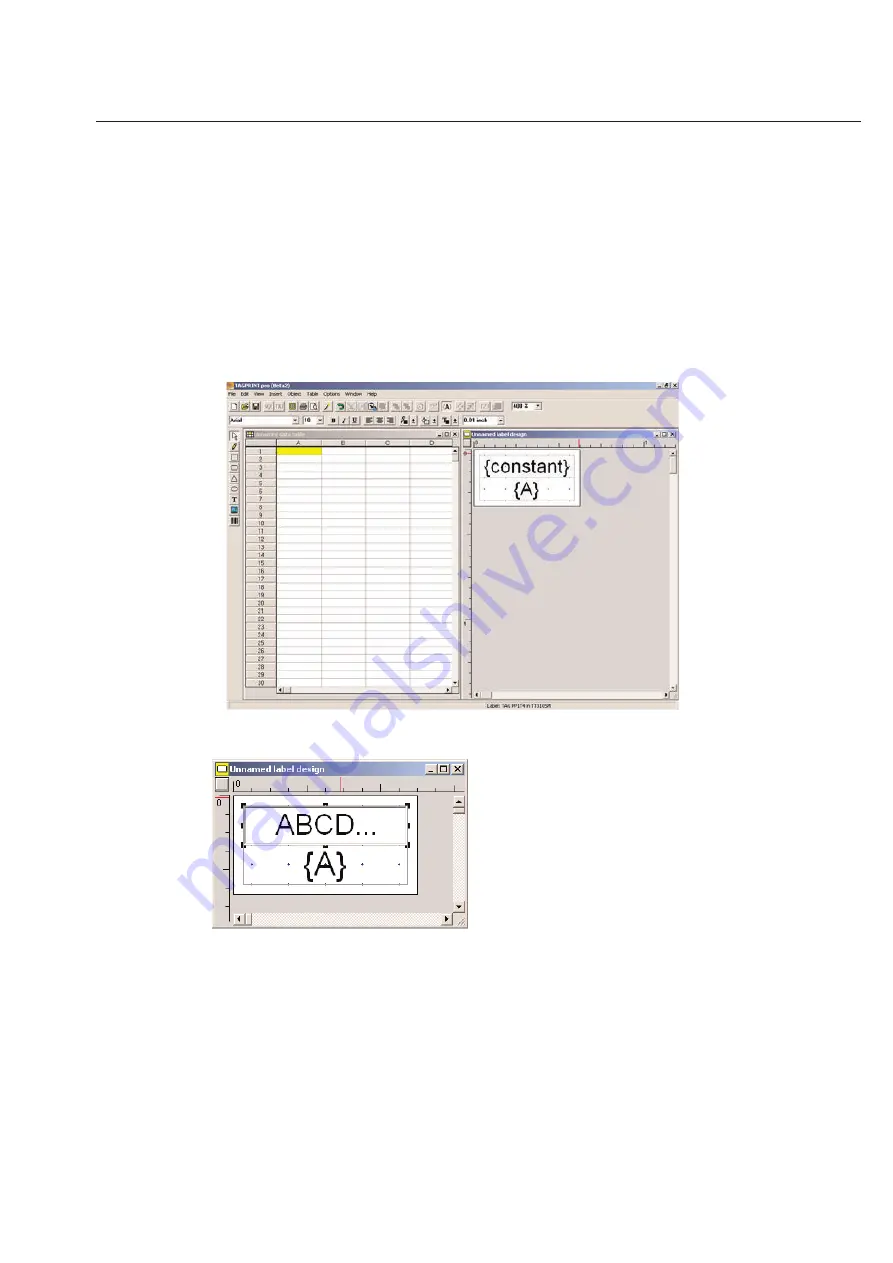
When you have created a new label design, which includes a data table, you will see a split screen. The unnamed
label design is where you determine what the label will look like when finished. It is here that you control the font
size and type, location of text on the label as well as anything related to the editing of that label. It is a WYSIWYG
(What You See Is What You Get) interface.
To use any of the icons associated with the unnamed label design, you need to click your mouse on that side of the
split screen. Clicking once on the table side will activate a different set of icons.
To add printable text to your
{constant}
field, double-click on this field and a cursor will appear. Begin to type your
information.
If you wish to add a serial number or random data to your data field
{A}
you will need to click once on the unnamed
data table side of your split screen.
Manual Entry in the Data Table
First, you can manually enter text in each cell by clicking once on the first cell in which you wish to add data and typ-
ing in the information. Pressing the
Enter
key will bring you to the next cell below.
Important Note
:
The A column of the table is for line 1 of your unnamed label design. Column B would represent
line 2 and column C would represent line 3 of a three line label that incorporates three variable fields, which would be
represented a {A} {B} {C} on your unnamed label design.
Summary of Contents for TagPrintPRO
Page 1: ...Version 2 0 User s Manual...
Page 20: ...Installing TT310SM TT210SM TT1210 Printer Drivers Page 13 Click Finish Select Continue Anyway...
Page 70: ...3 14 Chapter 3 Table...
Page 80: ...3 24 Chapter 3 Table...
Page 106: ...6 8 Chapter 6 Thermal Transfer Printers...


