Lullaby
TM
Warmer 2042376-001 Rev G ©2012 General Electric Company. All rights reserved. 73
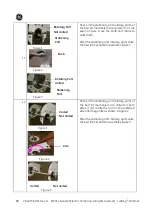
8.
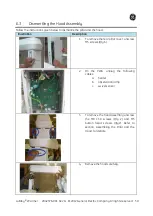
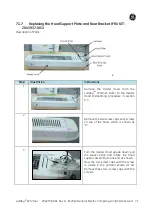
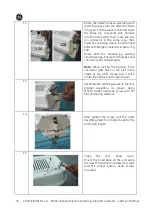
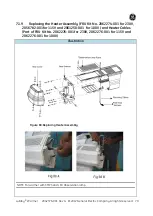
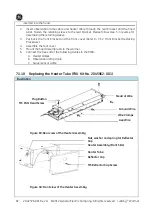
After removing the screws, separate the
hood support assembly from the heater
hood and harness as shown in Fig 8A &
8B.
9.
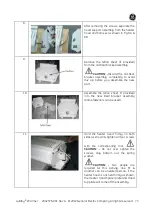
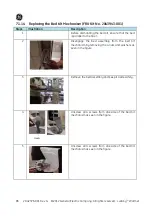
Remove the teflon sheet (if provided)
from the old Rear bracket assembly.
CAUTION: -
Discard the old Rear
bracket assembly completely to avoid
mix up before you assemble the new
part.
10.
Assemble the teflon sheet (if provided)
into the new Rear bracket assembly
(Same fasteners can be used).
11.
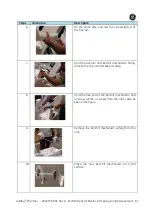
Hold the heater hood firmly on both
sides as shown & tighten all four screws
with the corresponding tool.
CAUTION: -
Do not over tighten the
screws, only bottom out the spring
washer.
CAUTION: -
Two people are
required for this activity, one FE &
another can be unskilled person. If the
heater hood is not held firmly as shown,
the Heater, Hood Spacer plate and Hood
top plate will come off the assembly.
8A
8B
Summary of Contents for Lullaby Warmer
Page 12: ...This page is left blank intentionally ...
Page 139: ...LullabyTM Warmer 2042376 001 Rev G 2012 General Electric Company All rights reserved 113 ...
Page 140: ...114 2042376 001 Rev G 2012 General Electric Company All rights reserved LullabyTM Warmer ...
Page 150: ...124 2042376 001 Rev G 2012 General Electric Company All rights reserved LullabyTM Warmer ...

