26 2042376-001 Rev G ©2012 General Electric Company. All rights reserved. Lullaby
TM
Warmer
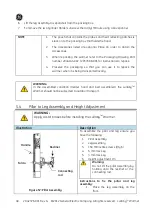
Step Illustration
Description
9
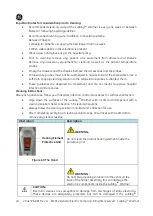
Figure 46:
Removing the Plexiglas
Remove the clear Plexiglas plate by holding it at the
slots as seen in Figure 46.
10
Figure 47:
Cleaning With Ear Bud
Wipe down component parts of the bed and the
chassis base with recommended cleaning solution
as per hospital infection control policy. Rinse and dry
according to the cleaning agent manufacturer’s
direction.
NOTE: To clean the areas which are not reachable,
use cleaning acids such as cotton swabs,
cleaning wipes or hospital suggested aids to
ensure visible cleanliness of all areas.
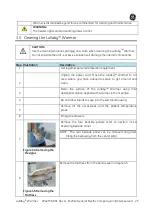
11
Figure 48:
Removing the X-Ray Tray
Remove the X-ray tray to clean it.
12
Chemically disinfect and dry the control panel.
13
Chemically disinfect and dry the dovetail rails.
14
Remove the drawers, immerse in soap solution,
wash and wipe after complete drying to remove
residue. Also follow cleaning manufacturer’s
instructions.
15
Inspect all visible surfaces of the Lullaby
TM
Warmer.
16
Allow all parts to dry for 45 minutes before using
the Lullaby
TM
Warmer bed.
17
Replace chemically disinfected component parts in
the reversed order in which they were removed.
18
Replace the temperature probes and the cleaned
accessories.
19
Plug the power cord to a power outlet.
Summary of Contents for Lullaby Warmer
Page 12: ...This page is left blank intentionally ...
Page 139: ...LullabyTM Warmer 2042376 001 Rev G 2012 General Electric Company All rights reserved 113 ...
Page 140: ...114 2042376 001 Rev G 2012 General Electric Company All rights reserved LullabyTM Warmer ...
Page 150: ...124 2042376 001 Rev G 2012 General Electric Company All rights reserved LullabyTM Warmer ...

