43
Enjoy various printing!
2
Enjoy
various
printing!
Save Image - Save
1
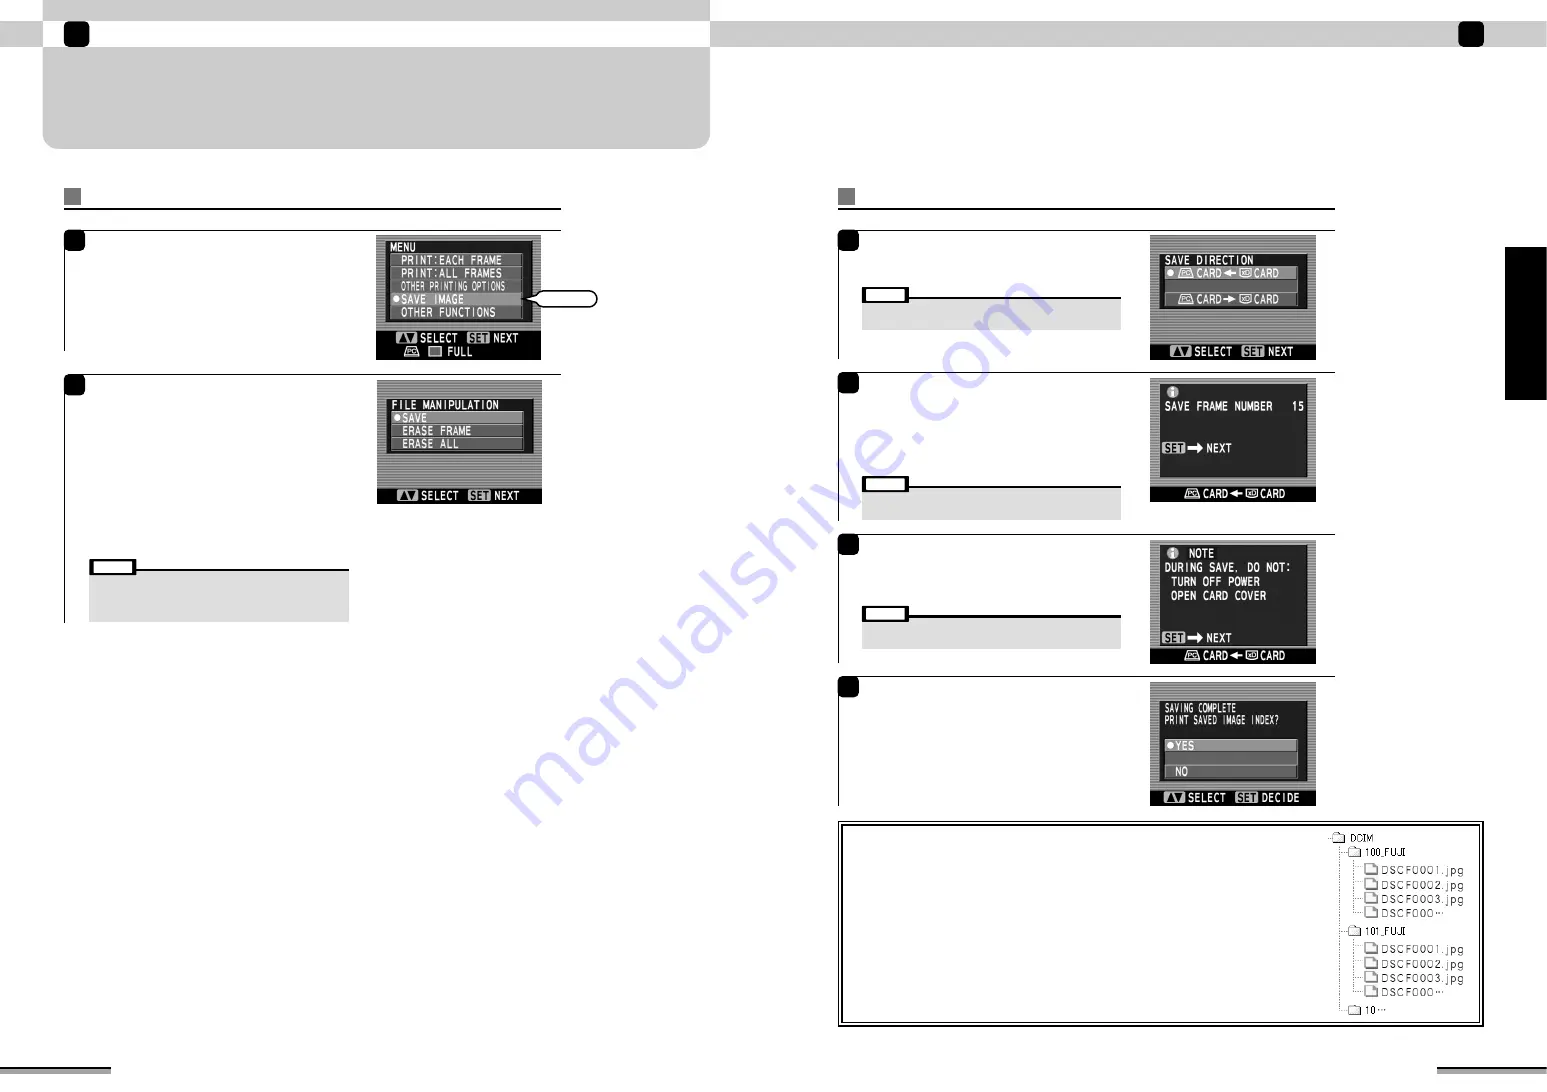
The “SAVE DIRECTION” window appears.
Use
f
to select the image data save direction
and then press the [SET] button.
2
A confirmation window appears showing the
number of saved files and the save direction.
Check that information is correct and then press
the [SET] button.
If the information is incorrect, press the [BACK]
button to return to the previous screen.
• Do not turn off the printer during saving.
• Do not open the memory card cover during saving.
Note
• Do not turn off the printer during saving.
• Do not open the memory card cover during saving.
Note
3
Precautionary notes are displayed.
Check the notes and press the [SET] button.
Image data saving begins. The [BUSY] lamp
blinks during saving.
4
When image data saving ends, the “SAVING
COMPLETE” window appears.
To print an index of the saved images, use
f
to select “YES” and then press the [SET] button.
Then proceed with index printing (
→
P.30).
To skip index printing, select “NO” and press the
[SET] button to return to the “MENU” window
(
→
P.21).
• Do not turn off the printer during saving.
• Do not open the memory card cover during saving.
Note
e e e
SAVE IMAGE/ERASE PICTURES (
➔
P.42) continued
42
SAVE IMAGE/ERASE PICTURES
Provides a simple way to back up images on one memory card to another memory card.
Enjoy various printing!
2
Save Image/Erase Pictures
1
Press the [MENU] button.
Use
f
to select “SAVE IMAGE” and then
press the [SET] button.
2
In the “FILE MANIPULATION” window, use
f
to select the desired function and then press the
[SET] button.
SAVE: (
→
P.43)
Images on one memory card can be saved on
another memory card.
ERASE FRAME: (
→
P.44)
Selects and erases images on a memory card one
frame at a time.
ERASE ALL: (
→
P.45)
Erases all the images on the memory card.
Select
• “SAVE” is the function of only package preservation.
• Refer to 14 pages about the image data which can be saved.
• Refer to 13 or 14 pages about the memory card which can
be used.
Note
■
Images are saved on the destination memory card as shown below.
• The images are saved in the “
✽✽✽
_FUJI” folder, which is in the DCIM folder.
(A number between 100 and 999 is inserted for “
✽✽✽
” in the above folder name.)
The number in the folder name increases (100, 101, etc.) each time images are saved.
If the number in the folder name exceeds 999, no further images can be saved.
• Image file names are written as “DSCF
✽✽✽✽
”.
(A number between 0001 and 9999 is inserted for “
✽✽✽✽
” in the above file name.)
File names such as “DSCF0001”, “DSCF0002”, etc. are assigned in the order of image display.
The file extension does not change.
See P.14 for information on the image display order.


