


Enjoy
various
printing!
37
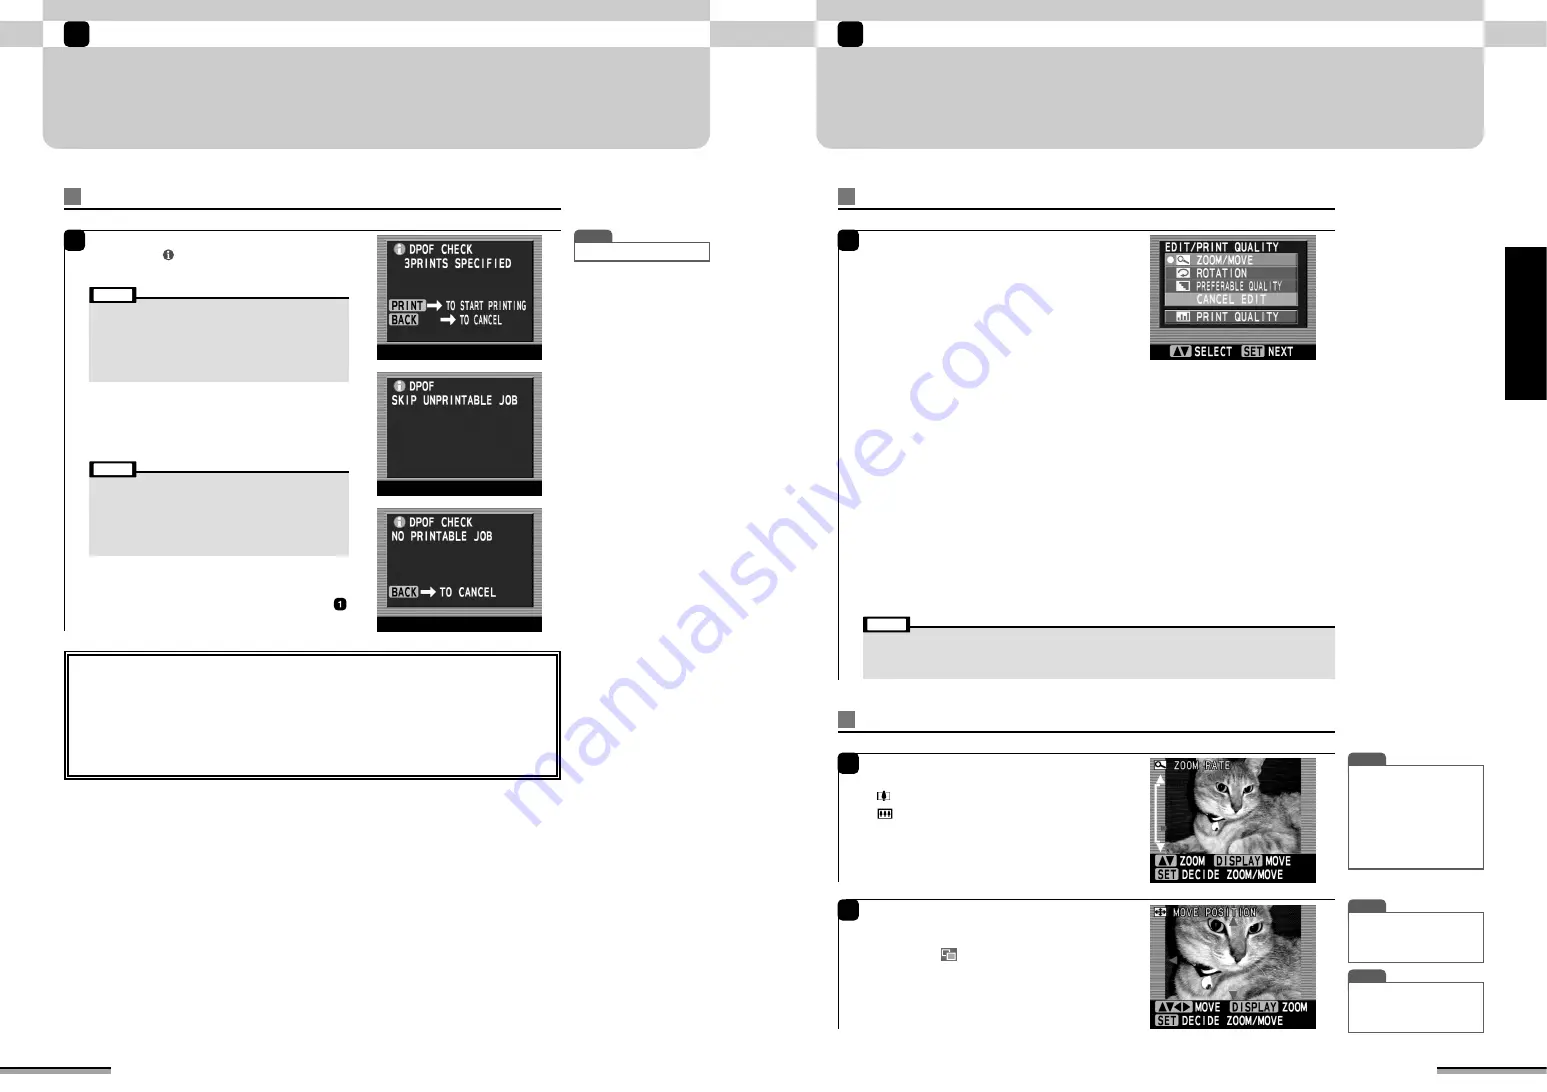
EDIT/PRINT QUALITY
Edit your pictures using such functions as “ZOOM/MOVE” to magnify the picture, “ROTATION” to
changes the orientation (vertical or, horizontal) of the picture, and “PREFERABLE QUALITY” to
change the quality to match the scene.
Enjoy various printing!
2
Setting the Edit/Print Quality menu
1
Select the picture to be finished in each mode,
and press the [EDIT] button.
The “EDIT/PRINT QUALITY” window is displayed.
Use
f
to select the preferred picture finish,
and press the [SET] button.
ZOOM/MOVE:
Magnifies the picture and adjusts its position. This
function prints the picture so that the parts you do
not want to see are cropped (
→
P.37).
ROTATION:
This function sets the direction (vertical, horizontal)
of the picture in 90° steps (
→
P.38).
PREFERABLE QUALITY:
This function allows individual images to be edited
using the “MODE”, “PINPOINT COLOR CONV.” and
“EFFECT” settings (
→
P.38).
CANCEL EDIT:
This function resets the “ZOOM/MOVE”, “ROTATION”
and “PREFERABLE QUALITY” photo editing (
→
P.39).
PRINT QUALITY:
This function allows adjustment of the brightness
and density of the color of all the pictures to be
printed. Adjusted print quality can also be formatted
(
→
P.39).
• Editing cannot be performed in the Index mode.
• When “ROTATION” is performed after “ZOOM/MOVE”, the “ZOOM/MOVE” settings are canceled. When
performing both “ZOOM/MOVE” and “ROTATION” photo finishing, perform them in “ROTATION”
→
“ZOOM/MOVE” order.
Note
Zoom/Move
1
The “ZOOM RATE” window is displayed.
Use
f
to adjust the picture zoom rate.
a
: Raises the picture zoom rate.
b
: Lowers the picture zoom rate.
After adjusting the zoom rate, press the
[DISPLAY] button.
2
T I P
T I P
• For 1 frame display, “ZOOM/
MOVE” picture finishing can
be performed by using
f
at the “Selection of picture”
window.
• When you want to return the
picture to its state before
finishing, press the [BACK]
button.
• When you want to return the
picture to its state before
finishing, press the [BACK]
button.
T I P
• The zoom specifications are
as follows:
Max. zoom magnification: 5
×
No. of steps: 17
The “MOVE POSITION” window is displayed.
Use
fg
to adjust the part you want to print.
After adjustment, press the [SET] button.
A picture with
is displayed.
36
DPOF PRINT
DPOF print prints according to the DPOF information on the memory card. DPOF print can be
performed by loading the paper and a memory card containing DPOF data.
Enjoy various printing!
2
DPOF print
1
When there is DPOF information on the memory
card, the “
DPOF CHECK” window is
displayed.
When performing DPOF print:
Press the [PRINT] button.
When there is the DPOF information not corresponding
to the printer, a message is displayed.
When not performing DPOF print:
When the [BACK] button is pressed, the printer
advances to normal printing operation (Step
on page 15).
■
DPOF information not supported by the printer
The DPOF information shown below cannot be used to print on this printer.
• A rotation setting other than 0° is specified.
• A text print setting other than the date is specified.
• The trimming extends beyond the image area.
• The trimmed image is smaller than 32 pixels.
• The image type or image size (number of horizontal or vertical pixels) is not supported by the
printer.
• DPOF printing works only when print size is set to 4”
×
6”
size.
• The DPOF settings on the memory card cannot be changed
with this printer. The DPOF information on the memory card
cannot be checked either.
• DPOF supports borderless full-size prints and index prints
(no text).
Note
• Do not touch the moving paper while printing.
• Do not remove the memory card while printing.
• Do not pull out the trash box while printing.
• When an error window or information window is displayed,
refer to pages 54 to 61.
• Do not turn off the printer during printing
• Do not open a memory card cover during printing.
Note
T I P
• Refer to P.13.


