


41
Enjoy various printing!
2
Enjoy
various
printing!
Preferable quality - Effect
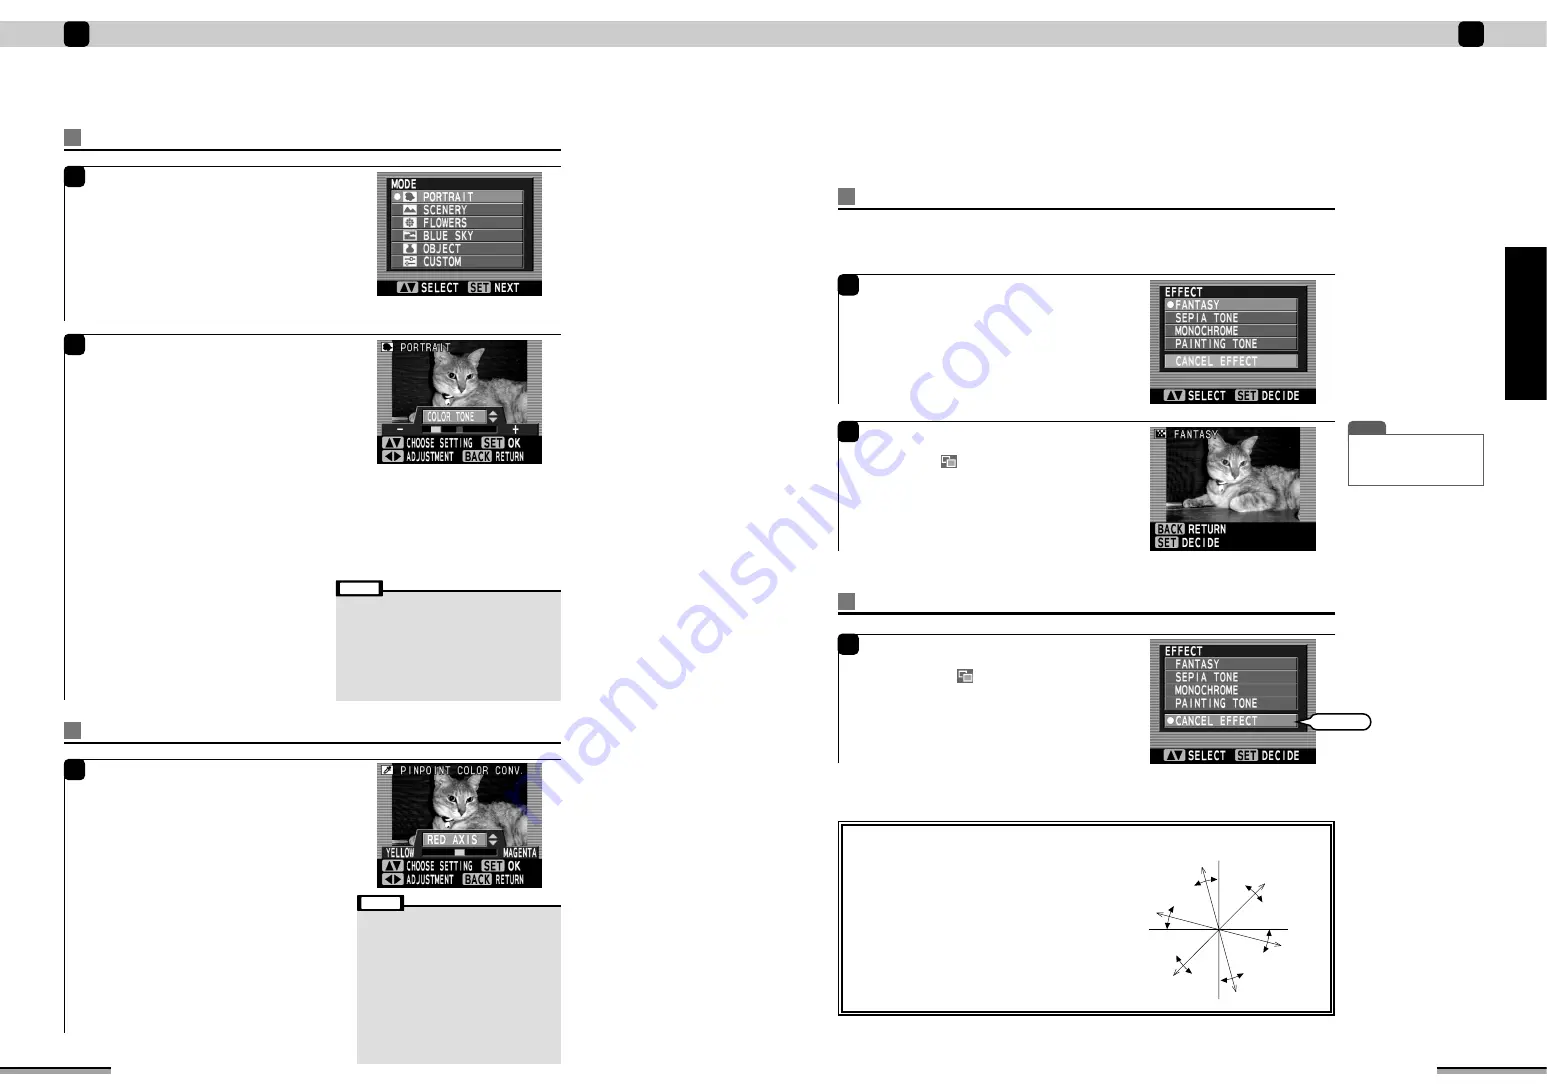
1
The “EFFECT” window is displayed.
Use
f
to select the preferred effect, and press
the [SET] button.
2
The Effect result window is displayed.
After checking the result, press the [SET] button.
A picture with
is displayed.
When the “EFFECT” is used, printing of a different atmosphere than the original picture can be
enjoyed.
The following photo finishing is possible using the “EFFECT”.
i
FANTASY (Brightening effect)
i
SEPIA TONE
i
MONOCHROME
i
PAINTING TONE
T I P
• When you want to return the
picture to its state before
finishing, press the [BACK]
button.
Preferable quality - Cancel Effect
1
Use
f
to select “CANCEL EFFECT” and then
press the [SET] button.
A picture without
is displayed.
Select
e e e
PREFERABLE QUALITY (
➔
P.38) continued
■
Pinpoint color conversion - Color conversion range
• See the figure at right for the conversion range
for each color.
<Ex.>
• When a yellow flower is tinged with orange,
shifting the “YELLOW AXIS” towards the
“GREEN” setting will remove the orange tones.
• When a blue sky is tinged with purple, shifting the
“BLUE AXIS” towards “CYAN” will remove the
purple tones.
RED AXIS
YELLOW AXIS
GREEN AXIS
CYAN AXIS
BLUE AXIS
MAGENTA AXIS
40
Enjoy various printing!
2
Preferable quality - Mode
1
The “MODE” window appears.
Use
f
to select the desired mode, and then
press the [SET] button.
Six modes are available according to the scene being
shot.
PORTRAIT/SCENERY/FLOWERS/BLUE SKY/OBJECT
In each mode, recommended adjustments are set
for each of the settings, but these can be changed.
CUSTOM:
Each adjustment is set to the medium value. Set the
adjustments as desired.
2
The setting window appears.
Use
f
to select the item you want to adjust,
use
g
to adjust the value, and then press the
[SET] button.
The icon is displayed in images that have been
adjusted.
The 6 adjustments are listed below.
COLOR TONE:
Varies the degree of color variation in
colored sections.
+: Brightens the color tones /
–: Softens the color tones
COLOR LEVEL:
Varies the brightness of the colors in colored
sections.
+: Brighter colors. / –: Darker colors
BRIGHTNESS:
Varies the intensity of primarily bright
sections.
+: Brighter colors. / –: Darker colors.
DARKNESS:
Varies the intensity of primarily dark sections.
+: Brighter colors. / –: Darker colors.
CHROMATICITY:
Varies the color intensity.
Allows colors to be made extremely intense
or pale.
+: More intense colors. / –: Paler colors.
RESET:
Returns the processing adjustments for the
selected image to the recommended default
settings and applies them to the image.
“CUSTOM” settings revert to the median
values.
Preferable quality - Pinpoint color conv.
1
The “PINPOINT COLOR CONV.” window is
displayed.
Use
f
to select the adjustment and
g
to
change the setting and adjust the image quality.
Then press the [SET] button.
Specific colors in an image can be changed to the
desired color tones using six types of adjustment
(color).
Combinations of adjustments can also be set.
[RED AXIS]:
Yellow
←
Reds
→
Magenta
[MAGENTA AXIS]:
Red
←
Magentas
→
Blue
[BLUE AXIS]:
Magenta
←
Blues
→
Cyan
[CYAN AXIS]:
Blue
←
Cyans
→
Green
[GREEN AXIS]:
Cyan
←
Greens
→
Yellow
[YELLOW AXIS]:
Green
←
Yellows
→
Red
[RESET]:
Resets the selected color processing
adjustments to their median values.
See P.41 for the conversion range for each color.
• Depending on a picture, it may almost be
changeless.
• Change and the print of a picture which appear in a
monitor are not necessarily in agreement.
• In images where the “PREFERABLE QUALITY”
function has been used, AUTO QUALITY
ADJUSTMENT is set to off.
• Though the adjustment details for each image are
stored, the image editing is initialized when the printer
is switched off or the memory card is removed.
Note
e e e
PREFERABLE QUALITY (
➔
P.38) continued
• In some images, there may be little or no change.
• The changes in the image shown on the screen
may not necessarily match the print.
• In images where the “PREFERABLE QUALITY”
function has been used, AUTO QUALITY
ADJUSTMENT is set to off.
• Though the adjustment details for each image are
stored, the image editing is initialized when the
printer is switched off or the memory card is
removed.
• Colors other than the specified color may also
change slightly.
• While this function can make approximate
changes to color tones, it cannot necessarily
change the color tones as desired.
Note


