Specifying Destinations
67
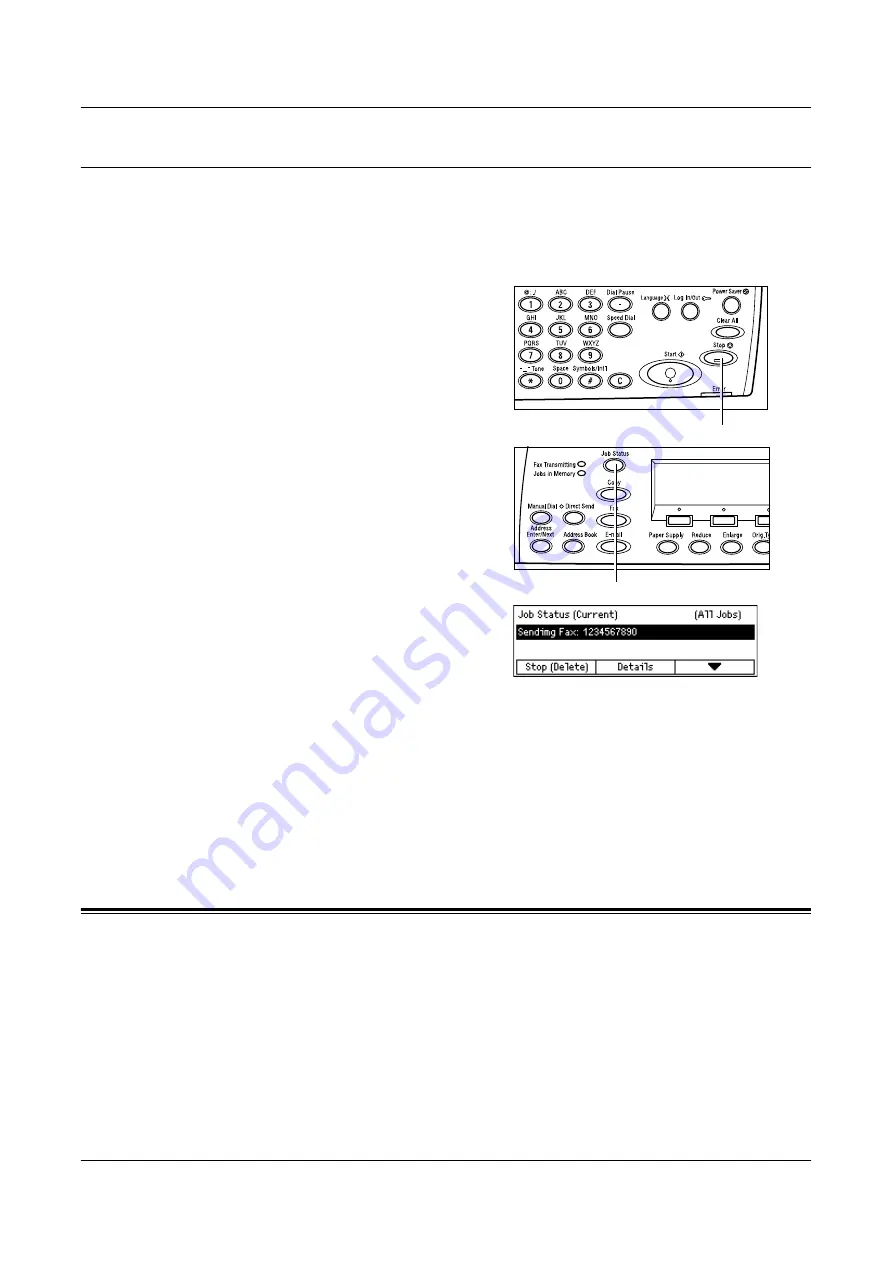
Stop the Fax Job
Follow the step 1 to manually cancel a fax job while scanning the document. After
scanning the document, follow the step 2 to 3.
NOTE:
When the document is sent by Direct Send, there may be some delay between
the cancel instruction and the actual end of transmission.
1.
Press the <Stop> button on the control
panel to cancel the current fax job.
2.
If required, press the <Job Status>
button on the control panel to display
the Job Status screen. To exit the Job
Status screen, press the <Job Status>
button.
3.
If the job to be canceled is displayed on
the current screen, select [Stop
(Delete)] using the <Select> button.
If not, go to step 4.
4.
Press the < > button to display the All Jobs screen.
5.
Select [Fax/E-mail] using the <Select> button.
6.
Select [Send] using the <Select> button.
7.
Select the job to be canceled by selecting [ ] or [ ] using the <Select> button.
8.
Select [Details] using the <Select> button.
9.
Select [Stop (Delete)] using the <Select> button.
Specifying Destinations
This section describes how to specify destinations using the features available on the
machine. For more information, refer to the following.
Address Enter/Next – page 68
Address Book – page 68
Speed Dial – page 69
One Touch Dial – page 70
Relay Broadcast – page 70
<Stop> button
<Job Status> button
Summary of Contents for DocuCentre 1055
Page 1: ...DocuCentre 1085 1055 User Guide...
Page 10: ...10...
Page 28: ...1 Before Using the Machine 28...
Page 48: ...2 Product Overview 48...
Page 62: ...3 Copy 62...
Page 86: ...4 Fax 86...
Page 122: ...7 CentreWare Internet Services 122...
Page 130: ...8 Paper and Other Media 130...
Page 172: ...9 Setups 172...
Page 182: ...10 Maintenance 182...
Page 208: ...11 Problem Solving 208...
Page 238: ...13 Glossary 238...
Page 244: ...14 Index 244...


