Tips for troubleshooting
179
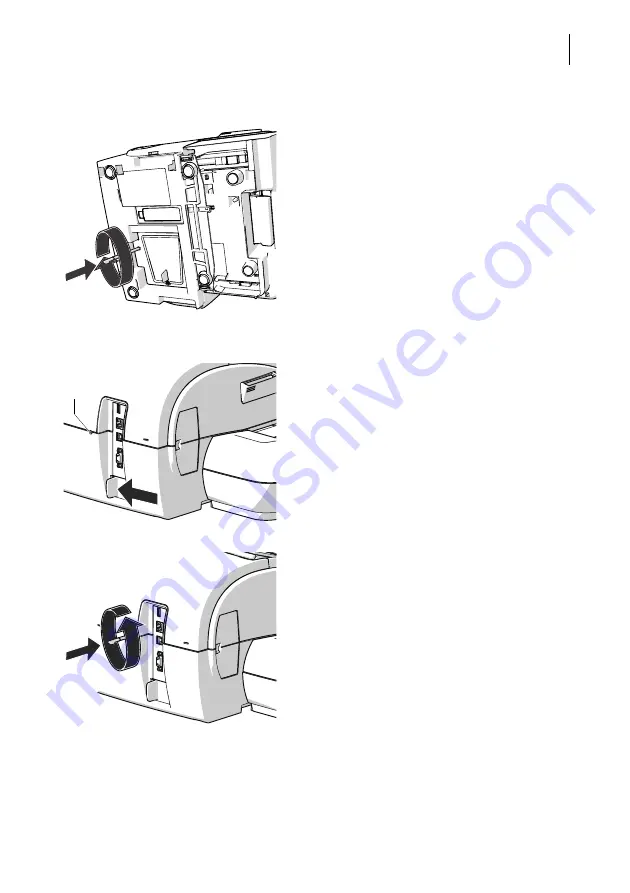
Lift ink cartridge from sealing position
• Tilt the franking machine on its right-hand
side and deposit it safely.
• Insert the stylus into the hole in the cover.
• Press the stylus against the resistance
(spring pressure) and rotate it clockwise
until a ‘snap’ indicates that the ink cartridge
has moved from its sealing position and is
ready to be moved to the exchange position.
• Remove the stylus.
• Place franking machine upright again.
Move ink cartridge to exchange position
• Push the white slider next to the power
outlet on the PostBase Vision in the
direction of the arrow
and hold it
.
• Insert the stylus in the opening in the back
of the franking machine.
• Rotate the stylus counterclockwise to
move the ink cartridge to the exchange
position.
When the flap of the print system opens, the
ink cartridge has reached the exchange posi-
tion.
• You can remove the ink cartridge now as
usual (see page 137).
Opening for ink
cartridge release


