


HyPower-Geko
Maintenance and Troubleshooting
FläktGroup DC-2014-0022-GB 2018-05/R5 • Subject to modifications
119
8.2.4 Examine heat exchanger and condensate tray
Visually inspect HE and condensate tray for contamination, damage, corrosion and
leak tightness, and clean and repair if necessary.
8.3
Annual maintenance
8.3.1 Clean accessory modules (sound absorber, intake/discharge boxes) (optional)
Personal injury and equipment damage!
Danger of personal injury by falling unit components! Consider the unit weight!
Before disassembling a module make sure that other modules in the ceiling are
firmly secured.
If necessary, take measures to secure such modules.
Risk of personal injury!
Injury may be caused by falling parts and sharp edges!
Upon disassembly of the unit, wear helmet, safety shoes and protective gloves. Dis-
assembly should always be performed by two persons
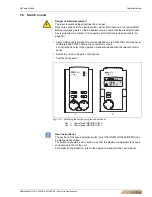
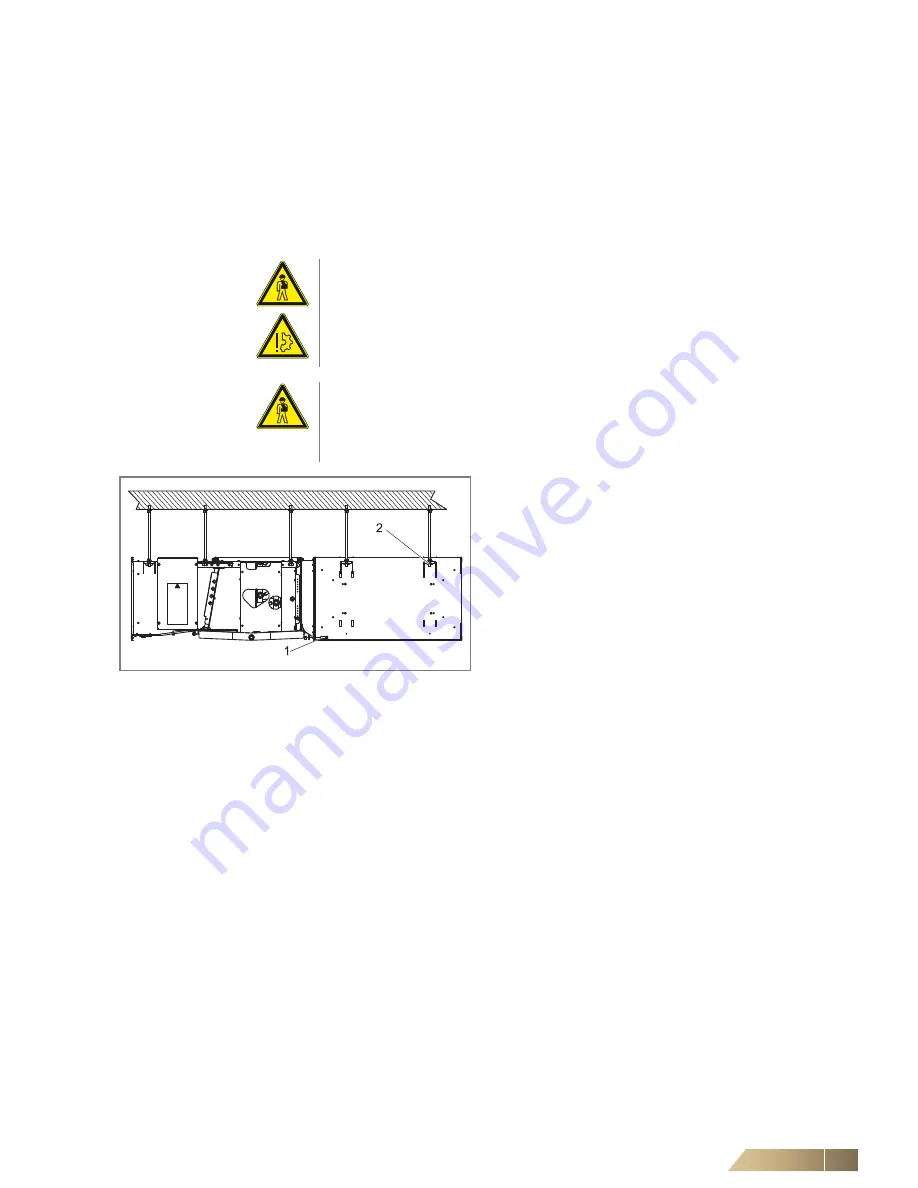
•
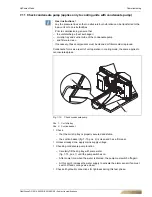
Release the center and connecting bolts (fig. 8-3,
Pos.1) on both sides of the add-on modules and remove
them.
•
Loosen nuts (M8) of the associated threaded rods
which fasten the module until the module can be discon-
nected (fig. 8-3, Pos. 2).
•
Remove the module. Consider the module weight.
•
Clean the add-on module from inside as well as casing
by vacuum and dry cleaning.
•
Place the module back in the ceiling bracket in the se-
quence opposite to disassembly.
•
Ensure correct seat of the module.
Fig. 8-3:
Cleaning the sound attenuator
Pos. 1:
Connection screws
Pos. 2:
Nut M8