www.exacq.com
+1.317.845.5710
+5255.56080817
+44.1438.310163
USA (Corporate Headquarters)
Mexico
Europe/Middle East/Asia
15
Add Systems
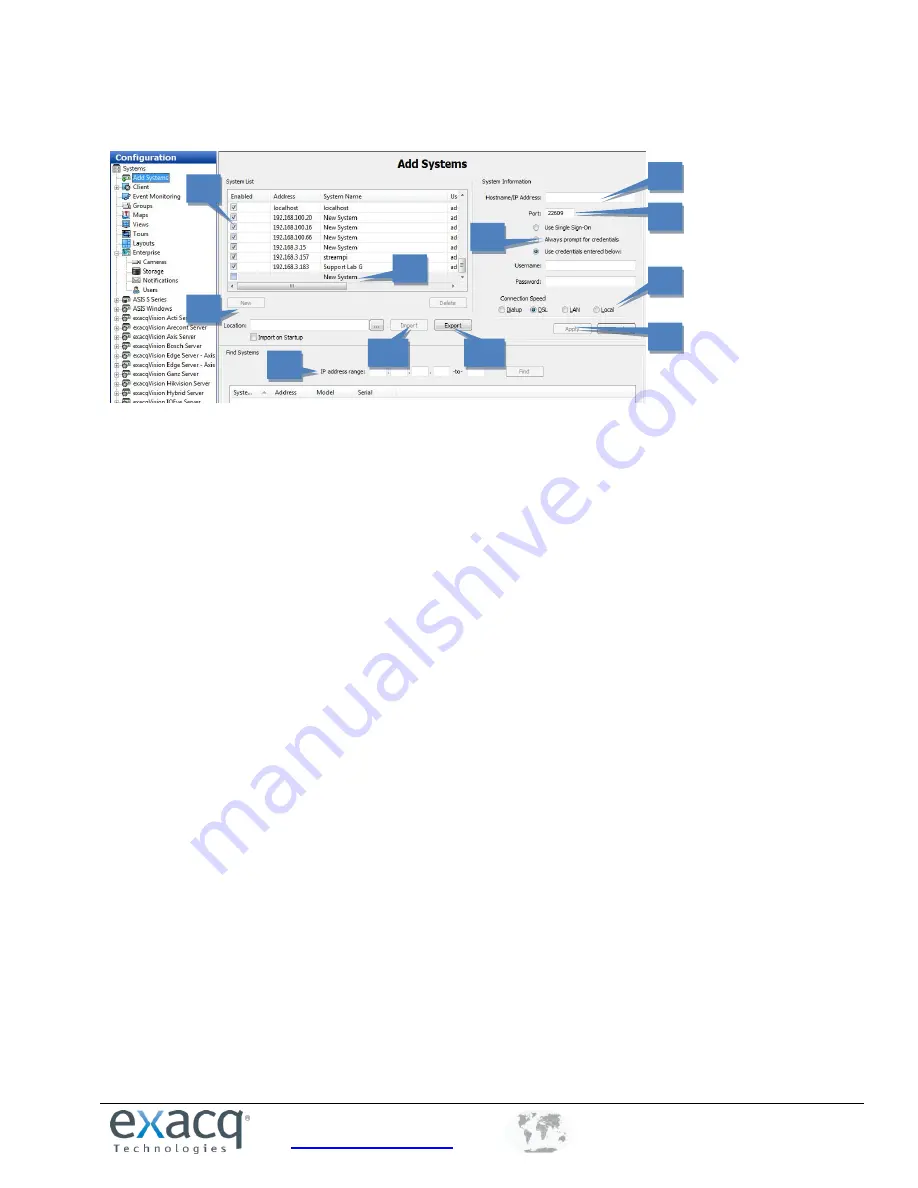
The Add Systems page allows you to add systems so that you can connect to them with exacqVision Client.
1.
To add a system, click New. (Alternatively, you can “find” a system, as discussed below.)
2.
The new system is added to the System List. The System Information fields are enabled.
3.
Enter the system’s hostname or IP address. Contact the system administrator for details.
4.
By default, the port number is 22609; change this only if necessary for your network configuration.
5.
Select one of the following login methods:
Use Single Sign-On is available only on systems with an Enterprise license. See the “Enterprise
Users” section of this manual for more information.
To require a username and password entry every time exacqVision Client is started, select Always
Prompt for Credentials.
To automatically log in to the system every time exacqVision Client is started, select Use
Credentials Entered Below. Then enter a valid Username, Password, and Password Confirm.
6.
Select a Connection Speed. This tells the system how much audio to buffer in order to help maintain a
smooth audio stream.
7.
When finished, click Apply. If the entered information is valid, the system is automatically connected.
8.
To disconnect or reconnect a system, select its box in the System List.
9.
To find a system and its address on your network, enter the IP address range in the Find Systems area.
The first three boxes must be the first three elements of the IP address; the fourth and fifth boxes are
used to create a range of numbers for the final element of the IP address. Click Find to list all systems
whose IP addresses are in the IP address range. When the search is complete (or when you click Stop,
which replaces the Find button), select any of the systems to add the system to the System List and
populate the Hostname/IP Address field. You must still enter a valid username or password to be able to
connect to the system. Click Apply when finished.
10.
Enter a network location or web site where a server configuration file is located and click Import to load
the list to the client computer. (This will not delete any systems already added.) Select Import on Startup
to automatically load the list whenever exacqVision Client is started.
11.
Click Export to save the server configuration file for import on another system.
Connected systems in the System List also appear in the Configuration, Live, and Search trees. Disconnected
systems do not appear in the trees.
NOTE:
You cannot connect to more than one system that is licensed as an exacqVision Start server at a time. If you
attempt to connect to a second Start server simultaneously, the first connection to a Start server is terminated.
1
3
4
5
6
7
6
8
9
2
10
11


