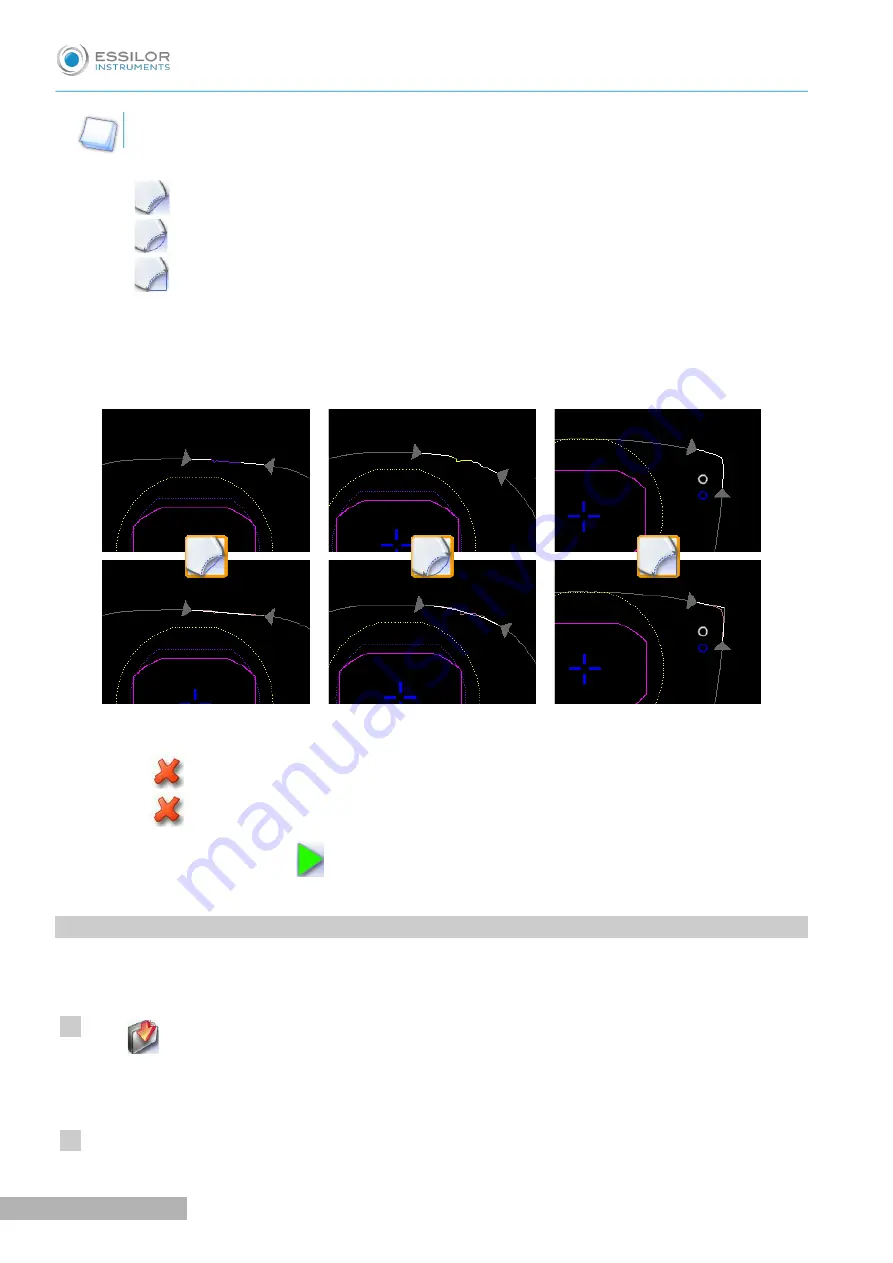
The types of retouch available vary according to the size of the selected area.
•
Retouch to create a straight line.
•
Retouch to create a curve.
•
Retouch to create an angle.
The selected area is retouched.
The original shape is displayed in light red.
Cancelling a modification
•
Press
once to cancel the last modification made to the shape.
•
Press
twice consecutively to return to the original shape.
Once the shape is modified, press
to save and go back to the centering screen.
3. A
RCHIVING
/
SAVING
A
SHAPE
This function enables you to save a modified shape to a new job with a new ID while keeping the original
job.
Press
.
The job-creation alphanumeric keypad is displayed.
Select the list in which you want to store the shape.
>
>
>
1
2
Pro-B 300 > v1.0 - 03.19
76
U
SER
M
ANUAL
> IV. M
ODIFYING
THE
LENS
SHAPE
Summary of Contents for Pro-B 300
Page 1: ...User Manual...
Page 2: ......
Page 6: ......
Page 8: ......
Page 9: ...I FIRST STEPS...
Page 17: ...II TRACING...
Page 40: ......
Page 41: ...III CENTERING A LENS...
Page 69: ...IV MODIFYING THE LENS SHAPE...
Page 78: ......
Page 79: ...V PREPARING A DRILLED JOB...
Page 91: ...USER MANUAL V PREPARING A DRILLED JOB 91 Pro B 300 v1 0 03 19...
Page 92: ......
Page 93: ...VI PREPARING LENS EDGING...
Page 98: ......
Page 99: ...VII TO SET UP THE DEVICE...
Page 114: ......
Page 115: ...VIII MAINTENANCE SERVICING...
Page 126: ......
Page 127: ...TECHNICAL DATA...
Page 130: ......
Page 131: ...GENERAL INFORMATION 9...
Page 135: ...GLOSSARY...


