background image

187

Nothing Prints
Cannot Print Over a Network
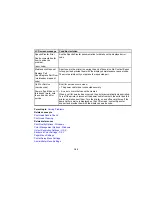
Print Head Moves But Nothing Prints
Red Light Shines Inside the Printer

Parent topic:

Solving Problems

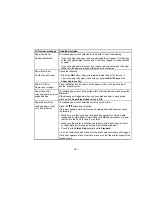
Nothing Prints

If you have sent a print job and nothing prints, try these solutions:

• Make sure your printer is turned on.

• Make sure any interface cables are connected securely at both ends. If you have a spare cable, try

connecting with the spare cable.

• Check the model and specifications of the interface cable to see if the cable is appropriate for your

computer and printer.

• If you connected your printer to a USB hub, make sure it is a first-tier hub. If it still does not print,

connect your printer directly to your computer instead of the hub.

• Make sure the USB hub is recognized correctly on the computer. Disconnect all USB hubs from the

computer and connect the printer directly to the computer's USB port.

• Make sure the USB cable length does not exceed 10 feet (3 m).

Parent topic:

Solving Printing Problems

Related references

Interface Specifications

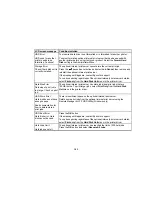
Cannot Print Over a Network

If you cannot print over a network, try these solutions:

• Make sure that your printer is turned on.

• Make sure you installed your printer's network software as described in the

Network Guide

.

• If you are using TCP/IP, make sure the printer's IP address is set correctly for your network. If your

network does not assign IP addresses using DHCP, set the IP address manually.

• Check your wired LAN router or access point to see if the LED for the port to which your printer is

connected is on or flashing. If the link LED is off, try the following:

• Make sure the Ethernet cable is securely connected to your printer and to your router, access point,

switch, or hub.

Summary of Contents for SureColor P8000

Page 1: ...Epson SureColor P6000 P7000 P8000 P9000 User s Guide ...

Page 2: ......

Page 3: ...ng Roll Paper 28 Cutting Roll Paper Manually 29 Printing Trim Lines 29 Removing Roll Paper 30 Cut Sheet Handling 34 Loading Cut Sheets 35 Loading Thick or Large Cut Sheets 37 Adjusting the Platen Gap 40 Using the Paper Basket 41 Catching Printouts Under the Product 41 Catching Printouts in Front of the Product 49 Storing the Paper Basket 53 Creating Paper Configurations 56 Printing a Paper Configu...

Page 4: ...Only 91 Selecting Print Layout Options Windows 97 Reduce Enlarge Options Windows 98 Multi Page Printing Options Windows 98 Selecting Additional Settings Windows 99 Printing Your Document or Photo Windows 101 Checking Print Status Windows 103 Saving Sharing and Customizing the Printer Settings 103 Saving and Sharing Print Settings Windows 104 Saving and Sharing Media Settings Windows 105 Editing Pr...

Page 5: ...aintenance Menu Settings 131 Paper Menu Settings 133 Printer Setup Menu Settings 137 Printer Status Menu Settings 140 Network Setup Menu Settings 140 Preferences Menu Settings 141 Administrator Menu Settings 141 Replacing Ink Cartridges 144 Checking Ink and Maintenance Box Status With Windows 144 Checking Cartridge Status with OS X 146 Purchase Epson Ink Cartridges 147 Ink Cartridge and Maintenanc...

Page 6: ...169 Replacing the Cutter 172 Moving or Transporting the Product 175 Moving the Product Short Distances 175 Moving the Product Long Distances 176 Solving Problems 180 Product Status Messages 180 Solving Printer Problems 186 Printer Does Not Turn On 186 LCD Screen Shuts Off 186 Solving Printing Problems 186 Nothing Prints 187 Cannot Print Over a Network 187 Print Head Moves But Nothing Prints 188 Re...

Page 7: ...nk Cartridge Specifications 210 Dimension Specifications 211 Electrical Specifications 212 Environmental Specifications 212 Interface Specifications 213 Safety and Approvals Specifications 213 Notices 214 Important Safety Instructions 214 General Product Safety Instructions 214 Ink Cartridge Safety Instructions 216 FCC Compliance Statement 217 Open Source Software License 217 Trademarks 227 Copyri...

Page 8: ......

Page 9: ...9 Epson SureColor P6000 P7000 P8000 P9000 User s Guide Welcome to the Epson SureColor P6000 P7000 P8000 P9000 User s Guide For a printable PDF copy of this guide click here ...

Page 10: ...cleaning cycles improve print head health over prolonged idle periods Ink repellant print head surface for reduced nozzle clogging High resolution Prints at resolutions up to 2880 x 1440 dpi Supports variable sized droplet technology as small as 3 5 picoliter Easy to use setup and operation Intuitive easy to read color LCD display Front loaded media for easy access Easy to use software Optional Eq...

Page 11: ...e plan EPP900B1 2 year extended Epson Preferred Plus service plan EPP900B2 Parent topic Printer Features Notations Used in the Documentation Follow the guidelines in these notations as you read your documentation Warnings must be followed carefully to avoid bodily injury Cautions must be observed to avoid damage to your equipment Notes contain important information about your printer Tips contain ...

Page 12: ...12 Product Parts Front 1 Front cover 2 Left and right ink bays 3 Paper basket 4 Casters 5 Paper supports 6 Manual holder 7 Control panel 8 Paper feed slot ...

Page 13: ...paper holder Parent topic Printer Part Locations Product Parts Back 1 Maintenance box 2 USB port 3 Interface for optional equipment 4 LAN port 5 LAN data light 6 LAN status light 7 AC inlet 8 Slot for optional internal print server ...

Page 14: ...se cancel button 4 The pause cancel light 5 LCD screen 6 The open ink cover button 7 The paper source and left arrow button 8 The paper feed and arrow buttons 9 The Menu and right arrow button 10 The paper cut button 11 The load paper button 12 The load paper light 13 The OK button 14 The Black ink button ...

Page 15: ...Display 1 Status messages 2 Paper source and the selected Paper Type The icon indicates the current paper source settings The selected Paper Type is listed to the right of the icon Roll paper with Auto Cut enabled Roll paper with Auto Cut disabled Cut sheet paper ...

Page 16: ... cartridge is expended Ink error check the status message on the LCD screen 6 Optional accessory status if applicable Auto Take Up Reel SC P8000 SC P9000 only SpectroProofer Optional Internal Print Server is installed Optional Internal Print Server is being accessed 7 Photo Black or Matte Black ink selected Press the Black ink button to switch cartridge types ...

Page 17: ...aintenance box status Amount of space remaining in the maintenance box Maintenance box is nearing the end of its service life Maintenance box is full 9 Roll paper remaining Parent topic Printer Part Locations ...

Page 18: ...pson Papers Borderless Paper Type Compatibility Roll Paper Handling See these sections to load cut and remove roll paper in your product Loading Roll Paper Cutting Roll Paper Removing Roll Paper Parent topic Media Handling Loading Roll Paper You can load roll paper with a 2 or 3 inch core and a width of up to 24 inches 61 cm SC P6000 SC P7000 or 44 inches 112 cm SC P8000 SC P9000 1 Open the roll p...

Page 19: ...19 2 Firmly push down the lock lever on the roll paper holder and move the holder to the left Note Make sure you push the lock lever all the way down to unlock it completely ...

Page 20: ...20 3 Place the roll paper on top of the printer 4 If necessary slide the tabs on the roll media adapters to the position that matches the core size of the roll paper 2 inch core 3 inch core ...

Page 21: ...21 5 Release the tension levers on both roll media adapters ...

Page 22: ...22 6 Push the adapters into the paper core at both ends of the roll Then push down the tension levers 7 Move the roll paper to the right side until it touches the roll paper guide ...

Page 23: ...23 8 Slide the roll paper holder until the left adapter aligns with the arrow on the holder 9 Roll the paper slowly into position ...

Page 24: ...24 10 Slide the roll paper holder to the right to secure it in the printer Make sure both ends of the roll paper are secured in the adapters ...

Page 25: ...25 11 Pull up the lock lever on the roll paper holder to it in place 12 If the load paper light is not on press the load paper button ...

Page 26: ...until the edge of the paper is even with the center of the stand Note If the paper does not feed through the slot you may need to decrease the suction by pressing the paper feed button Make sure you return the suction to its default setting after the paper is loaded ...

Page 27: ...printing position or wait for the paper to move into position automatically 17 On the screen that appears select one of the following settings If the paper settings are correct select Keep Settings Above Select Change Settings so you can adjust the settings 18 Press the OK button To avoid indenting or creasing the paper remove it from the paper path and roll it up when you are not printing Note St...

Page 28: ...ou are using the optional Auto Take up Reel disable the auto cut setting in the printer driver and on the control panel Caution Do not use the built in cutter with these paper types or you may damage or dull the built in cutter Fine art paper Canvas Vinyl Matte poster board Adhesive paper Banner media When you print on these paper types you need to disable the Auto Cut setting and cut the print by...

Page 29: ... setting 7 Press the pause cancel button to exit the menu 8 Run your print job 9 Press the paper cut button Note If the paper cannot be cut by the built in cutter press the paper feed button until your print is clear of the printer then cut the print by hand Parent topic Cutting Roll Paper Printing Trim Lines When you disable the Auto Cut setting you can print a trim line page line between print j...

Page 30: ...nish printing on roll paper you should remove it from the printer to avoid indenting or creasing the paper 1 Open the roll paper cover 2 Press the load paper button to release the paper The following may now occur If automatic media tracking is on the barcode and paper information is printed If you are not using the optional Auto Take Up Reel the paper rewinds automatically ...

Page 31: ...31 If you are using the optional Auto Take Up Reel rewind the paper using the Manual switch ...

Page 32: ...32 3 Firmly push down the lock lever on the roll paper holder to release it Note Make sure you push the lock lever all the way down to unlock it completely ...

Page 33: ...dle slide the roll paper holder all the way to the left and remove it from the end of the roll Note Always use the handle when sliding the roll paper holder 5 Roll the paper forward so that it rests on top of the printer ...

Page 34: ...nd or horizontally if the packaging end caps are installed Never store roll paper on its edge as a flat spot can develop and lead to imaging artifacts on the prints Parent topic Roll Paper Handling Related topics Using the Auto Take up Reel Cut Sheet Handling You can load a variety of types and sizes of cut sheet paper in your product Loading Cut Sheets Loading Thick or Large Cut Sheets Adjusting ...

Page 35: ... the load paper button Note Make sure the paper path is clear and any roll paper is rolled up before you load cut sheet paper 1 Make sure the printer is turned on and the roll paper cover is closed 2 Press the paper source button 3 Select Cut Sheet and press the OK button 4 Feed the sheet into the right side of the paper slot until it meets resistance Align the sheet with the vertical line on the ...

Page 36: ...f the paper settings are correct select Keep Settings Above Select Change Settings so you can adjust the settings 7 Press the OK button 8 Print your page After printing the sheet stays in the printer 9 To remove your print hold the sheet and press the paper feed button Note Store cut sheet media flat in its original packaging Storing sheet media unprotected or on its long or short edge can lead to...

Page 37: ...entation short edge first Load paper that is more than 19 mil 0 5 mm thick and 30 inches 762 mm long in landscape orientation SC P8000 SC P9000 Note Make sure the paper path is clear and any roll paper is rolled up before you load cut sheet paper 1 Make sure the printer is turned on and the roll paper cover is closed 2 Press the paper source button 3 Select Cut Sheet and press the OK button 4 Pres...

Page 38: ...38 5 Feed the sheet into the right side of the paper slot until the trailing edge is below the horizontal line on the roll paper cover ...

Page 39: ...ps hold the paper in place during loading and printing 7 Press the load paper button 8 Press the pause cancel button to move the paper into printing position or wait for the paper to move into position automatically 9 On the LCD screen select one of the following If the paper settings are correct select Keep Settings Above Select Change Settings so you can adjust the settings 10 Press the OK butto...

Page 40: ...n Gap setting Note If you notice scuffs on the first few inches of your prints this is caused by paper curl and print head strikes Make sure your paper is flat You can also try changing the Platen Gap setting to Wide If that doesn t solve the problem try changing it to Wider 1 Press the Menu button 2 Press the down arrow button to select Printer Setup and press the right arrow button 3 Press the r...

Page 41: ...art and other sensitive prints do not allow media to stack in the paper basket Catching Printouts Under the Product Catching Printouts in Front of the Product Storing the Paper Basket Parent topic Media Handling Catching Printouts Under the Product For printouts less than 19 mil 0 5 mm thick and up to 36 inches 914 4 mm long SC P6000 SC P7000 or 62 inches 1580 mm long SC P8000 SC P9000 you can con...

Page 42: ...42 1 Raise the paper guides ...

Page 43: ...43 2 Lower the front of the paper basket ...

Page 44: ...44 3 Press in on the left and right sides of the paper guides and lower them until they are vertical ...

Page 45: ...45 4 Raise the front of the basket one level ...

Page 46: ...46 5 Fasten the front of the basket with the tabs ...

Page 47: ...47 Note If printouts on matte paper are smudged or have banding raise the paper guides one level ...

Page 48: ...48 6 Adjust the basket based on your print size SC P8000 SC P9000 For media in this size or smaller raise the rear of the basket A1 23 4 33 1 inches 594 841 mm ...

Page 49: ...t topic Using the Paper Basket Catching Printouts in Front of the Product For printouts more than 19 mil 0 5 mm thick or any prints over 36 inches 914 4 mm long SC P6000 SC P7000 or 62 inches 1580 mm long SC P8000 SC P9000 you can configure the paper basket to catch printouts in the front the product ...

Page 50: ...50 1 Unfasten the tabs at the front of the paper basket ...

Page 51: ...51 2 Raise the paper guides ...

Page 52: ...52 3 Raise the front of the basket so that the cloth is pulled taut ...

Page 53: ...r guides and lower them until they touch the basket Parent topic Using the Paper Basket Storing the Paper Basket You should store the paper basket whenever you do the following You are not using the basket You are loading paper You are moving the printer ...

Page 54: ...54 1 Raise the paper guides ...

Page 55: ...55 2 Raise the front of the basket and lower the paper guides ...

Page 56: ...pson printer driver Note Custom paper configurations are based on the existing Uni D and Bi D print head alignment For best results perform the head alignments on Epson Doubleweight Matte Paper 1 Load the type of paper that you want to configure in the printer 2 Press the Menu button 3 Press the up or down arrow button to select Paper and press the right arrow button 4 Select Custom Paper Setting ...

Page 57: ...arrow button 9 Select a platen gap setting and press the OK button 10 Select Detect Paper Thickness and press the right arrow button 11 Press the OK button A paper thickness pattern prints 12 Check the printed pattern and locate the pattern with the most evenly overlapping lines 13 Select the number of the most even pattern and press the OK button 14 Select any additional settings in the Custom Pa...

Page 58: ...tions Related references Paper Menu Settings Selecting Custom Paper Configurations Once you have created a paper configuration you can select the configuration whenever you print on the associated media 1 Press the Menu button 2 Press the up or down arrow button to select Paper and press the right arrow button 3 Select Select Paper Type and press the right arrow button 4 Select Custom Paper and pr...

Page 59: ...ide in on the left or printable side out on the right It is best to do the following when using the auto take up reel Make sure that the end of the roll is cut straight across Load media with the printable side in Use a take up roll core that is the same width as your media so the core does not bend or take up media incorrectly Parent topic Using the Auto Take up Reel Take Up with the Printable Si...

Page 60: ... the power cable 2 Turn on the printer 3 Load roll media in the printer 4 Check that the Auto Take up Reel icon appears on the LCD screen Note If you don t see the icon make sure the take up reel is turned on and connected correctly 5 Press the paper source button on the printer ...

Page 61: ...oll media reaches the roll core 8 Wind the edge of the media around the back of the roll core 9 Tape the edge of the media to the center of the core then tape the edge to the left and right ends 10 Press and hold the paper feed button on the printer until it feeds enough media to wrap around the roll core three times ...

Page 62: ...e Backward position and hold it until the media wraps around the core three times 12 Make sure that there is some slack in the media and that it loads evenly on both sides Note The media will not take up correctly if it is looser on one side than the other ...

Page 63: ...up Reel Take Up with the Printable Side Out After you attach the roll core on the Auto Take up Reel as described in the documentation that came with the Auto Take up Reel follow these steps to take up media with the printable side out Note Make sure Auto Cut is set to Off when you use the Auto Take up Reel ...

Page 64: ... the power cable 2 Turn on the printer 3 Load roll media in the printer 4 Check that the Auto Take up Reel icon appears on the LCD screen Note If you don t see the icon make sure the take up reel is turned on and connected correctly 5 Press the paper source button on the printer ...

Page 65: ... button until the edge of the roll media reaches the roll core 8 Tape the edge of the media to the center of the core then tape the edge to the left and right ends 9 Press and hold the paper feed button on the printer until it feeds enough media to wrap around the roll core three times ...

Page 66: ...e Forward position and hold it until the media wraps around the core three times 11 Make sure that there is some slack in the media and that it loads evenly on both sides Note The media will not take up correctly if it is looser on one side than the other ...

Page 67: ...67 If you are printing on Epson Singleweight Matte Paper place the tensioner in the slack of the roll 12 Move the Auto switch on the take up reel to the Forward position ...

Page 68: ... Reel After printing on media loaded on the Optional Auto Take up Reel follow these steps to remove it Note Two people are required to remove media from the take up reel 1 Move the Auto switch on the take up reel to the Off position 2 Cut the media and roll the cut end onto the take up reel ...

Page 69: ... up reel unit Parent topic Using the Auto Take up Reel Available Epson Papers For information on how to purchase genuine Epson ink accessories and paper visit epson com U S sales or epson ca Canadian sales You can also purchase accessories from an Epson authorized reseller To find the nearest one call 800 GO EPSON 800 463 7766 Note Paper media availability varies by country ...

Page 70: ...041637 20 17 22 inches 432 559 mm S042097 25 Epson Exhibition Fiber Paper Letter 8 5 11 inches 216 279 mm S045033 25 13 19 inches 330 483 mm S045037 25 17 22 inches 432 559 mm S045039 25 Epson Hot Press Bright Letter 8 5 11 inches 216 279 mm S042327 25 13 19 inches 330 483 mm S042330 25 17 22 inches 432 559 mm S042331 25 Epson Hot Press Natural Letter 8 5 11 inches 216 279 mm S042317 25 13 19 inch...

Page 71: ...eet 30 5 m S042077 1 roll 16 inches 406 mm 100 feet 30 5 m S042079 1 roll 24 inches 610 mm 100 feet 30 5 m S042081 1 roll 36 inches 914 mm 100 feet 30 5 m S042082 1 roll 44 inches 1118 mm 100 feet 30 5 m S042083 1 roll Epson Metallic Photo Paper Glossy Letter 8 5 11 inches 216 279 mm S045589 25 13 19 inches 330 483 mm S045590 25 17 22 inches 432 559 mm S045591 25 Epson Metallic Photo Paper Luster ...

Page 72: ... S041271 100 Epson Premium Photo Paper Glossy Letter 8 5 11 inches 216 279 mm S041286 20 A3 11 7 16 5 inches 297 420 mm S041288 20 13 19 inches 330 483 mm S041289 20 Letter 8 5 11 inches 216 279 mm S041667 50 11 17 inches 279 432 mm S041290 20 4 6 inches 102 152 mm S041727 100 5 7 inches 127 178 mm S041464 20 8 10 inches 203 254 mm S041465 20 11 14 inches 279 356 mm S041466 20 17 22 inches 432 559...

Page 73: ...41257 50 11 14 inches 279 356 mm S041468 50 A3 11 7 16 5 inches 297 420 mm S041260 50 13 19 inches 330 483 mm S041263 50 17 22 inches 432 559 mm S042124 25 Epson Premium Presentation Paper Matte Letter 8 5 11 inches 216 279 mm S041062 100 Legal 8 5 14 inches 216 356 mm S041067 100 11 17 inches 279 432 mm S041070 100 13 19 inches 330 483 mm S041069 100 16 5 23 4 inches 420 594 mm S041079 30 17 22 i...

Page 74: ...on Standard Proofing Paper Publication 13 inches 300 mm 100 feet 30 5 m S041996 1 roll 17 inches 432 mm 100 feet 30 5 m S041997 1 roll 24 inches 610 mm 100 feet 30 5 m S041998 1 roll 36 inches 914 mm 100 feet 30 5 m S041999 1 roll 44 inches 1118 mm 100 feet 30 5 m S042001 1 roll Epson Standard Proofing Paper Commercial 13 inches 300 mm 100 feet 30 5 m S042144 1 roll 17 inches 432 mm 100 feet 30 5 ...

Page 75: ...tte Letter 8 5 11 inches 216 279 mm S041341 50 A3 11 7 16 5 inches 297 420 mm S041343 50 13 19 inches 330 483 mm S041339 50 13 19 inches 330 483 mm S041605 100 17 22 inches 432 559 mm S041908 100 Epson UltraSmooth Fine Art Paper 13 19 inches 330 483 mm S041896 25 17 22 inches 432 559 mm S041897 25 Epson Watercolor Paper Radiant White 13 19 inches 330 483 mm S041351 20 Epson Exhibition Canvas Matte...

Page 76: ...42 1 roll 24 inches 610 mm 100 feet 30 5 m S041638 1 roll 36 inches 914 mm 100 feet 30 5 m S041639 1 roll 44 inches 1118 mm 100 feet 30 5 m S041640 1 roll Epson Premium Semigloss Photo Paper 170 24 inches 610 mm 100 feet 30 5 m S041393 1 roll 36 inches 914 mm 100 feet 30 5 m S041394 1 roll 44 inches 1118 mm 100 feet 30 5 m S041395 1 roll Epson Premium Semimatte Photo Paper 250 16 inches 406 mm 100...

Page 77: ...inches 610 mm 100 feet 30 5 m S041595 1 roll 36 inches 914 mm 100 feet 30 5 m S041596 1 roll 44 inches 1118 mm 100 feet 30 5 m S041597 1 roll Epson Singleweight Matte Paper 17 inches 432 mm 132 feet 40 2 m S041746 1 roll 17 inches 432 mm 132 feet 40 2 m S041853 1 roll 36 inches 914 mm 132 feet 40 2 m S041854 1 roll 44 inches 1118 mm 132 feet 40 2 m S041855 1 roll Epson Doubleweight Matte Paper 24 ...

Page 78: ...aper 250 Epson Premium Semigloss Photo Paper 170 Epson Premium Glossy Photo Paper 170 Epson Premium Semimatte Photo Paper 250 Epson Premium Luster Photo Paper 260 Borderless Paper Widths 10 inches 254 mm 11 8 inches 300 mm 13 inches 330 mm 16 inches 406 mm 17 inches 432 mm 20 3 inches 515 mm 23 inches 594 mm 24 inches 610 mm 33 inches 841 mm 36 inches 914 mm 44 inches 1118 mm SC P8000 SC P9000 onl...

Page 79: ...sing any Windows application as described in these sections Selecting Basic Print Settings Windows Selecting Print Layout Options Windows Selecting Additional Settings Windows Printing Your Document or Photo Windows Saving Sharing and Customizing the Printer Settings Selecting Default Print Settings Windows Changing the Language of the Printer Software Screens Changing Automatic Update Options Par...

Page 80: ...eed to select Preferences Properties Print Settings or Printer Properties to view your print settings You see the Main tab of your printer settings window 4 Select the Media Type setting that matches the paper you loaded Note You can click Custom Settings to select a custom paper configuration ...

Page 81: ...ty or Max Quality available with certain media types only or select Quality Options and choose the quality option that matches the print quality you want to use 9 Select the desired color management option as the Mode setting 10 Select the Source setting that matches the paper feeding method you are using 11 Select the size of the paper you loaded as the Size setting Note You can also select the U...

Page 82: ...nt Options Windows Advanced Color Controls Windows Paper Source Options Windows Roll Paper Options Windows Using Layout Manager Windows Only Parent topic Printing with Windows Related references Borderless Paper Type Compatibility Related tasks Printing Your Document or Photo Windows ...

Page 83: ...83 Paper Configuration Options Windows Select any of the available Paper Configuration options to fine tune the quality of your print Color Density Adjusts the ink saturation level ...

Page 84: ...he roll paper wrinkles during printing Parent topic Selecting Basic Print Settings Windows Advanced B W Photo Options Windows If you select Advanced B W Photo as the Color option you can easily produce neutral and toned black and white prints Whether your photo is color or grayscale you can use this screening and color management technology to create stunning black and white prints Select Custom a...

Page 85: ...s of your image Parent topic Selecting Basic Print Settings Windows Print Quality Options Windows You can use the Speed Quality slider to set the desired quality level and select any of the available Quality options to fine tune the quality of your print Some settings may be unavailable depending on the paper type and border setting you have chosen High Speed Speeds up printing but may reduce prin...

Page 86: ...nce uses a sophisticated face recognition technology to optimize photos that include faces For this to work both eyes and the nose must be visible in the subject s face If your photo includes a face with an intentional color cast such as a statue you may want to turn off PhotoEnhance to retain the special color effects ICM Automatically adjusts colors based on the printer s ICC profile and the sel...

Page 87: ...ntrast saturation and individual Cyan Magenta and Yellow color tones You can choose from two Printer Color Adjustment modes and two Gamma settings and use either a color circle or slide bar to adjust color Parent topic Selecting Basic Print Settings Windows Paper Source Options Windows You can select any of the available options in the paper Source menu to print on the paper loaded in that source ...

Page 88: ...us images without any margin space between them Sheet Selects sheets of paper loaded in the sheet feeder Parent topic Selecting Basic Print Settings Windows Roll Paper Options Windows Select any of the available Roll Paper options Auto Cut options Off Select this option to cut your prints manually ...

Page 89: ...89 Normal Cut Creates a margin at the top and bottom of your image Single Cut Prints images end to end with no gap between them Borderless images may overlap slightly ...

Page 90: ...e cleanest edge for borderless printing Auto Rotate Automatically positions the image or file to fit the roll paper When Auto Rotate is selected the Roll Width setting becomes active Print Page Line Prints lines between pages as a guide for cutting Parent topic Selecting Basic Print Settings Windows ...

Page 91: ...91 Using Layout Manager Windows Only Layout Manager lets you create a poster or display by dragging multiple pieces of print data created in different applications onto one sheet of paper for printing ...

Page 92: ...92 You can also place the same print data multiple times as shown here ...

Page 93: ...93 You can place print data in different sizes and orientations to maximize media usage as shown here ...

Page 94: ...94 You can place print data on roll paper as shown here 1 Open the file you want to print in your application 2 Select the print command in your application ...

Page 95: ...ation Note You select the size of the paper you are printing on in a later step 4 Click OK and then click Print if necessary The Layout Manager screen opens and displays one page in the layout 5 Leave the Layout Manager screen open and repeat steps 1 to 4 to arrange additional print data The pages are added to the Layout Manager screen ...

Page 96: ...p for more details 7 Click File Properties then select your print settings on the Main tab 8 Click the File menu on the Layout Manager screen and click Print Note To save the current job to a file click the File menu on the Layout Manager screen save the file and close the Layout Manager screen To open the saved file later for editing or reprinting right click the printer icon in the Windows taskb...

Page 97: ...or photo on the Page Layout tab To change the orientation of your printed document or photo select the Portrait or Landscape checkbox To rotate or flip the printed image select the Rotate 180 or Mirror Image checkbox To select multiple copies and their print order select the Copies Collate and Reverse Order options ...

Page 98: ...t the Print Bckg Color checkbox and click Color Settings to select the color you want to use To print the time date and other information about your print job at the top or bottom of the page select the Job Settings checkbox and click Details to select the settings you want to use Reduce Enlarge Options Windows Multi Page Printing Options Windows Parent topic Printing with Windows Reduce Enlarge O...

Page 99: ...eline options Parent topic Selecting Print Layout Options Windows Selecting Additional Settings Windows You can run maintenance utilities and select additional settings that apply to all the print jobs you send to your product 1 Access the Windows Desktop and right click the product icon in the Windows taskbar 2 Select Printer Settings 3 Click the Utility tab ...

Page 100: ...t a nozzle check pattern to check whether the print head nozzles are clogged Head Cleaning to clean the print head if you notice banding or gaps in your printouts Print Head Alignment to align the print head if printouts appear grainy or out of focus Epson Status Monitor 3 to check the printer s status ...

Page 101: ...s to a file or import them from a file This is useful when you want to select the same print settings on multiple computers Epson LFP Remote Panel 2 to optimize printer settings and create and manage custom paper configurations This option is available only if Epson LFP Remote Panel 2 is installed Epson Color Calibration Utility to perform printer calibration This option is available only if the E...

Page 102: ...102 You see your application s Print window such as this one 2 Click OK or Print to start printing Checking Print Status Windows Parent topic Printing with Windows ...

Page 103: ...Document or Photo Windows Saving Sharing and Customizing the Printer Settings You can save groups of print settings or media settings so you can reuse them for future print jobs You can export these settings as a file so you can share them with other users You can also edit the settings displayed in the printer software screens Saving and Sharing Print Settings Windows Saving and Sharing Media Set...

Page 104: ...t your settings are correct enter a name for the group of settings in the Name field and click Save Note If you need to delete a group of settings you have created select the name of the group of settings from the list and click Delete 4 Do the following as necessary Select the name of the group of settings from the Select Setting list and use them to print To export the settings click Save Del se...

Page 105: ...nter Settings Related tasks Selecting Basic Print Settings Windows Printing Your Document or Photo Windows Saving and Sharing Media Settings Windows You can save and share settings you have selected for a particular media type so you can use them for future print jobs 1 Select the Media Settings you want to save on the Main tab as necessary 2 Click Custom Settings You see a window like this ...

Page 106: ... the media settings click Export select a location and enter a file name To import settings click Custom Settings select the name of the media settings click Import select the file you want to use and click Open Then use these settings to print Parent topic Saving Sharing and Customizing the Printer Settings Related tasks Selecting Basic Print Settings Windows Printing Your Document or Photo Windo...

Page 107: ...ws To move and reorder items drag and drop them in the list To add a new group folder click Add Group To delete a group folder select the group and click Delete Group To hide a group drag and drop it to Not Display Note If you delete a group the group folder is deleted but the items within the folder remain ...

Page 108: ...tings in a program the changes apply only while you are printing in that program session If you want to change the print settings you use in all your Windows programs you can select new default print settings 1 Access the Windows Desktop and right click the product icon in the Windows taskbar 2 Select Printer Settings You see the printer settings window ...

Page 109: ...in any program session Parent topic Printing with Windows Related tasks Selecting Basic Print Settings Windows Changing the Language of the Printer Software Screens You can change the language used on the Windows printer software screens 1 Access the Windows Desktop and right click the product icon in the Windows taskbar 2 Select Printer Settings You see the printer settings window 3 Click the Uti...

Page 110: ...ct the language you want to use as the Language setting 5 Click OK to close the printer software window The printer software screens appear in the language you selected the next time you access them Parent topic Printing with Windows ...

Page 111: ...the following To change how often the software checks for updates select a setting in the Check every menu To disable the automatic update feature select the Never option 4 Click OK to exit Note If you choose to disable the automatic update feature you can check for updates manually Parent topic Printing with Windows Printing with OS X You can print with your product using any OS X printing progra...

Page 112: ...ter Selecting Basic Print Settings OS X Select the basic settings for the photo or document you want to print 1 Open a photo or document for printing 2 Select the print command in your application Note You may need to select a print icon on your screen the Print option in the File menu or another command See your application s help utility for details 3 Select your product as the Printer setting 4...

Page 113: ...fferent depending on the version of OS X and the application you are using 5 Select the Copies and Pages settings as necessary Note If you do not see these settings in the print window check for them in your application before printing They may be accessible by selecting Page Setup from the File menu ...

Page 114: ... 24 or 44 inches to fit in the width of your roll paper set the margins to 0 in your application software Note You can reduce or enlarge the size of the printed image by selecting Paper Handling from the pop up menu and selecting a scaling option 7 Choose portrait or landscape as the Orientation setting 8 Select any application specific settings that appear on the screen such as those shown in the...

Page 115: ...g may not exactly match the name of your paper Check the media type settings list for details Note The Ink setting may change depending on the size and type of paper you select To avoid changing black ink more often than necessary set the printer to the type of black ink you usually use on the control panel ...

Page 116: ...ngs tab to use advanced color controls EPSON Standard sRGB Increases the contrast in images Click the Advanced Color Settings tab to use advanced color controls Adobe RGB Matches image colors to the Adobe RGB color standard Use this setting if your source file was captured in Adobe RGB Click the Advanced Color Settings tab to use advanced color controls Off No Color Adjustment Turns off color mana...

Page 117: ...anced Color Settings tab you see one of the screens below depending on the Print Mode you selected EPSON Precision Dot You can specify values for adjusting brightness contrast saturation and individual Cyan Magenta and Yellow color tones Advanced B W Photo ...

Page 118: ...e output While Darker is the default setting you may see better results if you choose Dark The tone color circle adjusts the hue of your black and white print Click on any portion of the color wheel or enter corresponding values to customize the tone hue to add to your print The closer you select to the edge of the wheel the more color you add Brightness Adjusts the overall lightness and darkness ...

Page 119: ...ng you have chosen Draft 180 dpi For draft printing on plain paper Draft 360 dpi For draft printing on plain or matte paper Fine 720 dpi For everyday text and image printing Fine 1440 dpi For everyday text and image printing with higher print quality Super Photo 1440 dpi For photos and graphics with good print quality and speed SuperPhoto 2880 dpi For the best print quality but the slowest print s...

Page 120: ... as the Paper Size setting 2 Click double click Untitled and enter a name for your roll paper size 3 Enter the width of the roll paper image as the Width setting Note Make sure your image fits within the width of your roll paper 4 Enter the length of your roll paper image as the Height setting Note Select your product from the Non Printable Area menu to automatically select the largest paper size ...

Page 121: ...not be available depending on the Roll Paper option you selected for your Paper Size 9 Select one of the following Auto Cut Settings Off Select this option to cut your prints manually Normal Cut Creates a margin and the top and bottom of your image ...

Page 122: ...ss printing 10 Select the following settings as necessary Select the Auto Rotate checkbox and select the roll paper width to fit the images to the paper size Select the Print Page Line checkbox to print trim lines around images when you select a banner paper size Click Save Roll Paper to minimize the amount of blank paper wasted when you print on banner paper Adjust the amount of image expansion w...

Page 123: ...lecting Paper Configuration Settings OS X If you are using non Epson media and need to fine tune its print quality select Advanced Media Control from the pop up menu Select the available options as necessary Note Before adjusting the Advanced Media Control settings select the Media Type setting that is closest to the paper you are using Advanced Media Control Options OS X Parent topic Printing wit...

Page 124: ...the print head Paper Thickness Lets you select the thickness of your paper or media Note If you have high speed bi directional printing enabled and small type or fine details appear too thick you may need to adjust the paper thickness setting Paper Suction Lets you decrease the paper suction when printing on thin media such as drafting paper or backlight film Platen Gap Adjusts the distance from t...

Page 125: ...rrange the print order of the pages select a Layout Direction setting To print borders around each page on the sheet select a line setting from the Border pop up menu To invert or flip the printed image select the Reverse page orientation or Flip horizontally settings Parent topic Printing with OS X Managing Color OS X You can adjust the Color Matching settings to fine tune the colors in your prin...

Page 126: ...lect from these settings on the Color Matching menu ColorSync Prints using standard color profiles for your product and paper to help match image colors You can customize the conversion method and filter settings on the ColorSync pop up menu in the print window EPSON Color Controls Lets you manage color using controls in your printer software or turn off color management Parent topic Managing Colo...

Page 127: ...enu To scale the image to fit on a specific paper size select the Scale to fit paper size checkbox and select a paper size from the Destination Paper Size pop up menu To restrict scaling of the image to reduced sizing select the Scale down only checkbox Deselect this checkbox when enlarging the image Parent topic Printing with OS X Selecting Printing Preferences OS X You can select printing prefer...

Page 128: ...ings on the Options tab Warning Notifications Lets you choose whether or not to receive warning notifications from the printer software for various operating conditions Establish bidirectional communication Allows the product to communicate with the computer Do not change the default setting unless you experience issues when using a shared printing pool Parent topic Selecting Printing Preferences ...

Page 129: ...r print settings you are ready to print Click Print at the bottom of the print window Checking Print Status OS X Parent topic Printing with OS X Checking Print Status OS X During printing you can view the progress of your print job control printing and check ink status ...

Page 130: ... printing click the print job and click or Delete To pause a print job click the print job and click or Hold To resume a print job click the paused print job and click or Resume To pause printing for all queued print jobs click Pause or Pause Printer To display other printer information click Settings or Supply Levels Parent topic Printing Your Document or Photo OS X ...

Page 131: ...through the menus Note Press the left arrow button to go back 3 To change settings in the highlighted menu press the right arrow button 4 Press the up or down arrow button to move through the settings If there are additional settings press the right or left arrow button as instructed on the screen 5 To select a setting press the OK button any time the OK button option is displayed 6 When you finis...

Page 132: ...rainy or out of focus Uni D when printing in one direction Various Bi D settings when printing in both directions If head alignment with this setting does not correct the problem select Uni D Manual Uni D Bi D 2 color Bi D All Color Cutter Maintenance Adjust Cut Position Replace Cutter Lets you adjust or replace the built in cutter Adjust Cut Position adjusts the cutter position in increments of 0...

Page 133: ...n media Proofing Paper Fine Art Paper Matte Paper Plain Paper Others Custom Paper Lists the custom paper configurations that you have created Custom Paper Setting Lets you create a custom configuration for the loaded media See the next table Print Paper List Press the OK button to print a list of custom paper settings Roll Paper Remaining Remaining Setup Lets you track the length of roll paper rem...

Page 134: ...Roll End Option Lets you select what the printer does if the roll paper runs out and is replaced during a print job Stop Printing automatically cancels printing after paper is replaced Continue resumes printing where the job left off Reprint restarts the job from the beginning available only when you are using the optional internal print server Roll Paper Tension Adjusts the paper tension Select H...

Page 135: ... print head Standard select for most media Narrow select if head alignment does not completely align the print head Wide Wider or Widest select if printouts are smeared Caution To avoid damaging the printer do not select the Narrow setting when loading thick media Detect Paper Thickness Lets you print patterns that you can use to determine the thickness of the current paper by selecting the patter...

Page 136: ... the gap between the print head and thin or soft paper If print quality is reduced or media does not feed correctly you may need to lower the suction Drying Time Per Pass Lets you adjust the amount of time the head pauses between each pass from 0 seconds to 10 seconds If the image is blurring on the paper you may need to increase the drying time per pass Roll Paper Tension Lets you adjust the pape...

Page 137: ...up menu lets you configure and monitor various aspects of your product Setting Options Description Platen Gap Narrow Adjusts the gap between the media and the print head Standard select for most media Narrow select if head alignment does not completely align the print head Wide Wider or Widest select if printouts are smeared Caution To avoid damaging the printer do not select the Narrow setting wh...

Page 138: ... Cleaning Setting Periodically Every Job Off Automatically runs a nozzle check and cleans the print head if necessary Periodically checks the nozzles occasionally Every Job checks the nozzles after every print job Note Even if you select Off as the Auto Cleaning Setting option the printer runs an automatic nozzle check and may clean the print head when you switch between black inks and after initi...

Page 139: ... however print quality is reduced when you change the ink type Calibration Setting On Off Lets you use the Epson Color Calibration Utility Store Held Job On Off When the optional internal print server is installed enables the printer to skip any job that will not print due to a paper size paper source or output paper size mismatch and save the job on the server Restore Settings Returns all printer...

Page 140: ... topic Using the Control Panel Menus Network Setup Menu Settings The Network Setup menu lets you configure your printer s network settings Setting Options Description IP Address Setting Auto Determines whether IP addresses are obtained automatically through DHCP or manually Select Panel to enter an IP address subnet mask and default gateway address Panel IPv6 Setting On Enables IPv6 communication ...

Page 141: ...t of length used on the control panel display and when printing test patterns ft in Unit Temperature C Selects the unit of temperature used on the control panel display F Sleep Mode 5 to 210 minutes Selects the interval before the printer enters sleep mode The default is 15 minutes Power Off Timer Off Selects the interval before the printer turns off automatically when it is idle The default is 8 ...

Page 142: ...o access the Network Setup menu Powerful Cleaning All Nozzles Lets you clean all or selected colors in pairs of two based on the nozzle check pattern Use this setting only if you still have clogged nozzles after running multiple head cleanings from the Maintenance menu Various colors Date And Time Sets the printer s built in clock The time and date are used in logs and status sheets Time Zone Lets...

Page 143: ...ve data Secure Quick quickly overwrites all data on the hard disk with random characters This option is more secure than Non Secure Quick but the deleted data may still be recoverable with recovery tools Secure Sanitizing overwrites all data on the hard disk with 0xFF data then checks the disk using an algorithm based on the U S Department of Defense standards for the removal of sensitive data DoD...

Page 144: ...n accordance with local requirements If you would like to return your used ink cartridges to Epson for proper disposal please go to epson com recycle for more information Checking Ink and Maintenance Box Status With Windows Checking Cartridge Status with OS X Purchase Epson Ink Cartridges Removing and Installing Ink Cartridges Replacing Maintenance Boxes Switch Black Ink Type Checking Ink and Main...

Page 145: ...d on the screen Note If any of the ink cartridges installed in the product is broken incompatible with the product model or improperly installed Epson Status Monitor will not display an accurate ink status Parent topic Replacing Ink Cartridges Related tasks Removing and Installing Ink Cartridges ...

Page 146: ...enu or the Dock select System Preferences Select Print Fax Print Scan or Printers Scanners select your product and select Options Supplies Select Utility and select Open Printer Utility 2 Select EPSON Status Monitor You see a window like this 3 Do the following as necessary To update the ink cartridge status click Update ...

Page 147: ... ink cartridges and ink supplies are not compatible and even if described as compatible may not function properly The cartridges included with the printer are designed for printer setup and not for resale After some ink is used for charging the rest is available for printing Yields vary considerably based on images printed print settings paper type frequency of use and temperature For print qualit...

Page 148: ...4600 T804600 SureColor P7000 SureColor P9000 Ink bay Slot Ink color 150 ml part number 350 ml part number 700 ml part number Left 1 Cyan C T834200 T824200 T804200 2 Orange OR T834A00 T824A00 T804A00 3 Yellow Y T834400 T832400 T804400 4 Light Cyan LC T834500 T824500 T804500 5 Matte Black MK T834800 T824800 T804800 6 Photo Black PK T834100 T824100 T804100 Right 7 Vivid Magenta VM T834300 T824300 T80...

Page 149: ...s are expended or any ink slots are empty 1 Turn on your product 2 Press the open ink cover button 3 Do one of the following if necessary If any of the cartridges are completely expended the corresponding ink cartridge cover unlocks If the cartridges are not completely expended select the ink bay that you want to open and press the OK button The ink cartridge cover unlocks 4 Open the ink cartridge...

Page 150: ...of used cartridges carefully Do not take the used cartridge apart or try to refill it Warning If ink gets on your skin wash it thoroughly with soap and water If ink gets into your eyes flush them immediately with water If ink gets into your mouth spit it out and see a doctor right away Keep ink cartridges out of the reach of children ...

Page 151: ...cing up and push it in until it clicks into place Caution Do not remove and re insert cartridges more often than necessary Doing so can break the needle valve seal and allow air to enter the ink tubes damaging the nozzles 9 Close the ink cartridge cover and push it in until it clicks into place Your product begins charging the ink delivery system Note Do not turn off the product during ink chargin...

Page 152: ...rinter cleaning maintenance the original cartridge can be re inserted and used until its Ink Cartridge Expended status is reached It does not have to be discarded Parent topic Replacing Ink Cartridges Related concepts Purchase Epson Ink Cartridges Replacing Maintenance Boxes The maintenance box absorbs ink used in maintenance operations such as head cleaning and changing black ink Replace the main...

Page 153: ... 4 Use the handle on the bottom of the maintenance box to carefully pull it out of the product without tilting the box 5 Place the used maintenance box in the bag supplied with the new box and seal the bag ...

Page 154: ...type of black ink at a time Your product switches the black ink type automatically depending on the type of media you load Because this process consumes some ink so you should avoid switching black ink more often than necessary and select a default black ink type for the type of media you print on most often Note To disable automatic black ink switching press the Menu button and select Printer Set...

Page 155: ...rent topic Switch Black Ink Type Related references Black Ink Type Media List Black Ink Type Media List To conserve ink select the default black ink type that matches the type of media you usually print on Matte Black Ink Media Types Epson Presentation Paper Matte Epson Premium Presentation Paper Matte Epson Premium Presentation Paper Matte Double sided Epson Ultra Premium Presentation Paper Matte...

Page 156: ...m Photo Paper Glossy Epson Premium Photo Paper Semi gloss Epson Ultra Premium Photo Paper Luster Epson Exhibition Canvas Gloss Epson Exhibition Canvas Satin Epson Exhibition Canvas Natural Satin Epson Exhibition Canvas Natural Gloss Epson Exhibition Fiber Paper Epson Metallic Photo Paper Glossy Epson Metallic Photo Paper Luster Parent topic Switch Black Ink Type Related references Available Epson ...

Page 157: ...it when a cartridge is low You must replace the cartridge first Print Head Nozzle Check Print Head Cleaning Parent topic Adjusting Print Quality Related tasks Removing and Installing Ink Cartridges Print Head Nozzle Check You can print a nozzle check pattern to check for clogged nozzles Checking the Nozzles Using the Product Control Panel Checking the Nozzles Using a Computer Utility Parent topic ...

Page 158: ...select Exit and press the OK button If there are gaps or the pattern is faint select Head Cleaning and press the OK button 9 Follow the instructions on the screen to clean the print head check the nozzles and repeat the process as necessary Parent topic Print Head Nozzle Check Related references Maintenance Menu Settings Related tasks Cleaning the Print Head Using the Product Control Panel Checkin...

Page 159: ...e product icon in the Windows taskbar OS X In the Apple menu or the Dock select System Preferences Select Print Fax Print Scan or Printers Scanners select your product and select Options Supplies Select Utility and select Open Printer Utility 4 Select Nozzle Check You see a window like this 5 Click Print The nozzle pattern prints ...

Page 160: ...ng a Computer Utility Print Head Cleaning If print quality has declined and the nozzle check pattern indicates clogged nozzles you can clean the print head Use the nozzle check pattern to determine which colors need cleaning You can save ink by cleaning only selected colors control panel only Note You cannot clean the print head if an ink cartridge is expended and may not be able to clean it when ...

Page 161: ...g select them and press the right arrow button 7 Press the OK button 8 Select one of the following as the cleaning strength level For a first cleaning select Normal If nozzles are still clogged after three normal level cleanings select Power Cleaning 9 Press the OK button to start the cleaning cycle When the cleaning cycle is finished the power light stops flashing and a confirmation screen appear...

Page 162: ... and Installing Ink Cartridges Cleaning the Print Head Using a Computer Utility You can clean the print head using a utility on your Windows computer or Mac 1 Make sure roll or cut sheet paper is loaded in the printer 2 Make sure the correct paper type is selected 3 Do one of the following Windows Access the Windows Desktop and right click the product icon in the Windows taskbar In the Apple menu ...

Page 163: ... and a confirmation screen appears Caution Never turn off the product during a cleaning cycle or you may damage it 6 Click Nozzle Check 7 Click OK The nozzle pattern prints 8 Check the printed pattern to see if there are gaps in the lines Note Use at least a 10 eye loupe to examine the pattern for any missing or deflected dots or segments ...

Page 164: ... to print and select the correct paper type as the Select Paper Type setting Run a nozzle check before you align the print head If there are any gaps in the nozzle check pattern clean the print head Automatic print head alignment cannot be performed on any transparent or colored paper or on these paper types Plain paper Epson Enhanced Matte Posterboard Manually align from the printer control panel...

Page 165: ...d on Light Cyan Bi D 2 color aligns each color for bi directional printing based on Light Cyan and Vivid Light Magenta Bi D All Color aligns each color for bi directional printing based on all colors Bi D 1 Bi D 2 Bi D 3 and Bi D 4 perform the most detailed adjustments based on the size of the ink dots Run all four adjustments in order from Bi D 1 to Bi D 4 to ensure that the printer is aligned pr...

Page 166: ...2 Make sure the correct paper type is selected 3 Do one of the following Windows Access the Windows Desktop and right click the product icon in the Windows taskbar In the Apple menu or the Dock select System Preferences Select Print Fax Print Scan or Printers Scanners select your product and select Options Supplies Select Utility and select Open Printer Utility 4 Select Print Head Alignment You se...

Page 167: ...is size or larger A4 8 3 11 7 inches 210 297 mm 2 Make sure the correct paper type is selected 3 Press the Menu button 4 Press the up or down arrow button to select Maintenance and press the right arrow button 5 Select Head Alignment and press the right arrow button 6 Select Manual and press the right arrow button 7 Press the up or down arrow button to select one of the following options Uni D ali...

Page 168: ...ctions on selecting the best square in each pattern set 10 Check the printed patterns and choose the number representing the pattern in which the white lines are the most evenly spaced then press the OK button When the manual head alignment process is complete your product should be properly aligned If it is not select a different alignment method and repeat the process Parent topic Print Head Ali...

Page 169: ...it regularly about once a month Note Do not use a hard brush benzene alcohol or paint thinner to clean the product or you may damage it Do not use oil or other lubricants inside the product or let water get inside 1 Turn off the product 2 Unplug the power cable 3 Disconnect any connected cables 4 Remove any paper from the product 5 Open the front cover and carefully clean the inside of the product...

Page 170: ...lers or the ink absorption pads or your prints may be soiled Caution Be careful not to touch the gears or ink tubes inside the product 7 If your product is still dirty dampen the cloth with a small amount of water and a mild detergent and repeat the previous step Then wipe the inside of the printer with a soft dry cloth ...

Page 171: ...Use a soft clean cloth to remove any dust or dirt from the outside of the product 11 Plug the power and connection cables back in 12 Turn on the product 13 Load roll paper in the printer 14 Press the paper feed button several times to feed blank paper through the paper path and clean the rollers 15 Press the paper cut button Parent topic Maintenance ...

Page 172: ...on removing it from your printer 1 Remove any paper from the printer 2 Press the Menu button 3 Press the down arrow button to select Maintenance and press the right arrow button 4 Select Cutter Maintenance and press the right arrow button 5 Select Replace Cutter and press the right arrow button 6 Press the OK button The cutter moves to the replacement position 7 Press in on the tab on the cutter c...

Page 173: ...lding the cutter in place 9 Carefully remove the cutter from the product Warning Keep the cutter out of the reach of children The blade is sharp and can cause injury 10 Align the pin on the new cutter with the hole in the product and insert it into your product ...

Page 174: ...til it clicks into place Note If you removed the optional SpectroProofer reinstall it See the instructions that came with the SpectroProofer for details on installing it 13 Press the OK button The cutter moves back to the home position Parent topic Maintenance Related references Maintenance Menu Settings ...

Page 175: ...move the product a short distance such as within the same building you can roll the product on its casters Caution During transportation and storage follow these guidelines Do not roll the product on angled or uneven surfaces Leave the ink cartridges installed to prevent drying out the print head 1 Turn off the product 2 Unplug the power cable 3 Disconnect any connected cables 4 Remove any paper f...

Page 176: ...ation 9 Lock the front casters Parent topic Moving or Transporting the Product Related tasks Removing Roll Paper Storing the Paper Basket Moving the Product Long Distances If you need to move the product a long distance or ship it you should remove the product from its stand ...

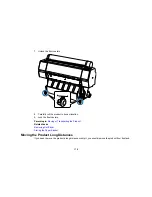
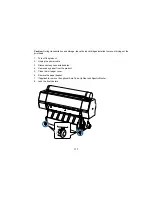
Page 177: ...rying out the print head 1 Turn off the product 2 Unplug the power cable 3 Disconnect any connected cables 4 Remove any paper from the product 5 Close the roll paper cover 6 Remove the paper basket 7 If applicable remove the optional Auto Take Up Reel and SpectroProofer 8 Lock the front casters ...

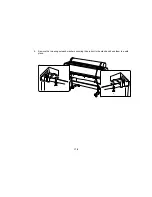
Page 178: ...178 9 Remove the two wing nuts and washers securing the product to the stand and keep them in a safe place ...

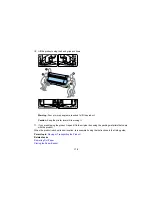
Page 179: ...el while moving it 11 If you are shipping the product repack it in the original box using the packing materials that came with the product When the product reaches its new location re assemble it using the instructions in the Setup guide Parent topic Moving or Transporting the Product Related tasks Removing Roll Paper Storing the Paper Basket ...

Page 180: ...artridge If the message persists insert a new ink cartridge You cannot change the ink configuration Standard or Commercial edition after the ink cartridges have been installed Make sure the correct cartridges are installed Condensation may have occurred in the ink cartridge Remove the cartridge leave it for four hours or more at room temperature and reinstall it Ink Cartridge Error Ink cartridge c...

Page 181: ...oaded paper size is not supported size The loaded paper is not a supported width Remove the paper and press the OK button If the message still appears when you have loaded paper in a supported width set the Paper Size Check setting to Off Paper Sensor Error Loaded paper or print out has a problem The loaded paper is not detected correctly by the printer Press the pause cancel button If this error ...

Page 182: ...the cable that runs from the optional Auto Take up Reel and the printer Reel Unit Disconnected Auto Take up Reel Unit is disconnected Do you continue The optional Auto Take up Reel is not connected Reconnect the unit and select No on the control panel to turn the printer off Wait a moment then turn the printer on again To continue printing without the Auto Take up Reel select Yes on the control pa...

Page 183: ...in the printer driver Data Size Error Data size of print job is too large Check on print job The optional internal print server can store individual print jobs that are 100GB in size To print larger jobs select Print Only from the Hard Disk Unit menu in the printer driver HDD Store Error Hard disk does not have enough space See documentation for how to delete stored print jobs There is insufficien...

Page 184: ... documentation for more details SProofer Disconnected SpectroProofer Mounter is not recognized Continue The optional SpectroProofer mounter is not connected correctly Reconnect the cables and select No to turn off the printer Wait a moment then turn on the printer again If you do not want to use the optional SpectroProofer select Yes See the SpectroProofer mounter documentation for more details IL...

Page 185: ...service A call for service occurs when The power cable is not connected securely An error occurs that cannot be cleared When a call for service has occurred the printer automatically stops printing Turn off the printer disconnect the power cable from both the outlet and the printer and reconnect them Turn the printer on and off several times If the same call for service is displayed on the LCD scr...

Page 186: ...ions Make sure the power cable is securely connected Make sure the power outlet works by connecting the power cable for another electronic device Parent topic Solving Printer Problems LCD Screen Shuts Off If the LCD screen shuts off intermittently the printer may be in Sleep Mode Try these solutions Press any of the buttons on the control panel to exit sleep mode You can adjust the delay time befo...

Page 187: ...y on the computer Disconnect all USB hubs from the computer and connect the printer directly to the computer s USB port Make sure the USB cable length does not exceed 10 feet 3 m Parent topic Solving Printing Problems Related references Interface Specifications Cannot Print Over a Network If you cannot print over a network try these solutions Make sure that your printer is turned on Make sure you ...

Page 188: ... not been used for a long time the nozzles may be clogged If you see the message Motor Self Adjustment on the product s LCD screen the printer is adjusting its internal motor Wait a few moments for the message to disappear and do not turn off the printer Parent topic Solving Printing Problems Related concepts Print Head Nozzle Check Print Head Cleaning Red Light Shines Inside the Printer The red l...

Page 189: ... into the paper feed slot make sure the paper is perfectly flat and not curled Do not load more than one piece of cut sheet paper Make sure your paper meets the specifications for your product If thick media does not feed make sure you are loading it straight into the product not at an angle If paper does not eject correctly decrease the Paper Suction setting for the loaded paper type Make sure th...

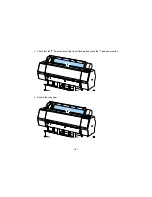
Page 190: ...190 2 Cut the paper above the paper feed slot ...

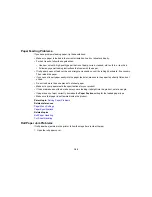
Page 191: ...191 3 Check that the pause cancel light is not flashing and press the load paper button 4 Rewind the roll paper ...

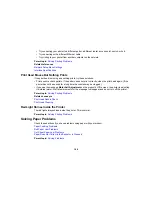
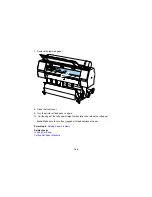
Page 192: ...192 5 Open the front cover Caution Do not touch the ribbon cable inside the printer 6 Carefully move the print head away from the paper jam ...

Page 193: ...193 Caution Do not touch the print head unless you are removing a paper jam Touching the print head may cause a static shock that damages the printer ...

Page 194: ...ter off and back on again 10 Cut the edge of the roll paper straight horizontally then reload the roll paper Note Make sure to cut off any jagged or folded sections of paper Parent topic Solving Paper Problems Related tasks Loading Roll Paper Cutting Roll Paper Manually ...

Page 195: ...195 Cut Sheet Paper Jam Problems If cut sheet paper has jammed in the printer follow the steps here to clear the jam 1 Open the front cover Caution Do not touch the ribbon cable inside the printer ...

Page 196: ...ove the print head to the opposite side of the printer from the paper jam Caution Do not touch the print head unless you are removing a paper jam Touching the print head may cause a static shock that damages the printer ...

Page 197: ...d paper 4 Close the front cover 5 Turn the printer off and back on again 6 Reload the paper making sure it is not skewed Parent topic Solving Paper Problems Related tasks Loading Cut Sheets Loading Thick or Large Cut Sheets ...

Page 198: ...Solving Paper Problems Related references Paper Menu Settings Related topics Using the Paper Basket Solving Print Quality Problems Check these sections if you have problems with print quality Nozzle Check Pattern Prints Incorrectly Overall Print Quality is Poor Lines Are Misaligned Prints are Scuffed or Smeared Margins Appear in Borderless Prints Too Much Ink is Consumed Parent topic Solving Probl...

Page 199: ...expired cartridges with new ones Shake the cartridges before installing them in the printer To maintain optimum print quality remove and shake the installed cartridges if the printer has not been used in the last three months Make sure you selected the correct Media Type setting in the printer driver that matches the paper loaded in the printer Compare the print result with the image on your compu...

Page 200: ...t head Parent topic Solving Print Quality Problems Related concepts Print Head Alignment Prints are Scuffed or Smeared If your prints are scuffed or smeared try these solutions Make sure your paper meets the specifications for your product Do not use paper with folds or creases and always use new media If you are using cut sheet paper check that changes in humidity and temperature have not made th...

Page 201: ...till have margins try these solutions Check the print settings selected in your print application you are using as well as the printer driver Make sure that the paper settings on the LCD screen match the paper you loaded Make sure borderless enlargement is not set to Min in the printer driver Paper that is stored incorrectly may expand or contract Make sure you have stored the paper according to t...

Page 202: ...ides technical support and information on the installation configuration and operation of professional printing products through the Epson Preferred Limited Warranty Plan Dial 888 377 6611 6 AM to 6 PM Pacific Time Monday through Friday Days and hours of support are subject to change without notice Note If you experience difficulty with the toll free number call 562 276 1305 U S or 905 709 3481 Ca...

Page 203: ...es You can purchase genuine Epson ink paper and accessories from an Epson authorized reseller To find the nearest reseller visit proimaging epson com U S or epson ca Canada or call 800 GO EPSON 800 463 7766 Parent topic Solving Problems ...

Page 204: ...imension Specifications Electrical Specifications Environmental Specifications Interface Specifications Safety and Approvals Specifications Windows System Requirements To use your product and its software your computer should meet these requirements Microsoft Windows OS version 32 and 64 bit compatible Windows 10 Windows 8 x Windows 7 CPU Core 2 Duo 3 05 GHz or better Memory 2GB or more 4GB recomm...

Page 205: ... or more Interface High Speed USB port compatible with USB 2 0 Specification Ethernet 10BASE T 100BASE TX 1000BASE T Display resolution WXGA 1280 800 or higher Note Visit Epson s support website at epson com support U S or epson ca support Canada for the latest in compatibility and drivers for your product Parent topic Technical Specifications Paper Specifications Note Since the quality of any par...

Page 206: ...6 mm 8 10 inches 203 254 mm 9 12 inches 229 305 mm 10 12 inches 254 305 mm 11 14 inches 279 356 mm 11 17 inches 279 432 mm 12 12 inches 305 305 mm 12 18 inches 305 457 mm 16 20 inches 279 432 mm 17 22 inches 432 559 mm 18 24 inches 457 610 mm 22 34 inches 559 864 mm 24 36 inches 610 910 mm 34 44 inches 864 1120 mm 36 48 inches 910 1219 mm SC P8000 SC P9000 only SC P6000 SC P7000 Non standard sizes...

Page 207: ...p to 4 1 inches 103 mm 3 inch core up to 5 9 inches 150 mm Width SC P6000 SC P7000 10 inches 254 mm to 24 inches 610 mm SC P8000 SC P9000 10 inches 254 mm to 44 inches 1118 mm Length 2 inch core up to 147 6 feet 45 m 3 inch core up to 662 7 feet 202 m Thickness 0 003 to 0 02 inches 0 08 to 0 5 mm Note Maximum thickness is reduced to 0 02 inches 0 45 mm when using the optional SpectroProofer Parent...

Page 208: ...eft right bottom margin 0 12 inch 3 mm minimum 2 Top margin 0 55 inch 14 mm minimum 3 SC P6000 SC P7000 Printable width 10 inches 254 mm to 24 inches 610 mm SC P8000 SC P9000 Printable width 10 inches 254 mm to 44 inches 1118 mm 4 Printable length 11 inches 279 mm to 62 2 inches 1580 mm ...

Page 209: ...2 Left margin 0 12 inch 3 mm minimum 3 Top margin 0 59 inch 15 mm minimum 4 Right margin 0 12 inch 3 mm minimum 5 Printable length 0 4 feet 0 13 m to 662 7 feet 202 m 6 SC P6000 SC P7000 Printable width 10 inches 254 mm to 24 inches 610 mm SC P8000 SC P9000 Printable width 10 inches 254 mm to 44 inches 1118 mm For these paper types the default top and bottom margins are 0 8 inch 20 mm Epson Premiu...

Page 210: ...f use and temperature For print quality a variable amount of ink remains in the cartridge after the replace cartridge indicator comes on Pigment ink SC P7000 SC P9000 Standard Edition Cyan Light Cyan Vivid Magenta Vivid Light Magenta Yellow Orange Green Light Light Black Light Black Photo Black Matte Black Commercial Edition Cyan Light Cyan Vivid Magenta Vivid Light Magenta Yellow Orange Green Vio...

Page 211: ... Dimension Specifications Height 48 inches 1218 mm Width SC P8000 SC P9000 73 4 inches 1864 mm SC P6000 SC P7000 53 4 inches 1356 mm Depth SC P8000 SC P9000 Paper basket closed 26 3 inches 667 mm Paper basket opened 51 9 inches 1318 mm SC P6000 SC P7000 Paper basket closed 26 3 inches 667 mm Paper basket opened 35 6 inches 903 mm Weight without ink cartridges or optional equipment SC P8000 SC P900...

Page 212: ...de 19 W Sleep mode 2 0 W Power off mode 0 5 W or less SC P6000 SC P7000 Printing 65 W ISO IEC24712 Ready mode 19 W Sleep mode 2 0 W Power off mode 0 5 W or less Parent topic Technical Specifications Environmental Specifications Temperature Operating 50 to 95 F 10 to 35 C Operating recommended 65 to 75 F 18 to 24 C Storage before unpacking 4 to 140 F 20 to 60 C 1 month at 104 F 40 C Storage after u...

Page 213: ...i Speed USB Compatible with the Universal Serial Bus Specifications Revision 2 0 Network Interface 10BASE T 100BASE TX 1000BASE T Parent topic Technical Specifications Safety and Approvals Specifications United States Safety UL60950 1 EMC FCC part 15 Subpart B class B Canada Safety CAN CSA C22 2 No 60950 1 EMC CAN CSA CEI IEC CISPR 22 Class B Parent topic Technical Specifications ...

Page 214: ...on the product Do not attempt to service this product yourself Use only the type of power source indicated on the product s label Use only the power cord that comes with the product Use of another cord may cause fires or shock Do not use the cord with any other equipment Place the product near a wall outlet where the plug can be easily unplugged Connect your product to a properly grounded power ou...

Page 215: ...k or cover openings in the cabinet or insert objects through the slots Keep the product away from potential sources of electromagnetic interference such as loudspeakers or the base units of cordless telephones When connecting the product to a computer or other device with a cable ensure the correct orientation of the connectors Each connector has only one correct orientation Inserting a connector ...

Page 216: ... seal from the ink supply port This may cause the cartridge to become unusable The green IC chip on this ink cartridge retains a variety of cartridge related information such as the ink cartridge status so that the cartridge may be removed and reinserted freely Do not touch the green IC chip on the side of the cartridge This may prevent normal operation and printing If you remove an ink cartridge ...

Page 217: ... equipment into an outlet on a circuit different from that to which the receiver is connected Consult the dealer or an experienced radio TV technician for help WARNING The connection of a non shielded equipment interface cable to this equipment will invalidate the FCC Certification or Declaration of this device and may cause interference levels which exceed the limits established by the FCC for th...

Page 218: ... GNU GPL This printer product includes the open source software programs which apply the GNU General Public License Version 2 or later version GPL Programs The list of GPL Programs linux 2 6 35 arm1 epson12 busybox 1 17 4 ethtool 2 6 35 e2fsprogs 1 41 14 scrub 2 4 smartmontools 5 40 WPA Supplicant 0 7 3 Shred Coreutils v8 23 GNU Lesser GPL This printer product includes the open source software pro...

Page 219: ...un RPC License This printer product includes the open source software program busybox 1 17 4 which apply the Sun RPC License Sun RPC Program ncftp license This printer product includes the open source software program ncftp 3 2 4 which applies the terms and conditions provided by owner of the copyright to the ncftp e2fsprogs license This printer product includes the open source software program e2...

Page 220: ...bject matter contained in the Original Code but only to the extent necessary to use reproduce and or distribute the Original Code without infringement and b in the case where You are the grantor of rights I claims of patents that are now or hereafter acquired owned by or assigned to You and ii that cover subject matter in Your Modifications taken alone or in combination with Original Code 1 2 Cont...

Page 221: ...strictions Subject to the terms and conditions of this License Apple hereby grants You effective on the date You accept this License and download the Original Code a world wide royalty free non exclusive license to the extent of Apple s Applicable Patent Rights and copyrights covering the Original Code to do the following 2 1 Unmodified Code You may use reproduce display perform internally distrib...

Page 222: ...r that the Covered Code does not infringe the patent or other intellectual property rights of any other entity Apple and each Contributor disclaim any liability to You for claims brought by any other entity based on infringement of intellectual property rights or otherwise As a condition to exercising the rights and licenses granted hereunder You hereby assume sole responsibility to secure any oth...

Page 223: ...ortion thereof is at Your sole and entire risk THE COVERED CODE IS PROVIDED AS IS AND WITHOUT WARRANTY UPGRADES OR SUPPORT OF ANY KIND AND APPLE AND APPLE S LICENSOR S COLLECTIVELY REFERRED TO AS APPLE FOR THE PURPOSES OF SECTIONS 8 AND 9 AND ALL CONTRIBUTORS EXPRESSLY DISCLAIM ALL WARRANTIES AND OR CONDITIONS EXPRESS OR IMPLIED INCLUDING BUT NOT LIMITED TO THE IMPLIED WARRANTIES AND OR CONDITIONS...

Page 224: ...ations and such Apple Modifications will not be automatically subject to this License Apple may at its sole discretion choose to license such Apple Modifications under this License or on different terms from those contained in this License or may choose not to license them at all 12 Termination 12 1 Termination This License and the rights granted hereunder will terminate a automatically without no...

Page 225: ... a contract shall be construed against the drafter will not apply to this License 13 5 Severability a If for any reason a court of competent jurisdiction finds any provision of this License or portion thereof to be unenforceable that provision of the License will be enforced to the maximum extent permissible so as to effect the economic benefits and intent of the parties and the remainder of this ...

Page 226: ... rights reserved For the purposes of this copyright and license Info ZIP is defined as the following set of individuals Mark Adler John Bush Karl Davis Harald Denker Jean Michel Dubois Jean loup Gailly Hunter Goatley Ed Gordon Ian Gorman Chris Herborth Dirk Haase Greg Hartwig Robert Heath Jonathan Hudson Paul Kienitz David Kirschbaum Johnny Lee Onno van der Linden Igor Mandrichenko Steve P Miller ...

Page 227: ... MacZip for its own source and binary releases Parent topic Notices Trademarks EPSON SureColor and SpectroProofer are registered trademarks and EPSON Exceed Your Vision is a registered logomark of Seiko Epson Corporation Epson StoreSM is a service mark of Epson America Inc Mac and OS X are trademarks of Apple Inc registered in the U S and other countries General Notice Other product names used her...

Page 228: ...m the use of any interface cables other than those designated as Epson approved Products by Seiko Epson Corporation This information is subject to change without notice A Note Concerning Responsible Use of Copyrighted Materials Copyright Attribution Parent topic Notices A Note Concerning Responsible Use of Copyrighted Materials Epson encourages each user to be responsible and respectful of the cop...

Reviews: