147
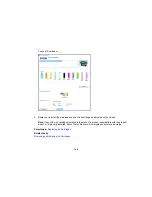
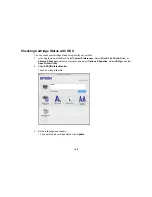
• Replace or reinstall any ink cartridge indicated on the screen.
Note:
If any of the cartridges installed in the product is broken, incompatible with the product model,
or improperly installed, Epson Status Monitor will not display an accurate cartridge status.
Parent topic:
Replacing Ink Cartridges
Related tasks
Removing and Installing Ink Cartridges
Purchase Epson Ink Cartridges
You can purchase genuine Epson ink and accessories at
epson.com
(U.S. sales) or
epson.ca
(Canadian
sales). You can also purchase accessories from an Epson authorized reseller. To find the nearest one,
call 800-GO-EPSON (800-463-7766).
Note:
This product uses only genuine Epson-brand cartridges. Other brands of ink cartridges and ink
supplies are not compatible and, even if described as compatible, may not function properly.
The cartridges included with the printer are designed for printer setup and not for resale. After some ink
is used for charging, the rest is available for printing. Yields vary considerably based on images printed,
print settings, paper type, frequency of use, and temperature. For print quality, a variable amount of ink
remains in the cartridge after the "replace cartridge" indicator comes on.
Ink Cartridge and Maintenance Box Part Numbers
Parent topic:
Replacing Ink Cartridges
Ink Cartridge and Maintenance Box Part Numbers
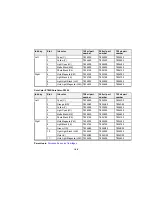
Use these part numbers when you order or purchase a new maintenance box or ink cartridges.
Note:
For best printing results, use up a cartridge within 6 months of opening the package.
Maintenance box part number: C13T699700
SureColor-P6000/SureColor-P8000
Summary of Contents for SureColor P8000
Page 1: ...Epson SureColor P6000 P7000 P8000 P9000 User s Guide ...
Page 2: ......
Page 8: ......
Page 21: ...21 5 Release the tension levers on both roll media adapters ...
Page 31: ...31 If you are using the optional Auto Take Up Reel rewind the paper using the Manual switch ...
Page 42: ...42 1 Raise the paper guides ...
Page 43: ...43 2 Lower the front of the paper basket ...
Page 45: ...45 4 Raise the front of the basket one level ...
Page 46: ...46 5 Fasten the front of the basket with the tabs ...
Page 50: ...50 1 Unfasten the tabs at the front of the paper basket ...
Page 51: ...51 2 Raise the paper guides ...
Page 52: ...52 3 Raise the front of the basket so that the cloth is pulled taut ...
Page 54: ...54 1 Raise the paper guides ...
Page 55: ...55 2 Raise the front of the basket and lower the paper guides ...
Page 92: ...92 You can also place the same print data multiple times as shown here ...
Page 190: ...190 2 Cut the paper above the paper feed slot ...


