182
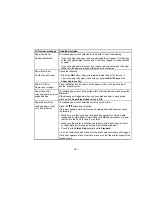
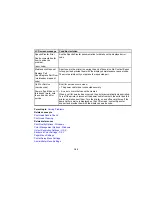
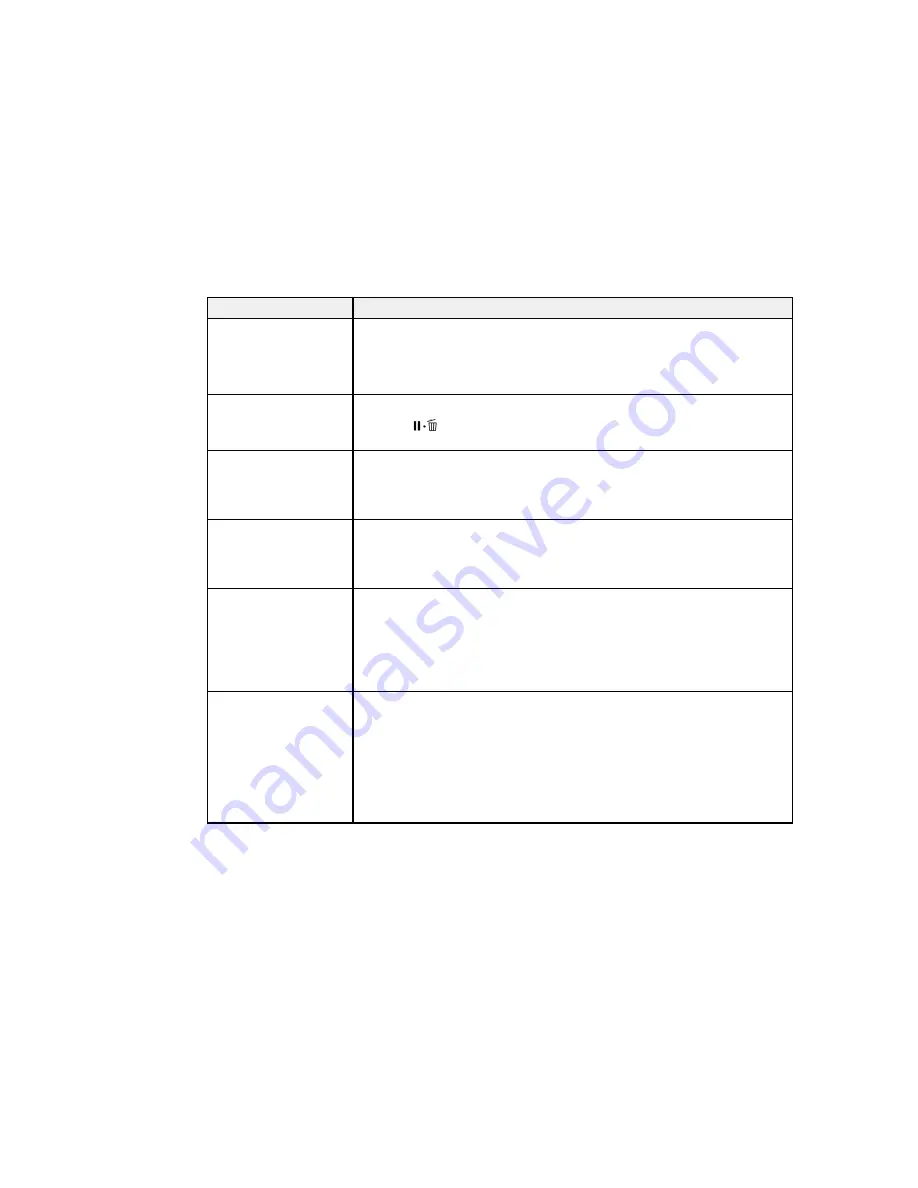
LCD screen message
Condition/solution
F/W Install Error
Firmware update failed.
Restart the printer.
The firmware updated did not install.
Turn off the printer, wait for awhile, and turn on the printer again. Then run
the firmware update file again.
If the message still appears, contact Epson for support.
Command Error
Check driver settings.
The printer driver sent an invalid or incorrect command to the printer.
Press the
pause/cancel button and select
Job Cancel
. Make sure that
the driver you are using supports your product.
Reel Unit Error
Check Auto Take-up
Reel Unit and restart
printer.
Turn off the printer, wait for awhile, and turn on the printer again.
If the message still appears, contact Epson for support.
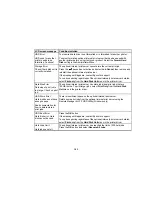
Reel Unit Error
Check Auto Take-up
Reel Unit cable and
restart printer.
Reconnect the cable that runs from the optional Auto Take-up Reel and the
printer.
Reel Unit Disconnected
Auto Take-up Reel Unit
is disconnected. Do you
continue?
The optional Auto Take-up Reel is not connected. Reconnect the unit and
select
No
on the control panel to turn the printer off. Wait a moment, then
turn the printer on again.
To continue printing without the Auto Take-up Reel, select
Yes
on the control
panel.
See the Auto Take-up Reel documentation for more details.
Take-Up Error
Is anything obstructing
the take-up reel sensor
system?
The optional Auto Take-up Reel cannot take up media.
Check the optional Auto Take-up Reel sensor and clear any obstructions,
then press the
OK
button.
If there is any loose paper on the Auto Take-up Reel roll core, set the
Auto
switch to
Off
and hold the
Manual
switch in the take-up direction to remove
slack in the roll paper. Confirm that the paper is attached to the roll core
correctly, then return the
Auto
switch to the original position and press the
OK
button.
Summary of Contents for SureColor P8000
Page 1: ...Epson SureColor P6000 P7000 P8000 P9000 User s Guide ...
Page 2: ......
Page 8: ......
Page 21: ...21 5 Release the tension levers on both roll media adapters ...
Page 31: ...31 If you are using the optional Auto Take Up Reel rewind the paper using the Manual switch ...
Page 42: ...42 1 Raise the paper guides ...
Page 43: ...43 2 Lower the front of the paper basket ...
Page 45: ...45 4 Raise the front of the basket one level ...
Page 46: ...46 5 Fasten the front of the basket with the tabs ...
Page 50: ...50 1 Unfasten the tabs at the front of the paper basket ...
Page 51: ...51 2 Raise the paper guides ...
Page 52: ...52 3 Raise the front of the basket so that the cloth is pulled taut ...
Page 54: ...54 1 Raise the paper guides ...
Page 55: ...55 2 Raise the front of the basket and lower the paper guides ...
Page 92: ...92 You can also place the same print data multiple times as shown here ...
Page 190: ...190 2 Cut the paper above the paper feed slot ...


