Programming
54
Operating Instructions 911-210-10 - 00.0 - 06/2020
3.
Press the
OK
(4) button.
The desired starting point is adopted and marked with a green / blue
dot.
Selecting the line type
4.
Use the line selection buttons (8) to select the type of line to be defined:
•
Seamless path
: The clamp moves over this path to the next
position without sewing
•
Straight seam
: A straight path is sewn
•
Curved seam
: A curve is sewn
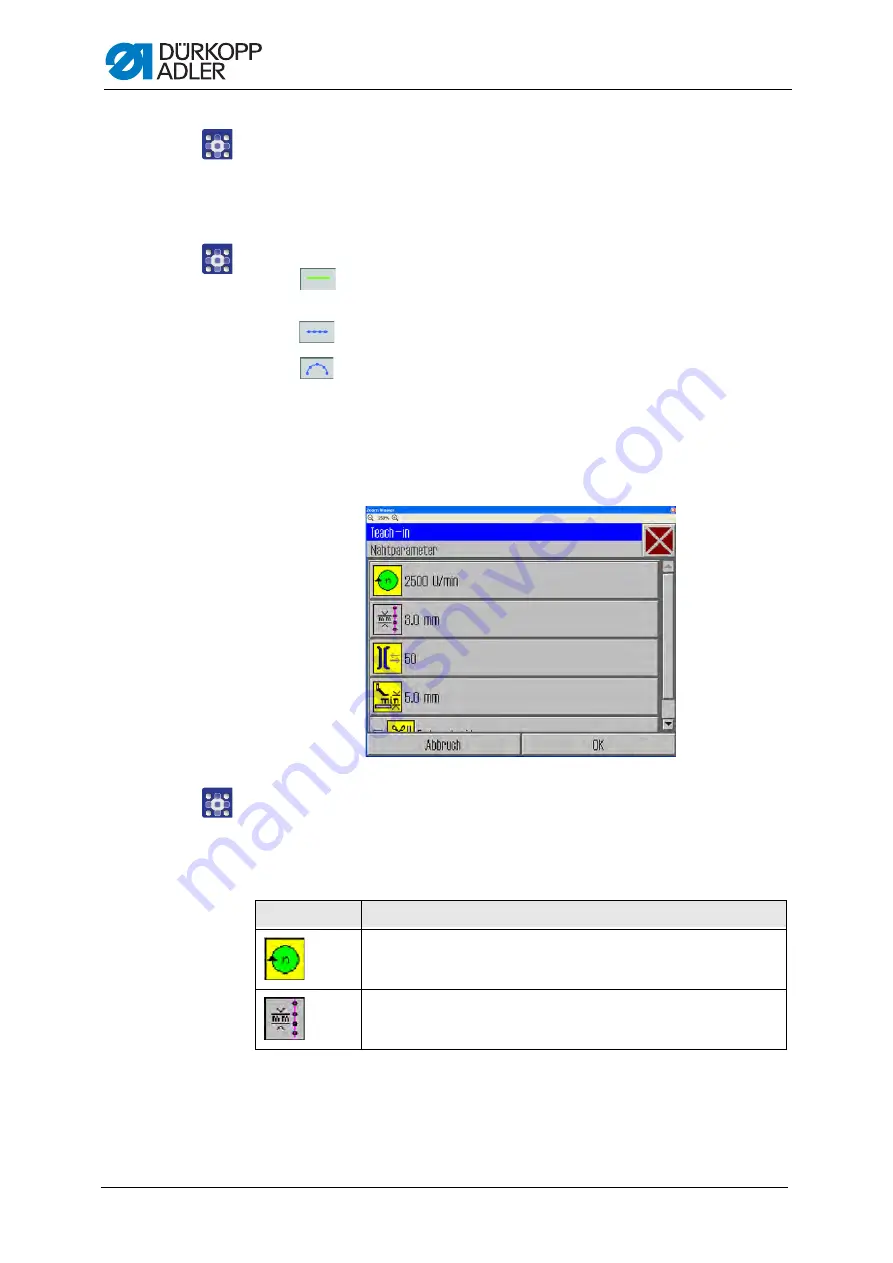
After pressing the button for a straight or curved seam, the correspond-
ing window for entering the sewing parameters for this path opens.
Defining the sewing parameters for the path
Fig. 36: Defining the sewing parameters for the path
5.
Press the desired parameter.
The window for entering the parameter value opens.
6.
Enter the desired value for the parameter (
Sewing parameters for Teach-In
Button
Meaning
Speed
Stitch length
Summary of Contents for 911-210-3020-10
Page 1: ...911 210 10 Operating Instructions...
Page 6: ...Table of Contents 4 Operating Instructions 911 210 10 00 0 06 2020...
Page 10: ...About these instructions 8 Operating Instructions 911 210 10 00 0 06 2020...
Page 18: ...Machine description 16 Operating Instructions 911 210 10 00 0 06 2020...
Page 34: ...Operation 32 Operating Instructions 911 210 10 00 0 06 2020...
Page 112: ...Setup 110 Operating Instructions 911 210 10 00 0 06 2020...
Page 114: ...Decommissioning 112 Operating Instructions 911 210 10 00 0 06 2020...
Page 116: ...Disposal 114 Operating Instructions 911 210 10 00 0 06 2020...
Page 124: ...Troubleshooting 122 Operating Instructions 911 210 10 00 0 06 2020...
Page 127: ......


