E-33
ON
TEST
ABC
1
DEF
2
GHI
3
JKL
4
MNO
5
PQR
6
STU
7
VWX
8
0
YZ/
9
POWER
INPUT
OFF
IMAGE/
PROJECTOR
ON
OFF
PICTURE
ADJUST
WHITE BAL.
5
Turning off the Projector
To turn off the Projector:
First press the POWER (ON/STAND BY) button on the Projector
cabinet or the POWER OFF button on the remote control for a
minimum of 1 second. The POWER indicator will glow orange.
Second, turn off the Main Power switch. The power indicator will
go out.
Last unplug the power cable.
CAUTION
• When switching off the Main Power switch, set the Pro-
jector to the standby mode beforehand. Values that have
been set with the on-screen menu or by other means might
not be stored in the main unit if the Projector power sup-
ply is on when the Main Power switch is switched off.
• Do not unplug the power cable from the wall outlet or do
not turn off the main power under any one of the follow-
ing circumstances. Doing so can cause damage to the
Projector:
* While the Hour Glass icon appears.
* While the message "Please wait a moment." appears. This mes-
sage will be displayed after the Projector is turned off.
* Immediately after the main power switch has been turned ON.
(When the POWER indicator is not lit in orange, and before
“Stand by” is displayed on the liquid crystal display screen.)
* Immediately after the end of the cooling down period (during
which the fan is running for 3 minutes after the POWER button
has been switched OFF, and before “Stand by” is displayed on
the liquid crystal display screen).
Steady green
light
Steady orange
light
3. Projecting an Image
ENTER
CANCEL
UNDO
AUTO
HELP
INFO
PIXEL
SOUND
OSD
MAGNIFY/
FOCUS
+
ZOOM
+
MENU/
ADDRESS
POSI/
LENS
KEY ST./
R
E-LIST/
B
AMP/
G
PICT/
SHUT
MUTE
4
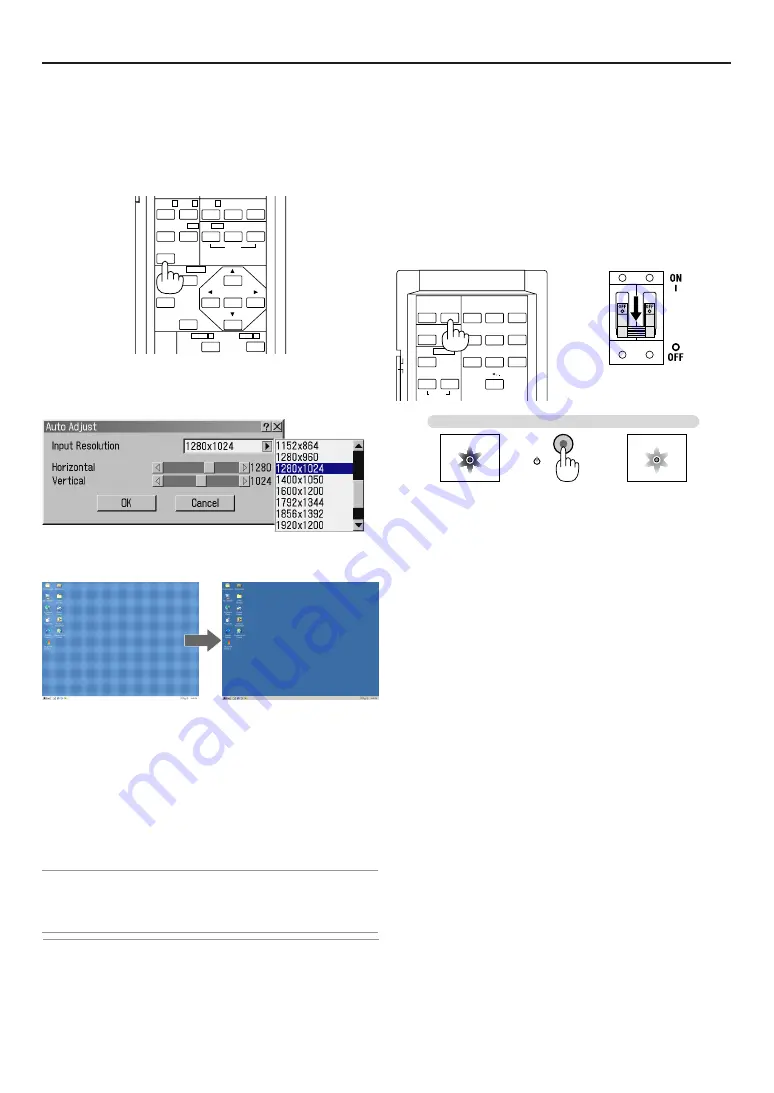
Optimizing RGB Picture Automatically
Adjusting the Image Using Auto Adjust
Optimizing RGB image automatically
1. Press the AUTO button on the remote control to optimize an RGB im-
age automatically.
[Poor picture]
[Normal picture]
Press the AUTO button to fine-tune the computer image or to
remove any vertical banding that might appear and to reduce
video noise, dot interference or cross talk (this is evident when
part of your image appears to be shimmering). This function ad-
justs the clock frequencies that eliminate the horizontal banding
in the image. This function also adjusts the clock phase to re-
duce video noise, dot interference or cross talk. (This is evident
when part of your image appears to be shimmering.)
This adjustment may be necessary when you connect your com-
puter for the first time.
NOTE:
• Some signals may not be displayed correctly or take time.
• The Auto Adjust function does not work for component and video signal.
• If the Auto Adjust operation cannot optimize the RGB signal, try to adjust Clock
and Phase manually. See page E-53.
The Auto Adjust menu is displayed.
2. Select “Input Resolution” and change the “Horizontal” number of pixels
and number of “Vertical” lines as required.
3. Align the cursor with “OK” and press the ENTER button.
Standby
Power on
POWER
POWER
ON/STAND BY
NOTE:
• The Auto Adjust operation alone does not automatically store the adjusted values
in memory. To store the adjustments, use the operations of the Entry List. For
details, see “6-3 Source Select, Entry Edi Command” on page E-50.
Summary of Contents for HIGHlite 10000Dsx+
Page 34: ...E 34...
Page 74: ...E 74 6 Using On Screen Menu...
Page 75: ...E 75 7 Maintenance 1 Cleaning the Cabinet and the Lens E 74...
Page 85: ...E 85 Unit mm 3 Cabinet Dimensions 8 Appendix HIGHlite 16000Dsx...
Page 86: ...E 86 Unit mm inch 8 Appendix HIGHlite 10000Dsx...
Page 94: ...E 94...
Page 95: ...E 95...
Page 96: ...E 96...


