E-17
1. Introduction
4
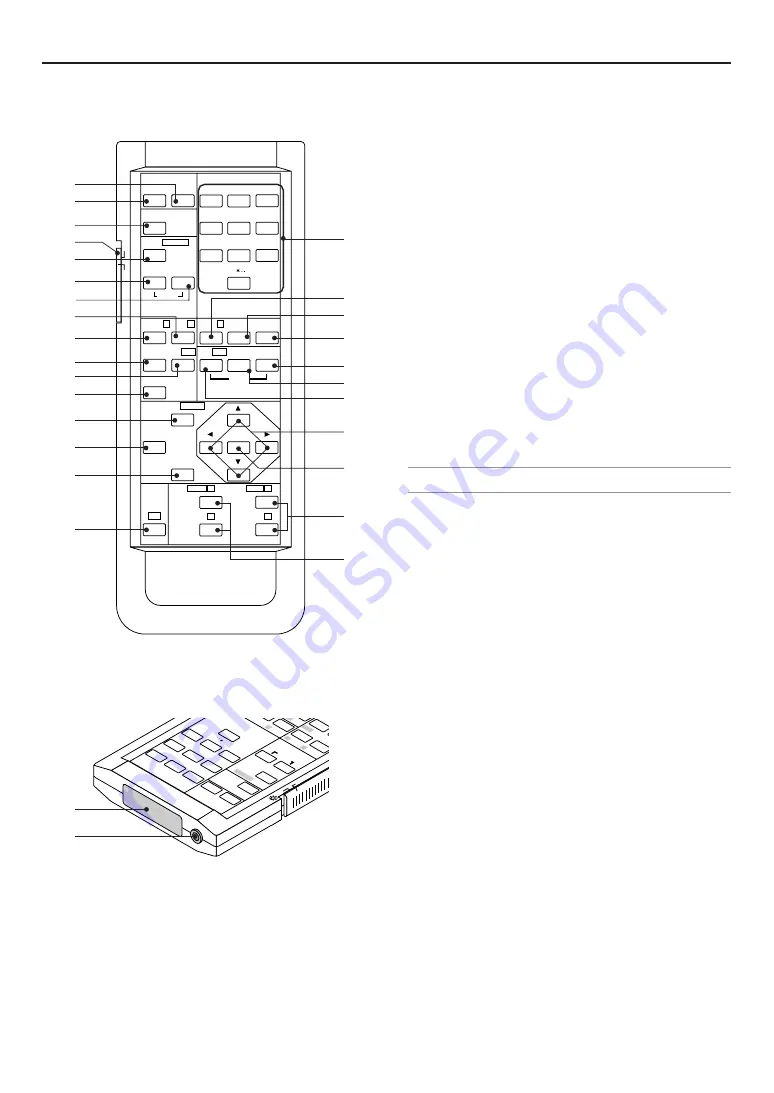
Remote Control Features
1. POWER ON
Press and hold this button for a minimum of 1 second to turn
on the Projector when the main power is supplied and the Pro-
jector is in standby mode.
2. POWER OFF
Press and hold this button for a minimum of 1 second to turn
off the Projector.
3. Source / Input
Press to select input or to name a signal.
1
Selects the input connector of Slot 1 (MM-VIDEO at time of factory
shipping).
Each press of “1” button switches the input connector one step in
the sequence of CVBS
→
S-Video
→
Component
→
CVBS
→
...
2
Selects the input connector of Slot 2 (MM-RGB at time of factory
shipping).
3
Selects the input connector of Slot 3. Becomes valid when an op-
tion board has been inserted.
4
Selects the input connector of Slot 4. Becomes valid when an op-
tion board has been inserted.
*
The aforementioned operation is for the Projector in the factory
shipping condition. The operation will differ depending on the in-
sertion of interface boards.
*
When multiple input connectors are available for a single slot, press-
ing the number buttons that correspond to that slot will switch the
input connectors within that board.
NOTE: While pressing and holding CTL, pressing this button switches to the
selected signal found in the Entry List.
4. TEST
Press to display the test pattern. Pressing this button sequen-
tially selects test patterns.
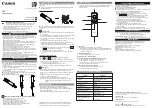
5. Backlight Switch
When using the remote control wirelessly:
Tums the backlight on and off. If no button operation is made
within 30 seconds with the Backlight ON, the Backlight will
turn off to conserve battery life.
When using as the wired remote control:
The light stays on in standby and power-on.
6. IMAGE/PROJECTOR
Press to display the Image Option screen. Pressing this but-
ton sequentially selects Image Options screens.
While pressing and holding CTL, pressing this button rotates
Projector Options screens.
7. ADJUST PICTURE
Press to display the Picture adjustment screen. Pressing this
button sequentially selects adjustment screens.
8. ADJUST WHITE BAL.
Press to display the Color Management screen.
9. KEYSTONE
• 3D Reform adjustment screen is shown. See page E-xx
• When optional MM-WARP is used, KEYSTONE screen and
Cornerstone screen will be switched one another each time
KEYSTONE button is pressed.
• When KEYSTONE button is pressed for more than 2 sec-
onds, 3D Reform’s adjustment value will be bach to factory
default setting.
10. AMPLITUDE
Service personnel only.
ENTER
CANCEL
UNDO
AUTO
HELP
ON
TEST
ABC
1
DEF
2
GHI
3
JKL
4
MNO
5
PQR
6
STU
7
VWX
8
0
YZ/
9
POWER
INPUT
OFF
INFO
PIXEL
SOUND
OSD
MAGNIFY/
CTL
FOCUS
+
-
ZOOM
+
MENU/ ADDRESS
IMAGE/ PROJECTOR
POSI/ LENS
KEY ST./
ON
OFF
R
E-LIST/
PICTURE
ADJUST
WHITE BAL.
B
AMP/ G
PICT/ SHUT
-
MUTE
23
27
24
20
19
14
15
9
10
8
7
6
5
4
1
2
25
26
22
21
16
17
18
13
12
11
3
ON
OFF
HE
LP
ON
TE
ST
AB
C
1
DE
F
2
GH
I
3
JK
L
4
MN
O
5
PQ
R
6
ST
U
7
VW
X
8
0
YZ
/
9
PO
WE
R
INP
UT
OF
F
XE
L
IMA
GE
/
PRO
JEC
TOR
PO
SI/
LEN
S
KE
Y S
T./
R
E-L
IST
/
PIC
TU
RE
AD
JU
ST
WH
ITE
BA
L.
B
AM
P/
G
PIC
T/
SH
28
29
Summary of Contents for HIGHlite 10000Dsx+
Page 34: ...E 34...
Page 74: ...E 74 6 Using On Screen Menu...
Page 75: ...E 75 7 Maintenance 1 Cleaning the Cabinet and the Lens E 74...
Page 85: ...E 85 Unit mm 3 Cabinet Dimensions 8 Appendix HIGHlite 16000Dsx...
Page 86: ...E 86 Unit mm inch 8 Appendix HIGHlite 10000Dsx...
Page 94: ...E 94...
Page 95: ...E 95...
Page 96: ...E 96...


