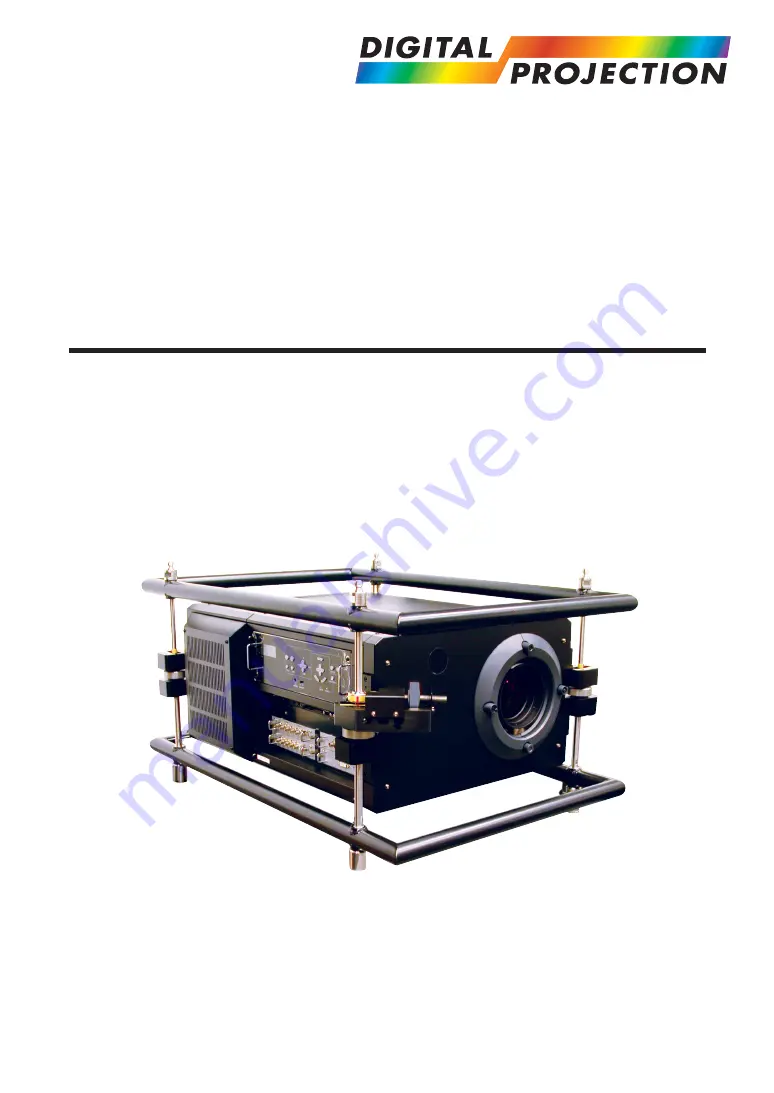
background image

E-1

HIGHlite 1

HIGHlite 1

Super High Brightness Digital Video Projector

User’s Manual

106-663A

Note:

HIGHlite 1 is marked as HL1 on the projectors rear
product label
HIGHlite 1 is marked as HL1 on the projectors rear
product label

HINWEIS:

Die Modellbezeichnung des Projektors, die auf dem hinteren
Aufkleber des Projektors steht, ist HL1  bzw. HL1
Beide Modelle werden in diesem Handbuch als HIGHlite 1 bzw.
HIGHlite 1  bezeichnet.

Summary of Contents for HIGHlite 10000Dsx+

Page 1: ...16000Dsx on the projectors rear product label HIGHlite 10000Dsx is marked as HL10000Dsx on the projectors rear product label HINWEIS Die Modellbezeichnung des Projektors die auf dem hinteren Aufkleber...

Page 2: ...ology Equipment EN 61000 3 2 2000 Harmonic Current Emissions EN 61000 3 3 1995 Immunity to Voltage Fluctuations and Flicker EN60950 2000 Specification for Safety of Information Technology Equipment in...

Page 3: ...operation and maintenance of this unit has been included Therefore it should be read carefully in order to avoid any problems DOC compliance Notice This Class A digital apparatus meets all requiremen...

Page 4: ...space between the ventilation outlet and object 2 Prevent foreign objects such as paper clips and bits of paper from fall ing into your projector Do not attempt to retrieve any objects that might fal...

Page 5: ...viter un incendie ou une d charge lectrique Pri re de les lire avec attention et de tenir compte de tous les avertissements Installation 1 Placer le projecteur sur une surface plane et de niveau dans...

Page 6: ...den Projektor weder in direktes Sonnenlicht noch in die N he einer Heizung oder sonstiger Hitze abstrahlender Einrichtungen 3 Wenn das Ger t direktem Sonnenlicht Rauch oder Dampf ausgesetzt wird k nne...

Page 7: ...b durchlesen Aufgrund der unter Druck luftdicht verschlossenen Lampe besteht bei falscher Handhabung eine geringe Explosionsgefahr Wenn sich das Ger t in einwandfreiem Zustand befindet ist dieses Risi...

Page 8: ...Line Help and Information E 36 3 Lens Memory E 36 5 Setting Up for ouble Stacking E 37 1 Stacking and Connecting the Projectors E 38 2 Adjusting and Registering Signals to Be Projected E 42 3 Adjusti...

Page 9: ...r E 12 Control Panel E 13 Control Terminals E 14 Input Terminals E 15 Option Boards E 16 4 Remote Control Features E 17 Remote Control Precautions E 19 Remote Control Battery Installation E 19 Operati...

Page 10: ...ortant Information printed 106 665A 1 Introduction HIGHlite 16000Dsx Projector 106 260A HIGHlite 10000Dsx Projector 106 625A USA power cable 104 069 ROW power cable 104 070 Remote control 102 161 and...

Page 11: ...t is standard equipment and wireless LAN is sup ported Connection of a commercially available LAN cable Ethernet cable to the LAN port RJ 45 permits control of this Projector from the personal compute...

Page 12: ...e E 13 Ventilation inlet Control terminals See page E 14 Main power switch See page E 30 Power cable Input terminals See page E 15 Remote sensor Lens optional Frame Remote sensor Tilt Adjustment Knob...

Page 13: ...ent or setting menu 1 Introduction 9 SHUTTER Button While pressing and holding CTL Button pressing this button shuts off the light completely 10 CTL Button Press the CTL Button together with the FOCUS...

Page 14: ...is typically used for UTP Ethernet Fast Ethernet Use this connector to control the Projector on a LAN See page E 26 Ferrite core supplied should be fitted to the projector end of the Remote cable 5 PC...

Page 15: ...equipment Standard definition only 525 60i 625 50i 4 ACT Indicator Steady green light Shows that this board is selected 1 RGB Input Connectors 5 BNC Type Use a 75 coaxial cable 5 conductor type and c...

Page 16: ...t connector of a computer When cable is connected to this port ferrite core which at tached to this equipment is assembled to the cable the side ferrite core is not attached 2 AUDIO Input Connector St...

Page 17: ...ly Tums the backlight on and off If no button operation is made within 30 seconds with the Backlight ON the Backlight will turn off to conserve battery life When using as the wired remote control The...

Page 18: ...nu item A press of the E button executes the selection Pressing and holding CTL then pressing F button works as a Back Space key in the entry screen Pressing and holding CTL then pressing this button...

Page 19: ...e will be required 1 Press and open the cover 2 Align and insert the batteries according to the and indications inside the case 3 Replace the cover Operating Range for Wireless Remote Control The infr...

Page 20: ...red Operation Connect one end of the supplied remote cable to the REMOTE IN 1 mini jack and the other end to the remote jack on the remote control NOTE Do not use this jack for anything other than int...

Page 21: ...ustable Range E 23 Maximum Possible Range for SL 14Z SL 18Z SL 25Z SL 45Z E 23 3 Making Connections E 24 Connecting to the Image Input Terminals E 24 Install the Option Boards and Expand the Image Inp...

Page 22: ...1752 0 1440 2 2335 8 1800 0 2920 1 SL 07F 1 19 1 48 2 23 2 97 3 71 4 45 5 93 7 42 46 9 58 3 87 8 116 9 146 1 175 2 233 5 292 1 Screen Size Lens Projection Distance for Screen Size and Each Lens Unit m...

Page 23: ...07F No shift available Maximum Possible Range for TL 1ZH TL 2Z TL 4Z TL 08SF Parenthesized values for the ceiling mount application For TL 08SF No shift available For TL 1ZH TL 2Z 4Z Up 0 37 V 0 14 V...

Page 24: ...iation of electromagnetic waves use the supplied ferrite clamp core When cable is for RGB signal ferrite core is assembled to the both side of the cable When cable is for DVI D signal ferrite core is...

Page 25: ...OTE When inserting the board into the slot insert it so that it moves along the rails located at the right and left of the slot If the board is not positioned be tween the rails the connector will not...

Page 26: ...and others Example of LAN connection Using the HTTP Server function 1 Configure your LAN settings such as IP address on the Projector See LAN Mode on page E 63 Server Hub Ethernet cable not supplied L...

Page 27: ...he main power switch before disconnecting the power plug Disconnecting the power plug or turning off the main power switch without first setting the projector to the standby mode may result in the val...

Page 28: ...a USB memory device as a Protect key for Security function select one from the Drive icons in the Security set ting screen NOTE Some USB memory devices brands or USB memory card readers may not work...

Page 29: ...cting an Image Basic Operation 1 Turning on the Projector E 30 2 Selecting a Source E 31 3 Adjusting the Picture Size and Position E 31 4 Optimizing RGB Picture Automatically E 33 5 Turning off the Pr...

Page 30: ...green and the Projector become ready to use Note on Startup screen Menu Language Select screen When you first turn on the Projector you will get the Startup screen This screen gives you the opportuni...

Page 31: ...L B AMP G PICT SHUT MUTE Using the menu You can also select the computer or video source using the menu 3 Adjusting the Picture Size and Position 1 Turn on the projector 2 Select your type of projecto...

Page 32: ...Tool If you use a special shaped screen such as a cylindrical or spherical screen a downloadable program Geometric Cor rection Tool is available This program Geometric Correc tion Tool enables the ge...

Page 33: ...teady orange light 3 Projecting an Image ENTER CANCEL UNDO AUTO HELP INFO PIXEL SOUND OSD MAGNIFY FOCUS ZOOM MENU ADDRESS POSI LENS KEY ST R E LIST B AMP G PICT SHUT MUTE 4 Optimizing RGB Picture Auto...

Page 34: ...E 34...

Page 35: ...E 35 4 Convenient Features 1 Turning Off the Image E 36 2 Getting the On line Help and Information E 36 3 Lens Memory E 36...

Page 36: ...s tom Point the adjusted settings in Ref erence Point will be applied Custom memory Custom Point Adjusted settings are stored in memory for each input signal Usage Example When you wish to display on...

Page 37: ...Up for Double Stacking 1 Stacking and Connecting the Projectors E 38 2 Adjusting and Registering Signals to Be Projected E 42 3 Adjusting the Lens Shift Zoom and Focus to Clearly Display all projected...

Page 38: ...more apparent when displaying small text and detailed graphics NOTE The frame is not supplied on HIGHlite 10000Dsx CAUTION To prevent the projectors from falling install them in a place and fasten the...

Page 39: ...rled knob S Knurled knob Enlarged Screen Screen Screen note 1 when Knurled knobs at two locations are turned the same charge should be turned 1 3 Assigning Projector IDs You can operate multiple proje...

Page 40: ...ct are different Please check the picture devices instruction manuals S Video cable not supplied 1 3 3 On the remote control specify the ID number of the pro jector to be adjusted Press and hold the C...

Page 41: ...d at the same time with one remote controllers To control two projectors indivisually setup IDs for each projector and each remote controller Master projector Slave projector REMOTE OUT REMOTE IN 1 Re...

Page 42: ...2 1 2 for all signals you want to project Display all the signals you registered and check To check select Source Select Entry List 3 Adjusting the Lens Shift Zoom and Fo cus to Clearly Display all p...

Page 43: ...E 52 Gamma Correction E 52 Image Options E 53 Option Adjust E 54 Lens Memory E 54 Signal Type E 55 Ref Adjust E 55 3D Reform E 55 Screen E 56 Ref Lens Memory E 56 Edge Blending E 57 Lamp Mode E 59 Fac...

Page 44: ...u cannot cancel the changes on the Menu screen However you can reedit the menu items over again as described in the steps above NOTE If the Advanced Menu item has been selected on the Menu mode you ge...

Page 45: ...al in the Entry List 6 Using On Screen Menu 3 Using the USB Mouse Using a commercially available USB mouse gives you smooth operation NOTE There may be some brands of USB mouse that the projector does...

Page 46: ...ture Low High White Balance Brightness R Brightness G Brightness B Contrast R Contrast G Contrast B Return to Reference Ok Cancel Set Custom Set Reference Cancel Graphics Enhanced Graphics NTSC NTSC E...

Page 47: ...Display Time Manual Auto 5 sec Auto 15 sec Auto 45 sec Date Format MM DD YYYY MM DD YYYY ddd DD MM YYYY DD MM YYYY ddd YYYY MM DD YYYY MM DD ddd Month DD YYYY Month DD YYYY ddd Date Time Preset Date M...

Page 48: ...work Type Mode Infrastructure 802 11 Ad Hoc SSID Channel Auto 1 to 13 TX Rate Automatic 54M 48M 36M 24M 18M 12M 9M 6M 11M 5 5M 2M 1M WEP WEP Disable 64 bit 128 bit 152bit Key Select Key 1 to 4 Key 1 t...

Page 49: ...App Config Degamma Main App Sequences Page 4 Version Formatter Green Boot App Config Degamma Main App Sequences Page 5 Version Formatter Blue Boot App Config Degamma Main App Sequences Cross Hatch Cr...

Page 50: ...ntered when you use the remote control Source Input buttons while displaying the Software Keyboard 5 Menu Descriptions Functions Source Select Enables you to select a video source such as a VCR DVD pl...

Page 51: ...eric characters See page E 84 for the key function of the software keyboard All Delete This feature enables you to delete all the regis tered signals in the Entry List The following buttons are not av...

Page 52: ...e colour temperature using the slide bar Checking Colour Temperature enables the colour temperature slide bar White Balance Item relating to colour adjustment Press the White Balance button to access...

Page 53: ...orrect resolution PAL SECAM Enhanced Correction fit to PAL signals and SECAM signals are done Gamma 1 0 3 0 Gamma value is set by 0 1 step Note If Edge Blending is On Gamma Correction is not available...

Page 54: ...tton or press the remote con trol CANCEL button Sync Protection When a VCR DVD or some other equipment that supports Copyguard a copy prevention system is played back the screen may be displayed in a...

Page 55: ...tion is pos sible For de activation set no check mark on Projector Options Setup page 3 WARP Correction Keystone Correction 1 Press SELECT Button Adjust screen size in vertial direction 2 Press ENTER...

Page 56: ...Use Point on Signal Change For change to take effect at the time of source selection select Yes Picture Mute during Lens Shift To turn off the image and sound during lens shift select Yes Screen Scre...

Page 57: ...ss Hatch in the projector superim pose the images so that the height of the two projected images is the same and distortion does not appear If the number of pixels 6 Using On Screen Menu in the superi...

Page 58: ...Decreases the correction value in steps of 10 F Ebuttons Increases Decreases the correction value in steps of 1 Adjust the brightness of the dark part non superimposed area and that of the bright area...

Page 59: ...selecting an advanced menu Ref Adjust Screen and 1 90 1 as the screen type Set 16 9 as the screen type in Screen when MM WARP option is used Lamp Mode Lamp brightness can be adjusted to 8 levels or au...

Page 60: ...uttons are pressed within 15 sec onds Auto 45 sec The menu will automatically be turned off in 45 seconds if no buttons are pressed within 45 sec onds Selecting Date Format Eight display formats can b...

Page 61: ...mal use Select the Hi Z when inputting a TTL signal Page 2 Selecting Signal Format Signal Select RGB Allows you to choose RGB for an RGB source such as a computer or Component for a component video so...

Page 62: ...ally available switcher is connected turning on this feature may cause the image to appear incorrectly Should this happen turn this feature off to mute the screen during switching Lens Shutter on Duri...

Page 63: ...ork administrator about these settings NOTE Connect an Ethernet LAN cable to the LAN port RJ 45 of the Projector for net work connection Optional wireless LAN card is available The standard built in L...

Page 64: ...he IP address set here The IP address that is set here must be one that can be identified by a search of the routing informa tion DNS Configuration Type in the IP address of DNS server on the net work...

Page 65: ...4bit 128bit or 152bit in WEP Up to 5 characters can be set in 64 bit up to 13 characters in 128 bit and up to 13 characters in 152bit Press the HEX button to change to ASCII to set the key in ASCII di...

Page 66: ...mage Mode Seamless Installation of the MM IMGPRO and MM SCALING options per mits the instantaneous switching of signals between two input interface boards when Seamless of the Image Mode is se lected...

Page 67: ...and sub image are transposed 5 When selecting slot 1 Main image slot 1 Sub image slot 3 The main im age and sub image remain in their respective posi tions 6 When restarting the projector The state go...

Page 68: ...he Confirm Pass word screen and press the ENTER button Your password will be assigned Delete To delete your password 1 Highlight Delete and press the ENTER button The Current Password screen will be d...

Page 69: ...yword and use the software keyboard to enter a keyword NOTE To use a PC card as a protect key you must also set up a keyword Please make a note of your keyword This completes registration of your PC c...

Page 70: ...e displayed as well as your Re quest Code 24 alphanumeric characters 3 Enter your Release Code in the Release Code Input screen If the projector is turned on by entering the Release Code your Secu rit...

Page 71: ...ram or more are specified all the settings are active NOTE The settings will be executed in numerical order Finished settings will be automatically deleted NOTE The On Off Timer will not work while th...

Page 72: ...anging Background Logo You can change the default background logo using the PC Card Files feature See page E 28 NOTE File size must be 256KB or less Other file formats than JPEG and BMP are not availa...

Page 73: ...Nothing is displayed on the item Serial Number Please confirm the serial number on label attached on the projector itself Page 2 Version BIOS Firmware Data FPGA Page 3 Version Formatter Red Boot App...

Page 74: ...E 74 6 Using On Screen Menu...

Page 75: ...E 75 7 Maintenance 1 Cleaning the Cabinet and the Lens E 74...

Page 76: ...cally with a damp cloth If heavily soiled use a mild detergent Never use strong detergents or solvents such as alcohol or thinner 3 Use a blower or lens paper to clean the lens and be careful not to s...

Page 77: ...atible Input Signal List E 87 5 Pin Assignment of PC CONTROL IN Connector D Sub 9 Pin E 89 6 Pin Assignment of REMOTE IN 3 Connector XLR connector E 89 7 Pin Assignment of EXT I O Connector Mini D Sub...

Page 78: ...mp cover correctly The projector is overheated Move the projector to a cooler location Power unit will not work correctly Cooling fan has stopped Contact your dealer Lamp fails to light Wait 3 minutes...

Page 79: ...the projector and the notebook PC before turning on the power to the notebook PC In most cases signal cannot be output from RGB output unless the notebook PC is turned on after connecting with the pro...

Page 80: ...ectors can be gravity stacked Scan Rate Horizontal 15 107kHz RGB 31kHz or over Vertical 24 120Hz Synchronous Input Output mode 24 96Hz Input Signal MM VIDEO Composite Video 75ohms 1 0Vp p with Sync Bu...

Page 81: ...1 5 H 690mm W 1018mm D 547mm H HIGHlite 10000Dsx 26 4 W 36 5 D 16 8 H 670mm W 926mm D 425mm H Net Weight HIGHlite 16000Dsx 185lbs 84kg without lens HIGHlite 10000Dsx 150lbs 68kg without lens Environme...

Page 82: ...73 1 Fixed lens Adapter 104 020 Classic HIGHlite TLSeries Lens adapter 80 2 03 m 500 12 7 m diagonal bei 4 3 Ausrichtung Boden vorne Boden hinten Decke vorne Decke hinten Stapeln bis zu 3 Projektoren...

Page 83: ...In Ein D Sub 9 polig x 1 Out Aus D Sub 9 polig 3 x 1 Typ II x 1 Mini D Sub 15 polig x 1 200 240V Wechselstrom 50 60Hz HIGHlite 16000Dsx HIGHlite 10000Dsx 2 8 KW HIGHlite 16000Dsx HIGHlite 10000Dsx 14...

Page 84: ...nkel von 15 bis 15 Grad von der Horizontale ausaufzustellen 3 Diese Anschl sse sind f r eine k nftige Erweiterung vorgesehen Technische Daten k nnen ohne vorherige Benachrichtigung ge ndert werden Dig...

Page 85: ...E 85 Unit mm 3 Cabinet Dimensions 8 Appendix HIGHlite 16000Dsx...

Page 86: ...E 86 Unit mm inch 8 Appendix HIGHlite 10000Dsx...

Page 87: ...A F A Analogue and DVI 640 480 37 9 72 8 A A A F A 640 480 37 5 75 0 A A A F A 640 480 43 3 85 0 A A A F A 800 600 31 25 50 0 A A A F A 800 600 35 2 56 3 A A A F A 800 600 37 9 60 3 A A A F A 800 600...

Page 88: ...required depending on the type of personal computer SDTV and HDTV signals also support a vertical frequency of fV 1 001 RGB signals support analog and DVI Please contact your dealer about details conc...

Page 89: ...and switching operations are enabled by ei ther opening OPEN or short circuiting SHORT the pin number 15 GND of the external control connector EXT I O with the various pins listed in the table below 5...

Page 90: ...ut and then re insert the LAN card Access is gained to the HTTP server functions by specifying http the Projector s IP address index html in the entry column of the URL Preparation Before Use Make net...

Page 91: ...of Slot 2 S2 None No operation S2 None No operation S3 None No operation S3 None No operation S3 None No operation S4 None No operation S4 None No operation S4 None No operation Switcher Status This d...

Page 92: ...ate Time Preset E 60 Default Source Select E 62 DHCP E 65 Display Select E 60 DNS Configuration E 64 Domain Name E 64 DVI D signal cable E 10 E Edge Blending E 57 Entry Edit Command E 50 Entry List E...

Page 93: ...51 Screen E 56 Screen Type E 56 Seamless E 66 Security E 68 Sender s Address E 66 Setup E 61 Setup Level E 51 Sharpness E 51 Signal Level E 54 Signal Select E 61 Signal Type E 55 Sleep Timer E 71 SMTP...

Page 94: ...E 94...

Page 95: ...E 95...

Page 96: ...E 96...

Reviews: