34
2
Measurement flow
I
.
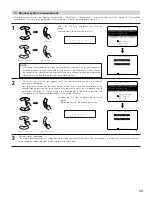
Connect the microphone to be used for the auto setup procedure.
Please place the measuring microphone at ear height at the main listening
position.
III
.
Preliminary measurement items
q
Measuring the background noise (noise in the room)
w
Determining whether or not speakers are connected (speaker detection)
e
Checking the polarities of the speakers
NOTE:
• A moderately loud test tone is output during
the measurement. Please consider this should
you be planning night time measurements, and
consider not allowing small children into the
listening time.
II
.
Extra Setup
q
Channel Setup
w
Power Amp Assign
By default, the speaker system
setting is set to 9.1 channels.
Please set under “Extra Setup”,
only when you want to change
this arrangement.
III
.
Check the results of the speaker detection.
IV
.
Speaker system measurement items
q
Speaker Configuration : This sets the speaker bass reproduction ability.
w
Delay Time
: This sets the optimum delay time from each speaker corresponding to the listening position.
e
Channel Level
: This sets the volume that is output from each speaker.
r
Crossover Frequency : This set the frequency (Hz) below which the bass sound of the various speakers is to be output from
the subwoofer.
t
Room EQ
: This sets the frequency response of each speaker.
(Main (1st) listening position)
Continue measuring ?
Select “OK Next” and put the
microphone at next point.
Quit measuring ?
Select “Calculate”.
V
.
Check the results of the speaker system measurements.
V
.
Store the measurement results in the memory.
Move the microphone to the 2nd
to 8th listening positions and
repeat the measurement.


