


xStack Storage User’s Guide
63
5.4.1.3
Reconfiguring Volumes
After you create a volume, you can reconfigure it if you need to change its size or its
organization.
1.
In the
Logical Resources
tab, click the volume you want to reconfigure.
2.
Perform one of the following steps:
–
On the
Storage
menu, click
Reconfigure
.
–
Press the right mouse button and click
Reconfigure
.
Either step starts the Auto Create Volume Wizard and displays the Select Volume Type to
Create screen. For each screen in the Wizard, the xStack Storage Array shows the values for
the Volume’s current organization. Except for the Volume’s Name, which is shown in gray, all
fields can be changed. For example, you can change the
Data Redundancy
check box from
None
to
Parity
, which would change the Volume’s organization to
Parity
.
3.
Review the settings in the displayed screen and change them as necessary.
4.
Click the
Finish
button.
5.4.1.4
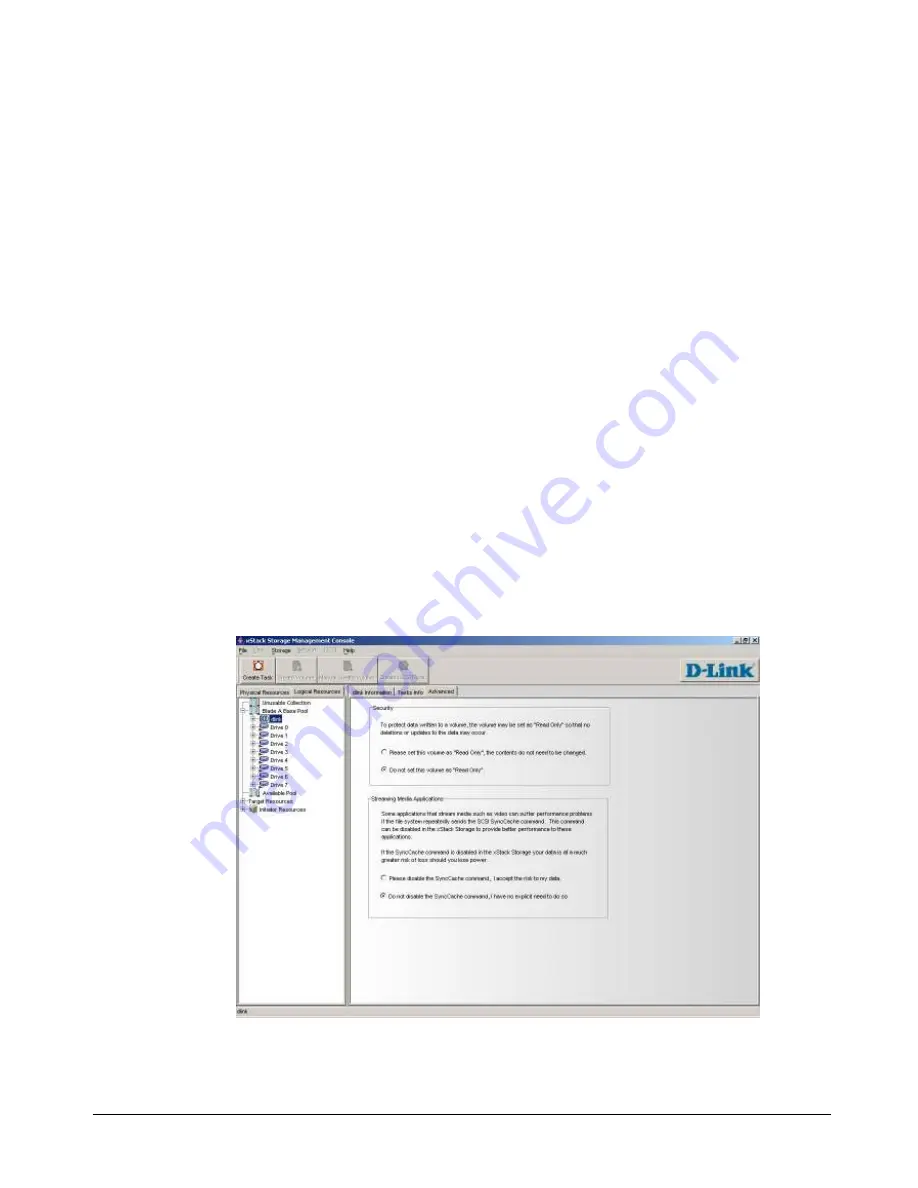
Advanced Volume Operations
When you click a volume under
Blade A Base Pool
, you can use the Advanced screen (see Figure
5-17 and for a closeup, Figure 5-18 ) to write-protect the volume and disable Sync Cache
commands from a host.
Figure 5-17 Advanced Screen
Summary of Contents for DSN-2100-10 - xStack Storage Area Network Array Hard...
Page 10: ...x Contents...
Page 20: ...20 Chapter 2 Identifying Hardware Components Figure 2 6 Press Lever Inwards Until it Locks...
Page 26: ...26 Chapter 2 Identifying Hardware Components...
Page 42: ...42 Chapter 4 Starting the xStack Storage Array for the First Time...
Page 101: ...xStack Storage User s Guide 101...
Page 115: ...xStack Storage User s Guide 115 Figure 6 12 Viewing SMART Attributes...
Page 158: ...158 Appendix D Replacing and Upgrading FRUs...
Page 162: ...162 Appendix F Hardware Enclosures...


