Chapter 6
Monitoring Queued Calls
5-18 CallConnector Operator
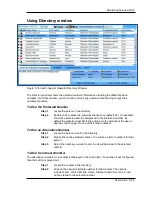
Transfer using Directory
Step 1
Select the connected call to transfer.
Step 2
Enter the first few letters of the person’s name. Make sure you have the
correct directory selected first. The cursor will move to the nearest
matching contact. Alternatively you can scroll through the directory and
click in the desired contact.
Step 3
To dial the contact’s preferred number, double-click on the entry or click
on the Pressing Enter again to auto-dial the preferred number. You can
also press the auto-dial key (default F9).
Transfer using Telephone Status Window
The Telephone Status window displays the status of the internal extensions. If viewing of idle
extensions is enabled then calls can be transferred to that number.
Step 1
Select the connected call to transfer.
Step 2
In the Telephone Status window, select the number you want to transfer
the call to. Double-click on the call or press Enter.
Step 3
Follow the steps to complete the transfer as described in the section
above.
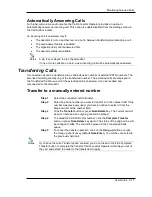
Transfer to an Alternate Number
A contact in the directory can have multiple numbers. A call can be transferred to any of those
numbers.
Step 1
Select the connected call to transfer.
Step 2
Find the desired contact in the directory. The cursor will move to the
currently selected directory contact.
Step 3
Click on the desired alternate number in the Action Bar. You can also
right-click on the contact and select the number to dial from the menu.
The current call will be placed on hold and the selected number will be
dialed.
Step 4
When the transfer-to number is ringing or connected, you can click on
Transfer Complete button or press the transfer shortcut key (default
Num-Delete).

