Getting Started
User Guide 4-3
Verify phone
information
Each operator is normally assigned an IP
phone. The operator should check the phone
information in the Call Control window to make
sure the assigned phone is connected and the
displayed line information is correct.
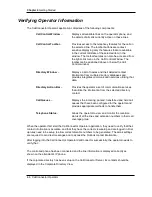
Verifying Operator
Information
Verify the corporate
directory
If the system administrator had setup a
corporate directory, the operator needs to check
if the corporate directory information is loaded to
the Operator.
Verifying Operator
Information
Make Available
After logging in, the operator should change the
status to “Available” and log into the call queues
to begin receiving calls by selecting the “Take
Call” option from the Call Queues window.
If the operator had selected the “Sync the
Operator Status with Presence Server”, when
they change their status to “Available”, the
Operator will automatically log them in the call
queues and change the queue status to “Take
Call”.
Making Yourself
Available/Unavailable
Table 4-2 Steps for getting started
Steps for Exiting the Operator
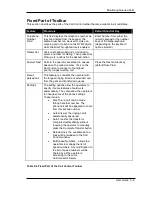
The following lists the recommended steps for exiting the CallConnector Operator along with the
references where the operator can find detailed instructions of the steps:
Steps
Description
References
Set Unavailable
Before logging out or exiting the CallConnector
Operator, the operator should change the status
to “Set Unavailable”. This will do the following:
•
Change the presence status to
“Unavailable”
•
Log the operator out of the hunt group
queues
•
Set call forward to the attendant’s directory
numbers
Making Yourself
Available/Unavailable
Log out of the
Operator
When the operator logs out of the
CallConnector Operator, it will close the
application window and present the Login
window.
Logging Out of the
Operator
Exit the Operator
After work hours, the operator can close all the
Operator windows by exiting the CallConnector
Operator application.
Exiting the
CallConnector Operator
Table 4-3 Steps for exiting the CallConnector Operator


