


3.0 GETTING STARTED
18
R599790 - FORCE Series User Manual
• Adjustable feet
Located on the underside of the projector are three adjustable feet. Raise or lower these feet when positioning the
projector to ensure it is level on all sides so the displayed image will appear rectangular without any keystone.Refer
to “Adjusting Projector Height/Tilt”, page 13 instructions on how to adjust the projector’s feet.
• Front & Rear IR sensors
The two IR sensors located on the projector receive transmissions from the IR remote from up to 30 meters (100
feet) away. It is important to keep the transmission path to these sensors unobstructed for uninterrupted
communications with the projector. The rear IR sensor is located at the back of the projector between the status
LEDs and the front IR sensor is located next to the projector’s front nameplate.
• Projection lenses, Lens Mount and Other Features
The projector includes a motorized lens mount that allows automated lens control and adjustment: vertical and
horizontal offsets, zoom and focus. The lens mount can be fitted with any one of the available optional lenses.
•
Zoom and Focus – There are two internal lens motors that allow for quick motorized adjustment of zoom and
focus. Adjust zoom to fit the displayed image on the screen and adjust focus to improve the clarity of the image.
NOTES:
1) The projection lens is shipped separately from the projector.
2) Motorized lenses should not be adjusted by hand without first setting them for manual operation, otherwise the
zoom and focus motors may be damaged. (Set in Menu>Configuration>Lens Settings>Manual Zoom/Focus).
•
Lens Offset. The motorized lens mount allows vertical and horizontal offset of the displayed image.
•
Shutter. It allows you to turn the screen absolutely black when in the “Closed” state.
•
Dynamic Iris Contrast Aperture. It enables adjustment of light output and contrast ratio.
3.2
User Interface Overview
The projector can be controlled via a menu system displayed on the image. The menu system can be controlled by
an IR remote, wired remote or through the built-in keypad.
The LCD screen and built-in keypad allow some functions to be controlled without the need of an OSD display, and
provide a quickly accessible interface to view error reporting. The functions on the OSD can also be controlled using
RS-232 / RS-422 / Web interface by using a serial or Ethernet connection to the projector. The Web interface
provides access to the menu system as a Virtual OSD (On-screen display) and to maintain the projector’s software
and settings.
3.3
Projector Control and Communications
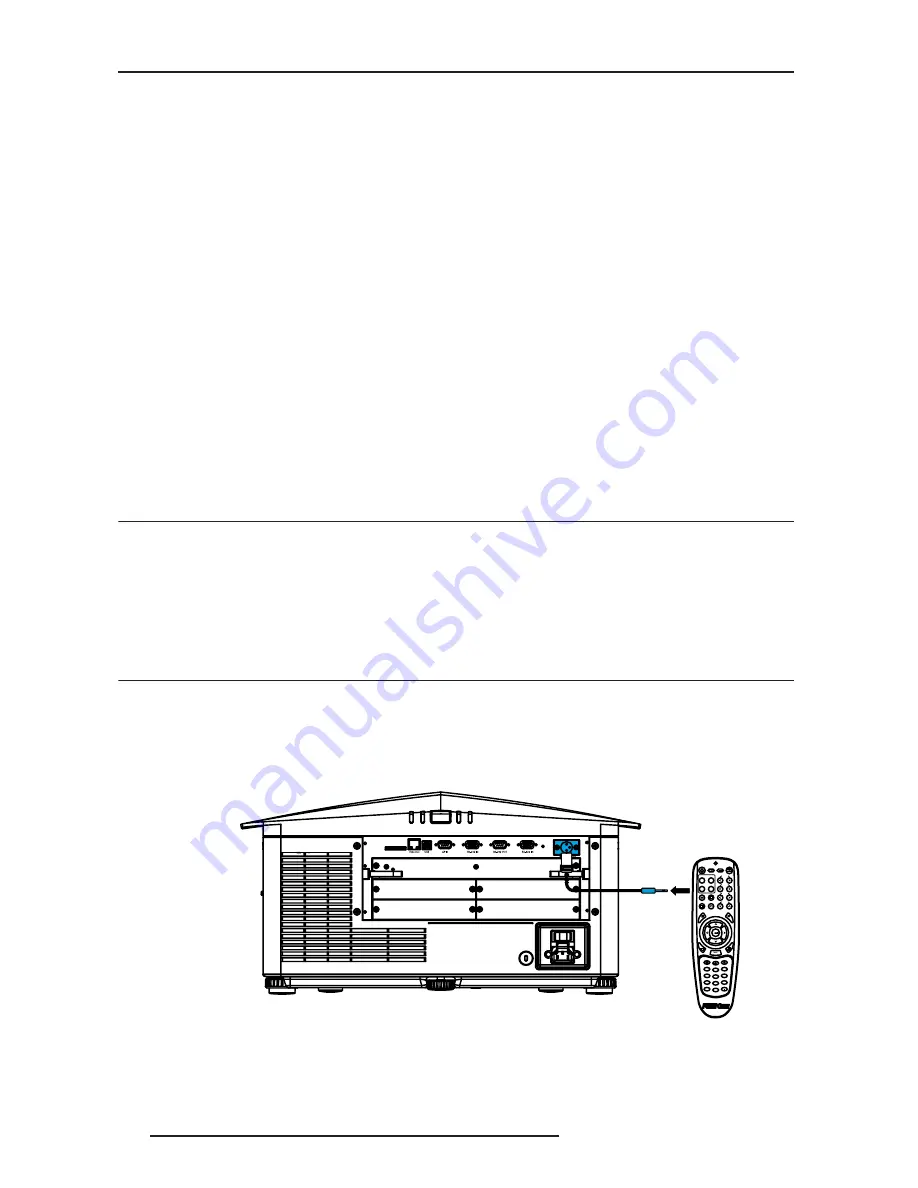
Remote Keypads
To control the projector, direct the projector’s IR remote towards the display screen or the projector’s IR sensors.
Alternatively, connect a wired (tethered) version of the remote to the XLR connector labeled as WIRED KEYPAD on
the projector’s input panel.
NOTE: The response to a wired keypad must also be enabled in the Communications menu— see “WEB USER
INTERFACE”, page 71 for more information.
As an alternative to the projector’s keypad or remote, you may wish to communicate with the projector using a PC or
other controller. Such a device sends commands and receives feedback via serial links (RS-232 and RS-422).
Remote Keypad
Summary of Contents for Force one
Page 1: ......
Page 99: ...16 0 APPENDIX DIMENSIONS R599790 FORCE Series User Manual 99...
Page 100: ......


