-
82
-
13.4 Alarm settings
Proceed from the MENU settings.
By tapping the
▼
button of the item for setting, the screen moves to the input screen.
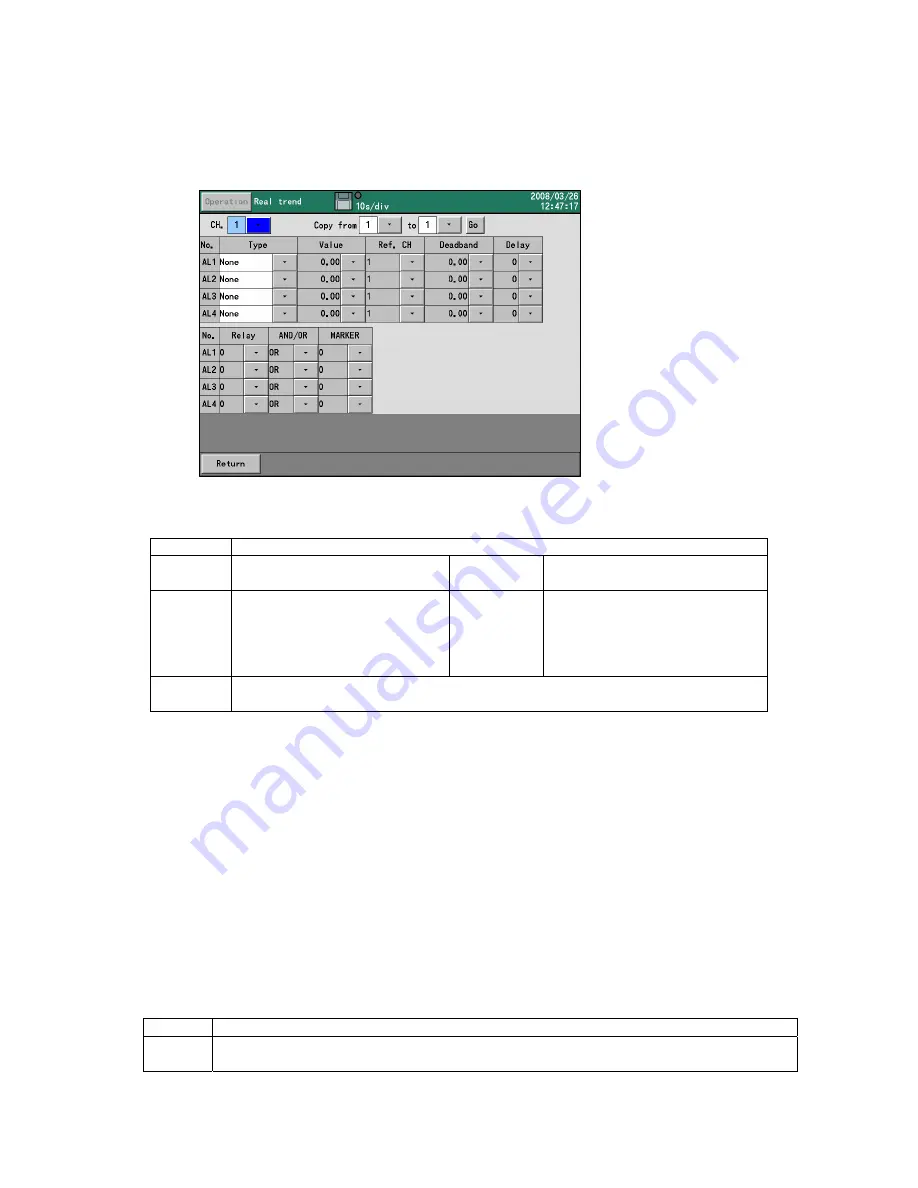
By selecting the alarm settings on the setting menu screen, the following screen is displayed.
Setting the type and the setting value
Set the alarm type and the setting value for judgment.
The alarms are activated by the following conditions.
None Not
activated
Upper
The measured value is the set
value or more.
Lower
The measured value is the set
value or less.
Diff.
upper
In case that the absolute value
of the difference between the
measured value and the
reference CH is the setting
value or more
Diff.
lower
In case that the absolute value
of the difference between the
measured value and the
reference CH is the setting
value or less
Error
The measured value is not a numerical value. (BURN, OVER, UNDER, CAL
ER, RJ ERR)
Setting the reference CH
Set the reference channel for the differential high limit alarm/differential low limit alarm.
Setting the deadband
Set the alarm deadband between the alarm value and its release. (Refer to the next page.)
Setting the delay
Set the delay time for the alarm. (0 to 3600 seconds)
The alarm is not output until the delay time has elapsed after the data exceeds the alarm value.
Setting the relay
* The alarm output terminal (option) is necessary for outputting alarms actually.
The relays can be set regardless of whether the alarm output terminal is used.
Set the relays with the alarm output terminal number 0 ~ 24. When 0 is set, the alarm is not
outputted.
Setting the alarm output mode
AND
The relay becomes ON when all alarms set in one alarm output terminal are activated.
OR
The relay becomes ON when any of alarms set in one alarm output terminal are
activated.
When both of “AND” and “OR” are set to one relay channel, the relay becomes ON when either of
“AND” of all alarms set with “AND” or all “OR” of alarms set with “OR” is established.


