3 - CONTROLS AND INSTRUMENTS
Dozer blade control lever
WARNING
Hazard to bystanders!
ALWAYS make sure the work area is clear of bystanders and domestic animals before starting this
procedure. Know the full area of movement of the machine. Do not permit anyone to enter the area
of movement during this procedure.
Failure to comply could result in death or serious injury.
W0245A
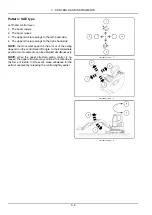
The dozer blade control lever is located on the right-hand
console.
The basic operation of dozer blade control lever are the
following:
• push the dozer blade control lever forward
(A)
to lower
the dozer blade.
• pull the dozer blade control lever rearward
(B)
to raise
the dozer blade.
The operation of the dozer blade stops when the lever is
released. The lever returns to the neutral position.
Use the blade only for light work such as dozing of soft
soil or mud.
Do not forcibly push down or dig deeply with the blade.
When operating in an area with many rocks and stones,
pay attention not to damage the blade.
NOTICE:
during blade operations, avoid application of
concentrated or lateral load to the blade. Severe dam-
ages may be caused to the blade structure.
When the blade is used as an outrigger during the opera-
tion, check that the ground has the sufficient strength, and
be sure that the edge surface of the blade is contacting
the ground uniformly. Severe damages may be caused
to the blade structure if the machine is supported only at
one side of the blade.
NOTICE:
make sure to lower the blade to the ground be-
fore stopping machine operation.
If the engine is stopped with the blade in raised position,
it is still possible to lower the blade proceeding as follows:
1. Turn the starter key to ON position.
2. Set the safety lock lever in forward position.
3. Push the blade control lever to lower the dozer blade.
SMIL16MEX1466AB
1
SMIL16MEX0040AA
2
3-22
Summary of Contents for CX37C
Page 16: ...1 GENERAL INFORMATION 1 10...
Page 64: ...3 CONTROLS AND INSTRUMENTS Footrest SMIL16MEX1264BA 17 3 12...
Page 136: ...5 TRANSPORT OPERATIONS 5 8...
Page 200: ...6 MAINTENANCE 6 64...
Page 204: ...7 TROUBLESHOOTING 7 4...
Page 212: ...8 SPECIFICATIONS 8 8...

