


(A) Desired print result
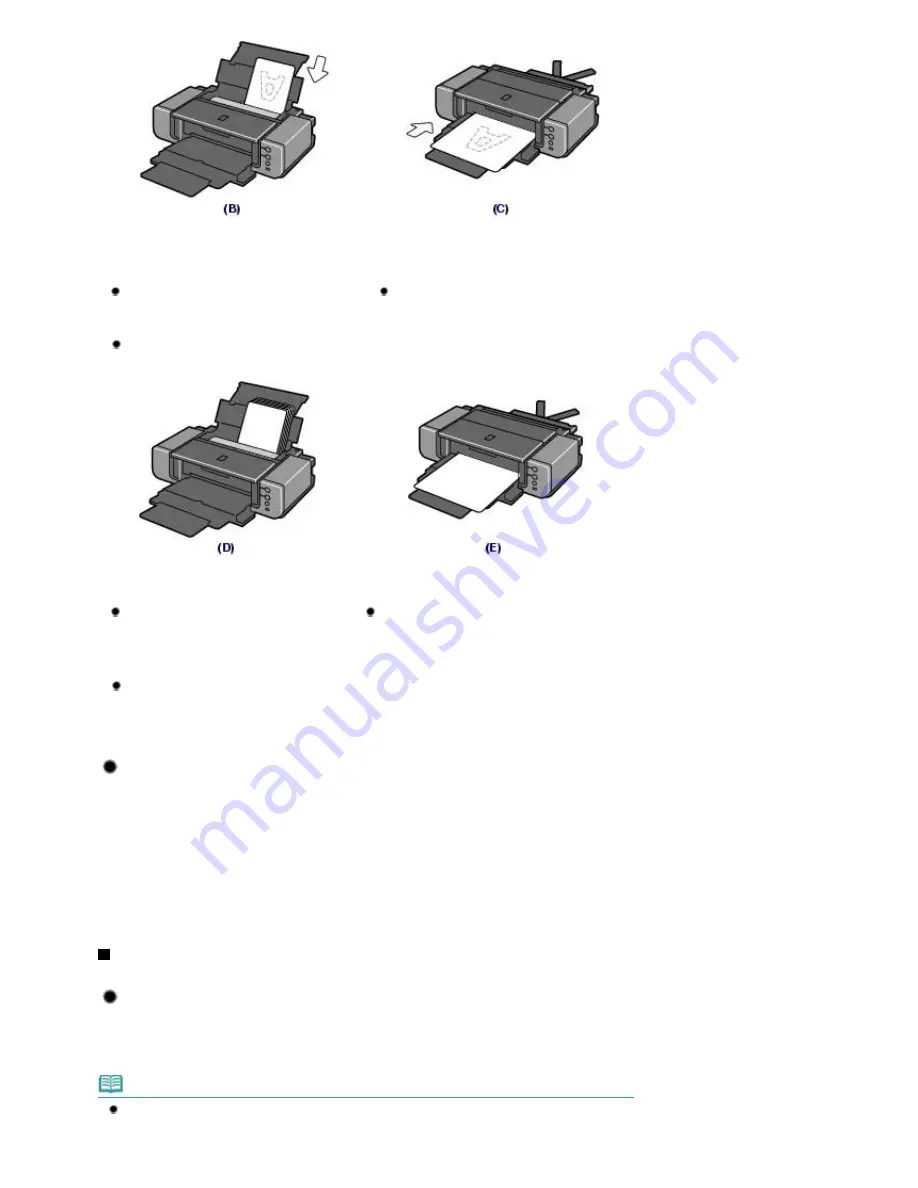
(B) Rear Tray
(C) Front Tray
Load paper in the Rear Tray with the print side
facing you.
Load paper in the Front Tray with the print side
facing up.
Is the paper loaded in the proper paper source?
Load paper either in the Rear Tray or in the Front Tray, depending on the size or type of paper.
(D) Rear Tray
(E) Front Tray
You can load various sizes of paper in the
Rear Tray.
Two or more sheets of the same size and
type of paper can be loaded at a time.
You can load large size paper, such as 14" x 17"
/ 36 x 43 cm paper, or thick paper in the Front
Tray.
Only one sheet of paper can be loaded at a time.
Is the paper curled?
The curled paper causes paper jam. Flatten the curled paper, then reload it.
Refer to "
Troubleshooting
" in the on-screen manual:
Advanced Guide
.
Tip!: After loading paper, be sure to specify the paper settings!
After loading paper, be sure to select the loaded paper in Media Type of the printer driver. If the type of
paper is not selected, you may not be able to get the satisfactory print result.
See
Printing Photos / Documents
and
Media Types You Can Use
.
There are various types of paper: paper with special coating on the surface for printing photos with
optimal quality and paper suitable for documents. Media Type of the printer driver has different settings
for each type of paper in advance (such as using ink, ejecting ink, or distance from nozzles) so that you
can print on each paper with the optimal image quality. You can print with different settings in Media Type
suitable for each type of loaded paper.
Use the RESUME/CANCEL button to cancel printing!
Tip!: Never press the Power button!
If you press the
Power
button while printing is in progress, the print data sent from the computer queues
in the printer and you may not be able to continue to print.
Press the
RESUME/CANCEL
button to cancel printing.
Note
If you cannot cancel printing by pressing the
RESUME/CANCEL
button while printing from a
computer, open the printer driver setup window to delete the unnecessary print jobs from the
printer status monitor (Windows).
Page 84 of 541 pages
Tips on How to Use Your Printer
Summary of Contents for Pro9500 Mark II Series
Page 26: ...Page top Page 26 of 541 pages Printing Documents Macintosh ...
Page 41: ...Page top Page 41 of 541 pages Loading Paper in the Front Tray ...
Page 55: ...Page top Page 55 of 541 pages When Printing Becomes Faint or Colors Are Incorrect ...
Page 113: ...Page top Page 113 of 541 pages Selecting the Paper ...
Page 123: ...Note See Help for details on the Edit screen Page top Page 123 of 541 pages Editing ...
Page 125: ...Page top Page 125 of 541 pages Printing ...
Page 130: ...Page top Page 130 of 541 pages Selecting the Paper and Layout ...
Page 133: ...Page top Page 133 of 541 pages Editing ...
Page 135: ...Page top Page 135 of 541 pages Printing ...
Page 142: ...Page top Page 142 of 541 pages Printing ...
Page 149: ...Page top Page 149 of 541 pages Printing ...
Page 186: ...Page top Page 186 of 541 pages Cropping Photos Photo Print ...
Page 190: ...Page top Page 190 of 541 pages Printing an Index ...
Page 282: ...Page top Page 282 of 541 pages Stamp Background Printing ...
Page 298: ...Adjusting Tone Page top Page 298 of 541 pages Printing a Color Document in Monochrome ...
Page 325: ...Page top Page 325 of 541 pages Reducing Photo Noise ...
Page 341: ...a flat place Page top Page 341 of 541 pages Attaching Removing the CD R Tray ...
Page 412: ...Page top Page 412 of 541 pages Colors Are Uneven or Streaked ...
Page 444: ...Page top Page 444 of 541 pages Before Printing on Art Paper ...
Page 483: ...Next Page top Page 483 of 541 pages Overview of Printing from Computers ...
Page 488: ...Page 488 of 541 pages Printing from Other Applications ...
Page 532: ...Page top Page 532 of 541 pages Adjusting Colors before Printing ...


