


262
4
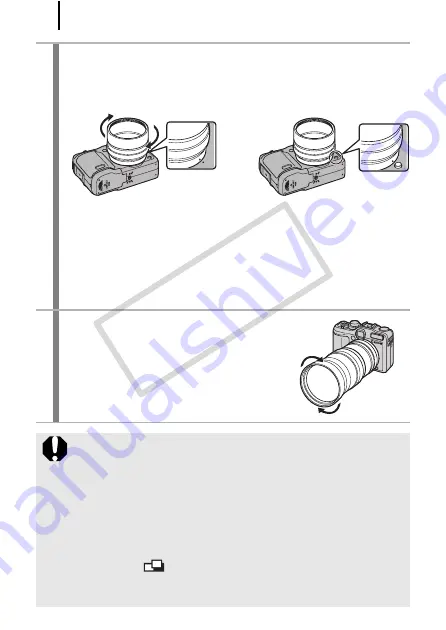
Align the
z
mark on the conversion lens adapter
with the
z
mark on the camera, and turn the
adapter in the direction of the arrows until
locked.
• The conversion lens adapter can be taken apart into a front and
back component, but be sure to use the adapter in its conjoined
state. Also, make sure that the front and back components are
firmly attached to each other before attaching the adapter to the
camera.
• To remove the conversion lens adapter, turn the adapter in the
opposite direction with holding down the ring release button.
5
Set the lens on the adapter,
and turn it in the indicated
direction to attach it
securely.
z
Completely remove all dust and dirt from conversion lenses
with a lens blower brush before use. The camera may focus
on any dirt that remains.
z
Be careful when handling the lenses since it is easy to get
finger prints on them.
z
Be careful not to drop the camera or adapter when removing
the ring.
z
When using these lens attachments, you should not shoot
images in
mode. It will not be possible to use the
PhotoStitch software from your computer to accurately stitch
the images together.
COP
Y
Summary of Contents for Powershot G10 IS
Page 41: ...39 Learning More COPY ...
Page 293: ...291 MEMO COPY ...
Page 294: ...292 MEMO COPY ...
Page 295: ...293 MEMO COPY ...
Page 296: ...294 MEMO COPY ...
Page 297: ...295 MEMO COPY ...
Page 298: ...296 MEMO COPY ...
Page 303: ...Functions Available in Each Shooting Mode 301 2 4 5 COPY ...
Page 305: ...Functions Available in Each Shooting Mode 303 10 10 10 10 COPY ...
Page 307: ...Functions Available in Each Shooting Mode 305 11 COPY ...


