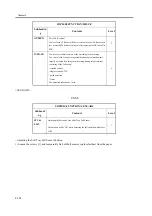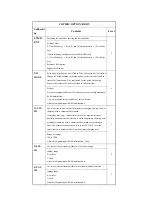
OHP-
SPED
Use it to switch over the cpm for value BK OHT (remedy against
adhesion upon delivery).
1
settings
0: 40 cpm if w/ finisher; 20 cpm if w/o finisher
1: 20 cpm
2: 10 cpm
at time of shipment/upon RAM initialization: 0
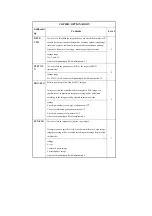
FX-
CROT
Use it to change the intervals at which the fixing roller is rotated idly
(remedy against deformation of the roller).
The fixing roller is rotated idly for 1 sec once every 30 min (default) to
prevent it from suffering deformation while the machine remains in
standby.
1
settings range
0: 30 min
1: 20 min
2: 10 min
3: 5 min
at time of shipment/upon RAM initialization: 0
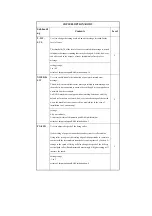
DRM-
DISP
Use it to enable/disable the message for drum phase shifting.
If the E310's photopositive drum is used with its home position
unchanged in relation to the drum shaft, uneven density at drum intervals
or lines can occur in output images.
To limit the symptom, the phase of the photosensitive drum is shifted by
90 deg every specific number of prints. The machine does not shift the
phase on its own, and requires the work of the service person.
When needed, the machine issues a message to prompt the work on the
User screen and the Service Mode screen.
Use this mode item to enable/disable the message.
1
Settings
0: disable message
1: indicate only in service mode (default)
2: indicate on both User and Service Mode screens
The message will go off automatically when the following is executed:
COPIER>FUNCTION>MISC-P>DR-P-ADJ.
at time of shipment/upon RAM initialization: 1
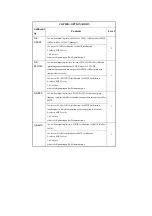
- To change the number of prints after which the message is indicated for
COPIER>OPTION>BODY>DRM-DISP, change the denominator in
COPIER>COUNTER>MISC>DRM-PHAS.
COPIER>OPTION>BODY
Subheadi
ng
Contents
Level
Summary of Contents for iR C6800 Series
Page 1: ...Jan 20 2005 Portable Manual iR C6800 Series ...
Page 2: ......
Page 6: ......
Page 12: ......
Page 13: ...Chapter 1 Maintenance and Inspection ...
Page 14: ......
Page 16: ......
Page 20: ...Chapter 1 1 4 Under high humidity and high temperature condition 85 000 images ...
Page 51: ...Chapter 2 Standards and Adjustments ...
Page 52: ......
Page 79: ...F 2 27 1 ...
Page 99: ...F 2 88 F 2 89 1 OK NG NG ...
Page 110: ......
Page 111: ...Chapter 3 Error Code ...
Page 112: ......
Page 114: ......
Page 172: ......
Page 173: ...Chapter 4 User Mode Items ...
Page 174: ......
Page 176: ......
Page 188: ...LIPS emulation 12 items utility printer initialize yes no Item Description ...
Page 190: ......
Page 191: ...Chapter 5 Service Mode ...
Page 192: ......
Page 380: ......
Page 381: ...Chapter 6 Outline of Components ...
Page 382: ......
Page 384: ......
Page 387: ...F 6 1 SL7 CL3 CL2 SL6 SL8 SL9 SL2 SL1 SL4 SL3 SL5 CL1 SL10 SL11 SL12 ...
Page 397: ...F 6 5 FM2 FM10 FM11 FM12 FM6 FM3 FM4 FM8 FM9 FM5 FM7 FM1 ...
Page 407: ...F 6 9 PS65 PS38 PS39 PS46 PS44 PS45 PS52 PS53 PS58 PS59 PS37 ...
Page 417: ...F 6 13 13 2 5 3 14 15 16 9 6 12 7 1 11 4 25 24 21 23 19 20 31 29 28 27 26 22 18 17 32 30 10 8 ...
Page 418: ......
Page 419: ...Chapter 7 System Construction ...
Page 420: ......
Page 422: ......
Page 443: ...Chapter 8 Upgrading ...
Page 444: ......
Page 446: ......
Page 455: ...Jan 20 2005 ...
Page 456: ......


