Chapter 2
2-19
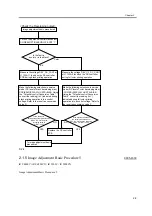
Execute the following service mode items to adjust
the registration:
COPIER > ADJUST > FEED-ADJ > RG-REFE
F-2-12
4. Leading Edge Non-Image Width Adjustment
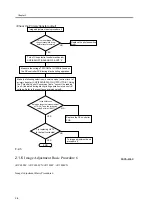
Execute the following service mode item:
COPIER > ADJUST > ADJ-XY > ADJ-X
F-2-13
5. Left/Right Non-Image Width Adjustment
Execute the following service mode item:
COPIER > ADJUST > ADJ-XY > ADJ-Y
F-2-14
2.2.3
Cassette
0003-8720
iR C6800C / iR C6800CN / iR 5800C / iR 5800CN
Make prints using the cassettes 3 and 4 as the source
of paper, and check to make sure that the left/right
margin is as indicated.
- If not as indicated, make the following adjustments:
1) Press the cassette release button, and slide out the
cassette 3 or 4 to the front.
2) Open the upper right cover and the lower right
cover.
3) Insert a screwdriver through the opening in the
front right stay; then, loosen the screw [1], and adjust
the position of the adjusting plate [2].
F-2-15
- move the adjusting plate toward the rear to decrease
the left margin.
- move the adjusting plate toward the front to increase
the left margin.
4) Tighten the screw.
5) Close the upper right cover and the lower right
cover.
6) Put the cassette 3 or 4 back in the machine.
2.2.4
Manual Feed Tray
0003-8721
iR C6800C / iR C6800CN / iR 5800C / iR 5800CN
Make copies using the manual feed tray as the source
of paper, and check to make sure that the left/right
margin is as indicated.
2
5
4 6 8 10 12 14 1618 20
0
decrease the setting of REGIST.
(an increase by 10 will decrease the margin by 1 mm)
Increase the setting of REGIST.
(an decrease by 10 will decrease the margin by 1 mm)
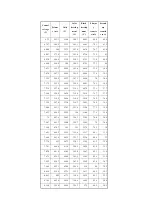
double-sided copy, 2nd side:4.0+1.5/-1.0mm
Paper leading edge
Image edge
Decrease the setting of ADJ-X.
(a decrease by 10 will decrease the non-image width by 1 mm)
Increase the setting of ADJ-X.
(an increase by 10 will increase the non-image width by 1 mm)
2
5
4 6 8 10 12 14 1618 20
0
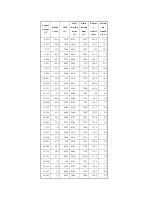
4.0+1.5/-1.0mm
Image edge
Increase the setting of ADJ-Y.
(a decrease by 10 will increase
the non-image width by 1 mm)
Decrease the setting of ADJ-X.
(a decrease by 10 will decrease
the non-image width by 1 mm)
10
8
6
5
4
2
0
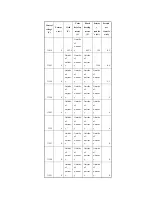
2.5 1.5mm/-1.5mm
[1]
[2]
Summary of Contents for iR C6800 Series
Page 1: ...Jan 20 2005 Portable Manual iR C6800 Series ...
Page 2: ......
Page 6: ......
Page 12: ......
Page 13: ...Chapter 1 Maintenance and Inspection ...
Page 14: ......
Page 16: ......
Page 20: ...Chapter 1 1 4 Under high humidity and high temperature condition 85 000 images ...
Page 51: ...Chapter 2 Standards and Adjustments ...
Page 52: ......
Page 79: ...F 2 27 1 ...
Page 99: ...F 2 88 F 2 89 1 OK NG NG ...
Page 110: ......
Page 111: ...Chapter 3 Error Code ...
Page 112: ......
Page 114: ......
Page 172: ......
Page 173: ...Chapter 4 User Mode Items ...
Page 174: ......
Page 176: ......
Page 188: ...LIPS emulation 12 items utility printer initialize yes no Item Description ...
Page 190: ......
Page 191: ...Chapter 5 Service Mode ...
Page 192: ......
Page 380: ......
Page 381: ...Chapter 6 Outline of Components ...
Page 382: ......
Page 384: ......
Page 387: ...F 6 1 SL7 CL3 CL2 SL6 SL8 SL9 SL2 SL1 SL4 SL3 SL5 CL1 SL10 SL11 SL12 ...
Page 397: ...F 6 5 FM2 FM10 FM11 FM12 FM6 FM3 FM4 FM8 FM9 FM5 FM7 FM1 ...
Page 407: ...F 6 9 PS65 PS38 PS39 PS46 PS44 PS45 PS52 PS53 PS58 PS59 PS37 ...
Page 417: ...F 6 13 13 2 5 3 14 15 16 9 6 12 7 1 11 4 25 24 21 23 19 20 31 29 28 27 26 22 18 17 32 30 10 8 ...
Page 418: ......
Page 419: ...Chapter 7 System Construction ...
Page 420: ......
Page 422: ......
Page 443: ...Chapter 8 Upgrading ...
Page 444: ......
Page 446: ......
Page 455: ...Jan 20 2005 ...
Page 456: ......

