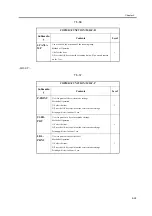
MTR-ON
Use it to start motor operation.
Operation
The operation varies from model to model.
1) Press [MTR-ON] to highlight; then, press the OK key to start motor
operation.
2) Press the OK key once again to stop the motor.
(The operation will stop automatically in 5 sec; however, the
indication will not change to [STOP] unless the OK key is pressed
once again.)
1
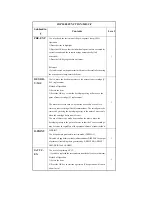
ROLL-CLN
Use it to clean the ADF roller.
In this mode item, the roller is rotated by the work of its motor; it is
cleaned by lint-free paper (moistened with alcohol) forced against it
while it rotates.
Operation
1) Press [ROLL-CLN] to highlight.
2) While the roller is rotating, clean it by forcing lint-free paper
(moistened with alcohol) against it.
3) Press [ROLL-CLN] to highlight, and press the OK key to stop the
rotation of the roller.
1
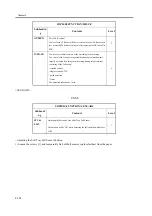
FEED-ON
Use it to check the movement of paper in the ADF on its own.
Operation
1) Press [FEED-ON], and then press the OK key so that the ADF starts
to move paper according to the operation mode selected using [FEED-
CHK].
1
FEEDER>FUNCTION
Subheadin
g
Contents
Level
Summary of Contents for iR C6800 Series
Page 1: ...Jan 20 2005 Portable Manual iR C6800 Series ...
Page 2: ......
Page 6: ......
Page 12: ......
Page 13: ...Chapter 1 Maintenance and Inspection ...
Page 14: ......
Page 16: ......
Page 20: ...Chapter 1 1 4 Under high humidity and high temperature condition 85 000 images ...
Page 51: ...Chapter 2 Standards and Adjustments ...
Page 52: ......
Page 79: ...F 2 27 1 ...
Page 99: ...F 2 88 F 2 89 1 OK NG NG ...
Page 110: ......
Page 111: ...Chapter 3 Error Code ...
Page 112: ......
Page 114: ......
Page 172: ......
Page 173: ...Chapter 4 User Mode Items ...
Page 174: ......
Page 176: ......
Page 188: ...LIPS emulation 12 items utility printer initialize yes no Item Description ...
Page 190: ......
Page 191: ...Chapter 5 Service Mode ...
Page 192: ......
Page 380: ......
Page 381: ...Chapter 6 Outline of Components ...
Page 382: ......
Page 384: ......
Page 387: ...F 6 1 SL7 CL3 CL2 SL6 SL8 SL9 SL2 SL1 SL4 SL3 SL5 CL1 SL10 SL11 SL12 ...
Page 397: ...F 6 5 FM2 FM10 FM11 FM12 FM6 FM3 FM4 FM8 FM9 FM5 FM7 FM1 ...
Page 407: ...F 6 9 PS65 PS38 PS39 PS46 PS44 PS45 PS52 PS53 PS58 PS59 PS37 ...
Page 417: ...F 6 13 13 2 5 3 14 15 16 9 6 12 7 1 11 4 25 24 21 23 19 20 31 29 28 27 26 22 18 17 32 30 10 8 ...
Page 418: ......
Page 419: ...Chapter 7 System Construction ...
Page 420: ......
Page 422: ......
Page 443: ...Chapter 8 Upgrading ...
Page 444: ......
Page 446: ......
Page 455: ...Jan 20 2005 ...
Page 456: ......


