


Connecting the Telephone Lines to the Machine
11-2
Dual Line Functions (Optional)
11
Connecting the Telephone Lines to the Machine
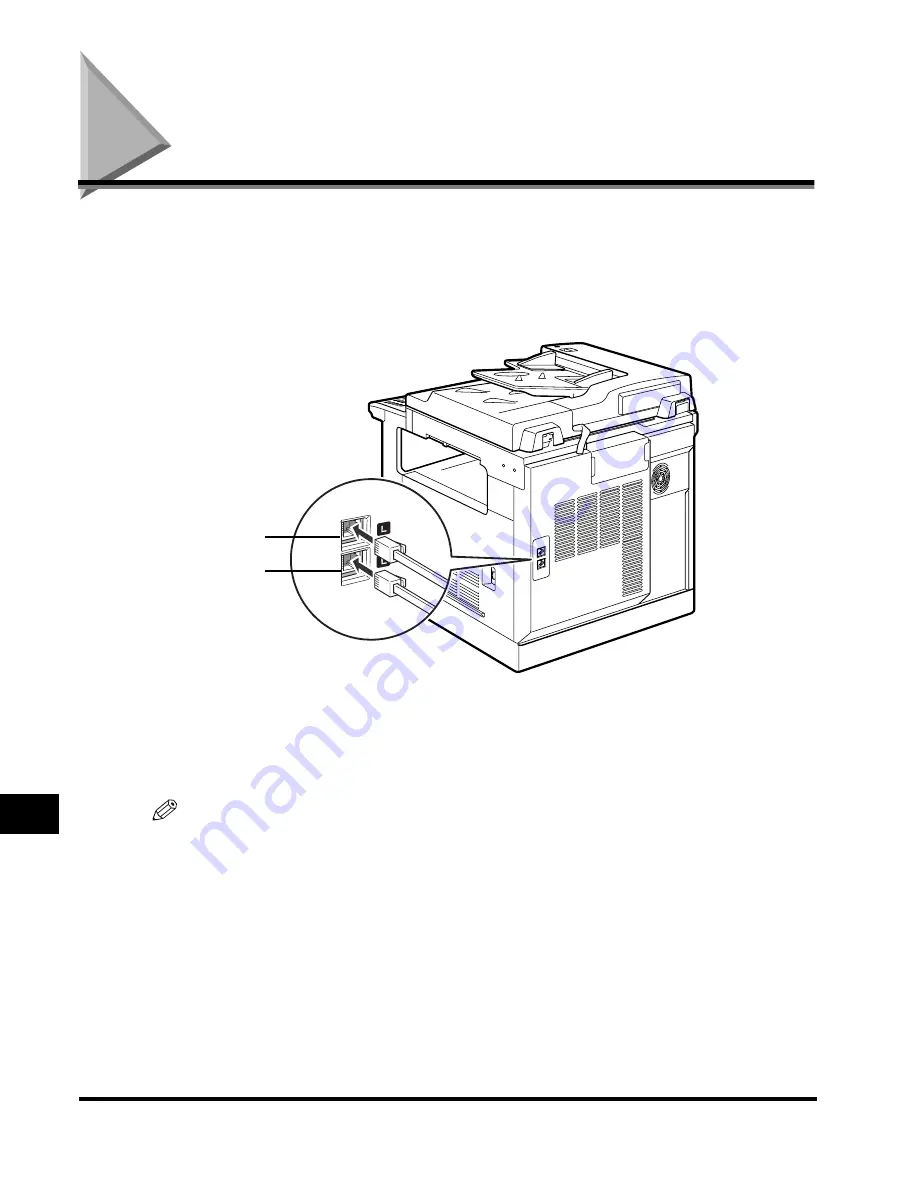
Locate two RJ-11 jacks on the back of the machine with the
Canon Super G3 FAX
Expansion Kit-B1
already installed. Connect your primary phone line to the top slot
(Line 1) marked with an [L] icon. Connect the other line to the bottom slot (Line 2),
also marked with an [L] icon. The physical connection of the phone lines to the
machine is now complete.
Line 1 and Line 2 have the following functional differences:
Line 1 (the top slot): All fax functions are available for use on Line 1.
Line 2 (the bottom slot): Telephone information services are not available on Line 2.
NOTE
You can designate a dedicated line for all incoming faxes. You can also set a preferred
line for outgoing fax transmissions when both lines are available at the time a fax is sent.
(See “Line Selection When Sending a Fax,” on p. 11-10.)
Line 1
Line 2
Summary of Contents for IMAGERUNNER 2010F
Page 2: ...imageRUNNER 2010F Facsimile Guide ...
Page 83: ...Using Speed Dialing 2 38 Speed Dialing 2 ...
Page 123: ...Checking Transaction Results 3 40 Basic Sending 3 ...
Page 185: ...Transferring Documents 5 32 Receiving Documents 5 ...
Page 207: ...Using a Memory Box 6 22 Memory Features 6 ...
Page 305: ...Changing the Fax Default Settings 10 22 Special Fax Features 10 ...
Page 321: ...Receiving a Fax on Line 2 11 16 Dual Line Functions Optional 11 ...
Page 358: ...Report Samples 15 3 Appendix 15 ...


