Using Your Photo Applications
55
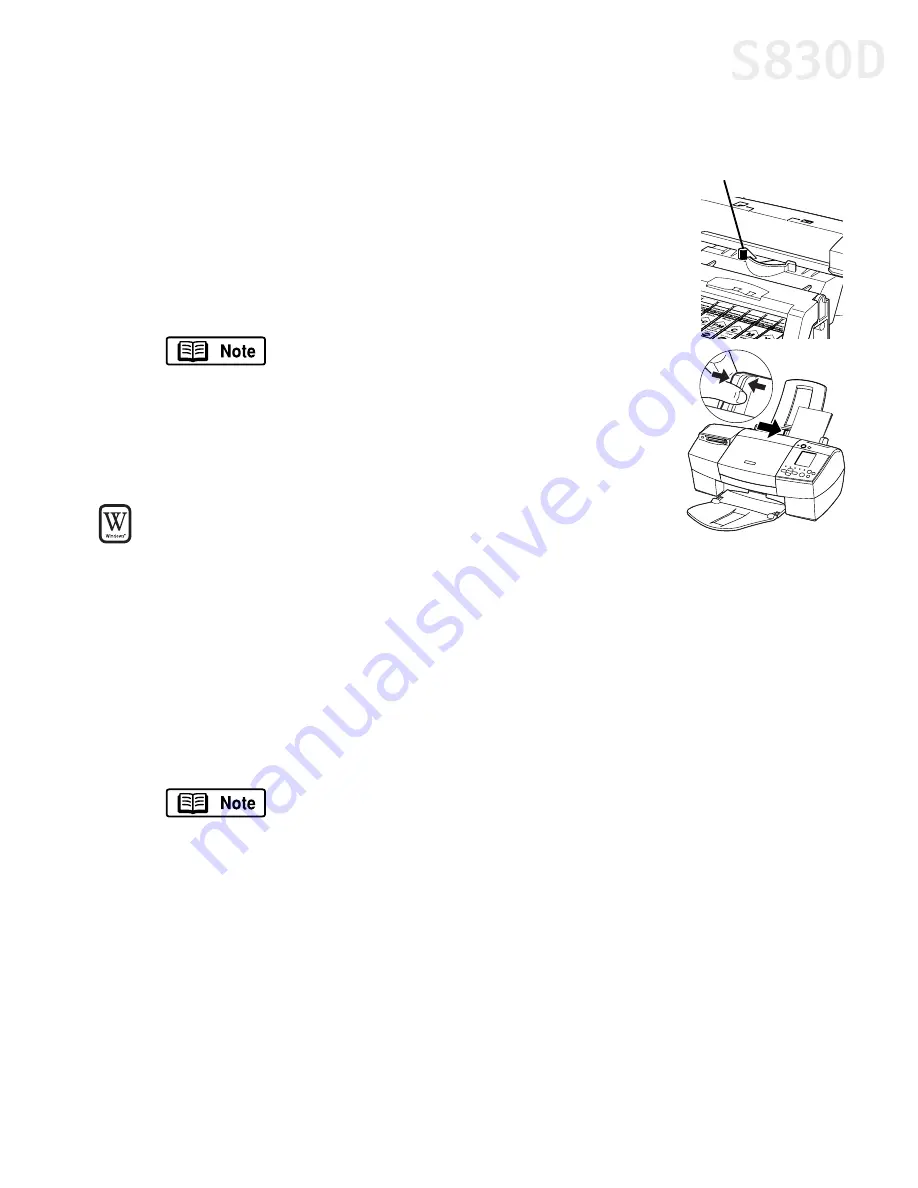
To load Photo Paper Pro for Borderless Printing 4" x 6":
1.
Set the paper thickness lever to the left.
2.
Slide the paper guide completely to the left.
3.
With the glossy side facing up, insert a sheet of
borderless paper into the paper rest.
4.
Slide the paper guide right to the edge of the paper.
To print with borderless paper for Windows:
1.
Follow the procedures above to load the borderless
paper.
2.
From ZoomBrowser EX, select the photo to be printed. To print images using
Easy-PhotoPrint for Windows, see “To Use Easy-PhotoPrint” on page 51.
3.
Click
, then click
Layout
. The PhotoRecord Print Modes wizard
will appear.
4.
Select the desired printer, then select
Borderless printing (Tiled photo)
from
the Print Mode options.
5.
Click
Next
.
6.
Specify
Media Type
,
Paper Size
and
Orientation
. The Preview area will show
the print image in relation to the paper.
7.
Click
Set Page Margins
to widen or narrow the printing area, then click
OK
,
then
Next
.
8.
Specify the number of photo tiles you want to place in a single page. Select
1 (1 row)
when printing a photo with no margins. If you select the
Automatic
You can load up to 20 sheets of
Canon Photo Paper Pro for
Borderless Printing 4" x 6" at a time.
The
Borderless printing (Tiled photo)
checkbox is available only
when you are using a printer which supports this feature.
Paper thickness lever
S830D QSG.book Page 55 Monday, April 29, 2002 4:30 PM


