3
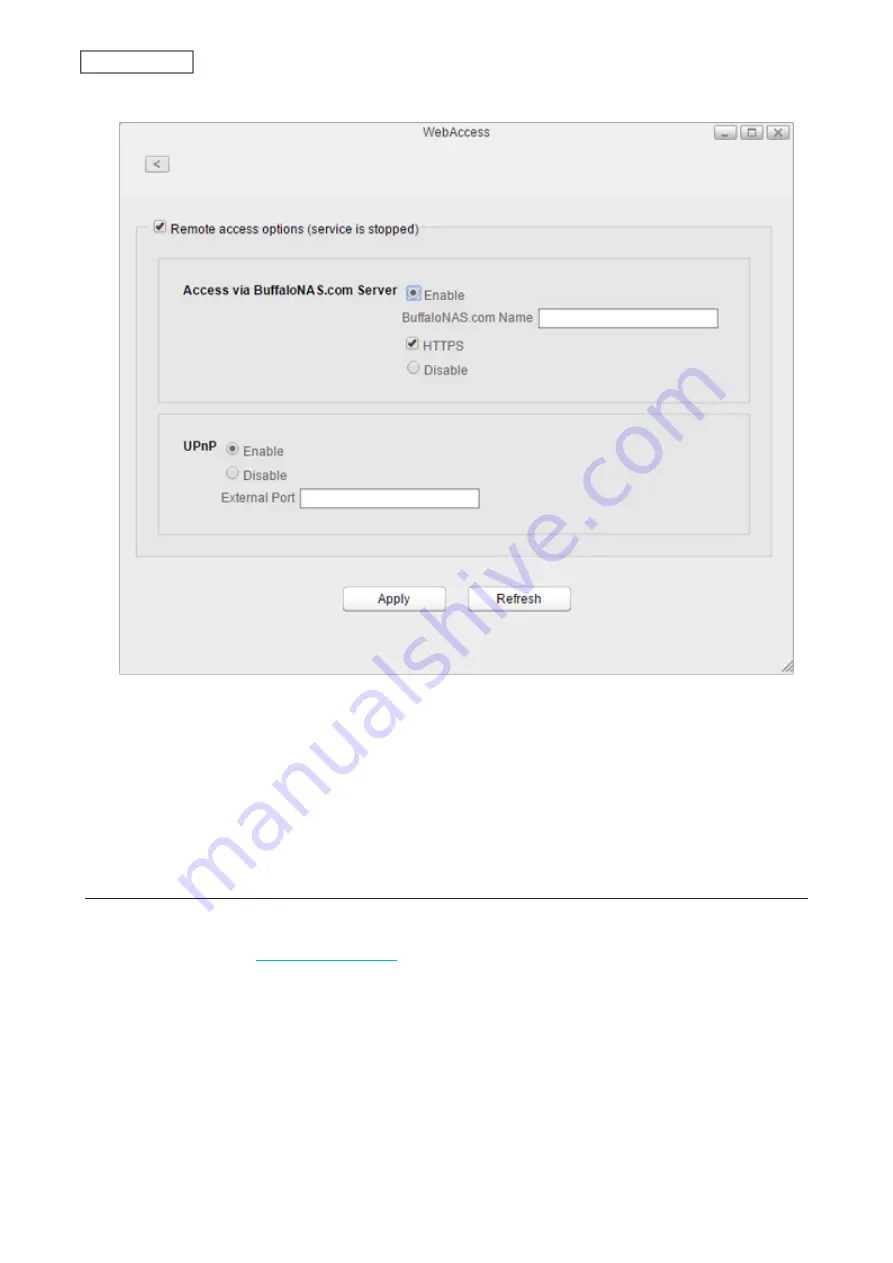
Select “Remote access options” to easily configure WebAccess settings.
4
Configure the desired settings, then click
Apply
.
• You may use the default BuffaloNAS.com registration, or select “Disable” to use a different DNS server.
• Choose a “BuffaloNAS.com Name” for your WebAccess account. Names may contain between 3 and 20
alphanumeric characters, underscores (_), and hyphens (-).
• If your router supports UPnP, enable “UPnP”. If UPnP is not supported or disabled on the router, disable that
setting and enter either “80” (HTTP) or “443” (HTTPS) into the “External Port” box. If configuring the external
port, port forwarding configuration is required to add the port number on the router. Access the router’s
port forwarding configuration page and register the port number “80” or “443” to the router.
Accessing Remotely
Once settings are configured, you are now ready for remote access from outside the local network. There are many
ways to access WebAccess folders depending on your device:
• From a computer, enter
into the address bar on your Internet browser and log in
with your BuffaloNAS.com name. Settings will remotely be opened. From My LinkStation, you can access the
files on the LinkStation. Refer to the help guide at the BuffaloNAS.com website after connecting with your
BuffaloNAS.com name for more detailed information.
• To access from an iOS device, install the “WebAccess i” application from App Store. Refer to the help guide for the
app for more detailed information.
• To access from an Android device, install the “WebAccess A” application from Google Play. Refer to the help guide
for the app for more detailed information.
Access Restrictions When Accessing Remotely
Access attributes for the shared folders on the LinkStation are as below:
74
Chapter 7 Services
Summary of Contents for LinkStation 500
Page 38: ...2 Click the RAID tab 3 Click the array to delete 37 Chapter 5 Disk Manager ...
Page 40: ...2 Click the RAID tab 3 Click Create RAID Array 39 Chapter 5 Disk Manager ...
Page 57: ...3 The system log window will open 56 Chapter 6 System Information ...
Page 66: ...2 Click Folder Setup 3 Select a shared folder for the DLNA server 65 Chapter 7 Services ...
Page 77: ...76 Chapter 7 Services ...
Page 97: ...2 From Settings click System Settings 3 Click Firmware 4 Click Browse 96 Chapter 8 System ...
Page 100: ...2 Click Folder Setup 3 Choose the folder to set as a backup destination 99 Chapter 8 System ...


