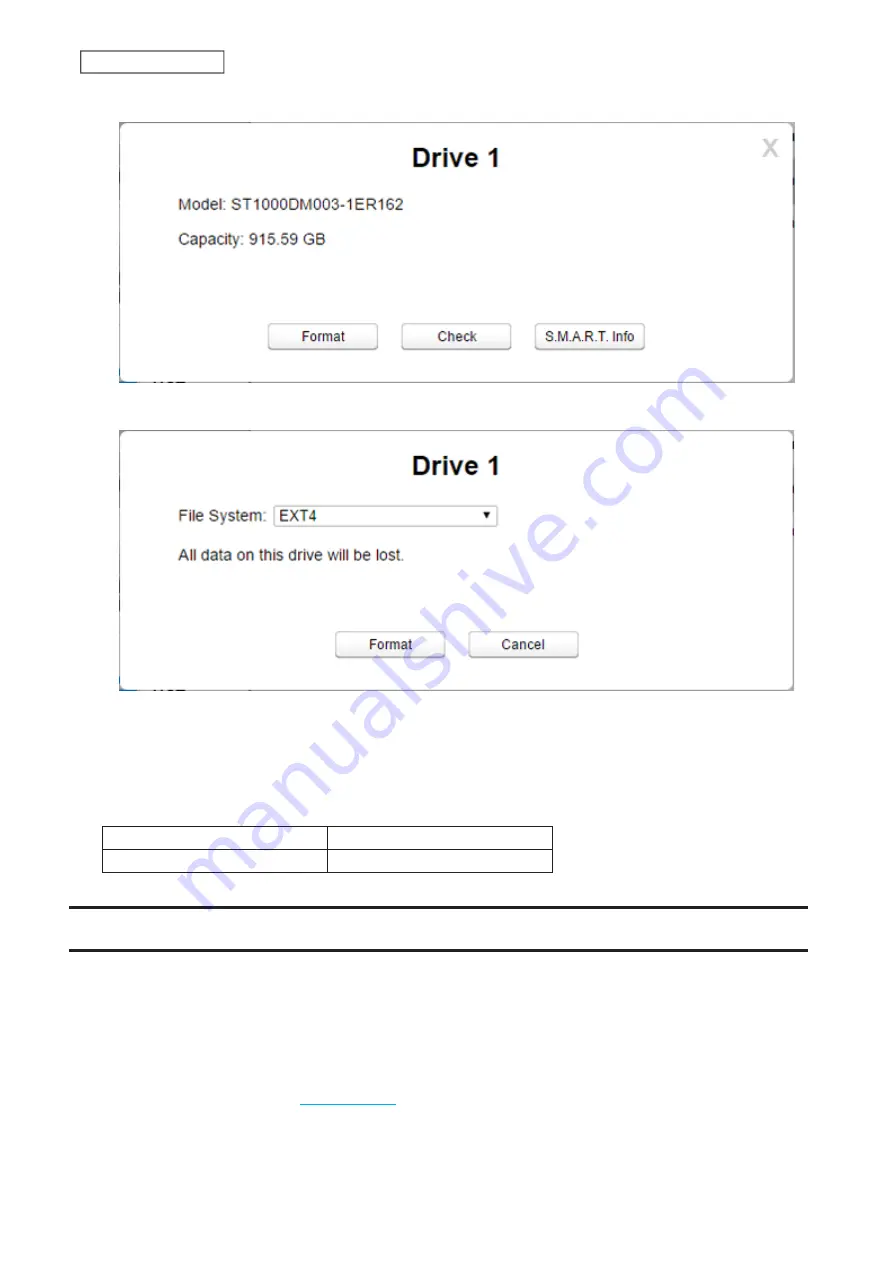
4
Click
Format
.
5
Select a file system from the drop-down list and click
Format
.
6
Click
OK
, then
Close
when completed.
Notes:
• Do not turn off the LinkStation or disconnect power to the LinkStation while formatting a drive.
• The following file systems can be formatted from Settings.
Internal Drive
ext4
External Drive
ext3, ext4, exFAT
Drive Replacement
If a drive fails, an error message will be displayed in both NAS Navigator2 and Settings.
Notes:
• Do not replace a running drive while the LinkStation is turned on. Power down the LinkStation before changing
the drive. While the LinkStation is running, never unplug or remove drives without dismounting them first.
• If using the LS520DN LinkStation model, use a Buffalo OP-HDBN series drive as the replacement drive. For the
replacement drive of other LinkStation models, use a Buffalo OP-HDBST series drive. You can also use compatible
non-Buffalo drives listed on the
as the replacement drive for the LS520DE LinkStation model. The
replacement drive should be the same size or larger as the original drive. If a larger drive is used, the extra space
will not be usable in a RAID 0 array. However with a RAID 1 array, you can expand the current RAID array capacity
47
Chapter 5 Disk Manager
Summary of Contents for LinkStation 500
Page 38: ...2 Click the RAID tab 3 Click the array to delete 37 Chapter 5 Disk Manager ...
Page 40: ...2 Click the RAID tab 3 Click Create RAID Array 39 Chapter 5 Disk Manager ...
Page 57: ...3 The system log window will open 56 Chapter 6 System Information ...
Page 66: ...2 Click Folder Setup 3 Select a shared folder for the DLNA server 65 Chapter 7 Services ...
Page 77: ...76 Chapter 7 Services ...
Page 97: ...2 From Settings click System Settings 3 Click Firmware 4 Click Browse 96 Chapter 8 System ...
Page 100: ...2 Click Folder Setup 3 Choose the folder to set as a backup destination 99 Chapter 8 System ...


