26
Panel Descriptions
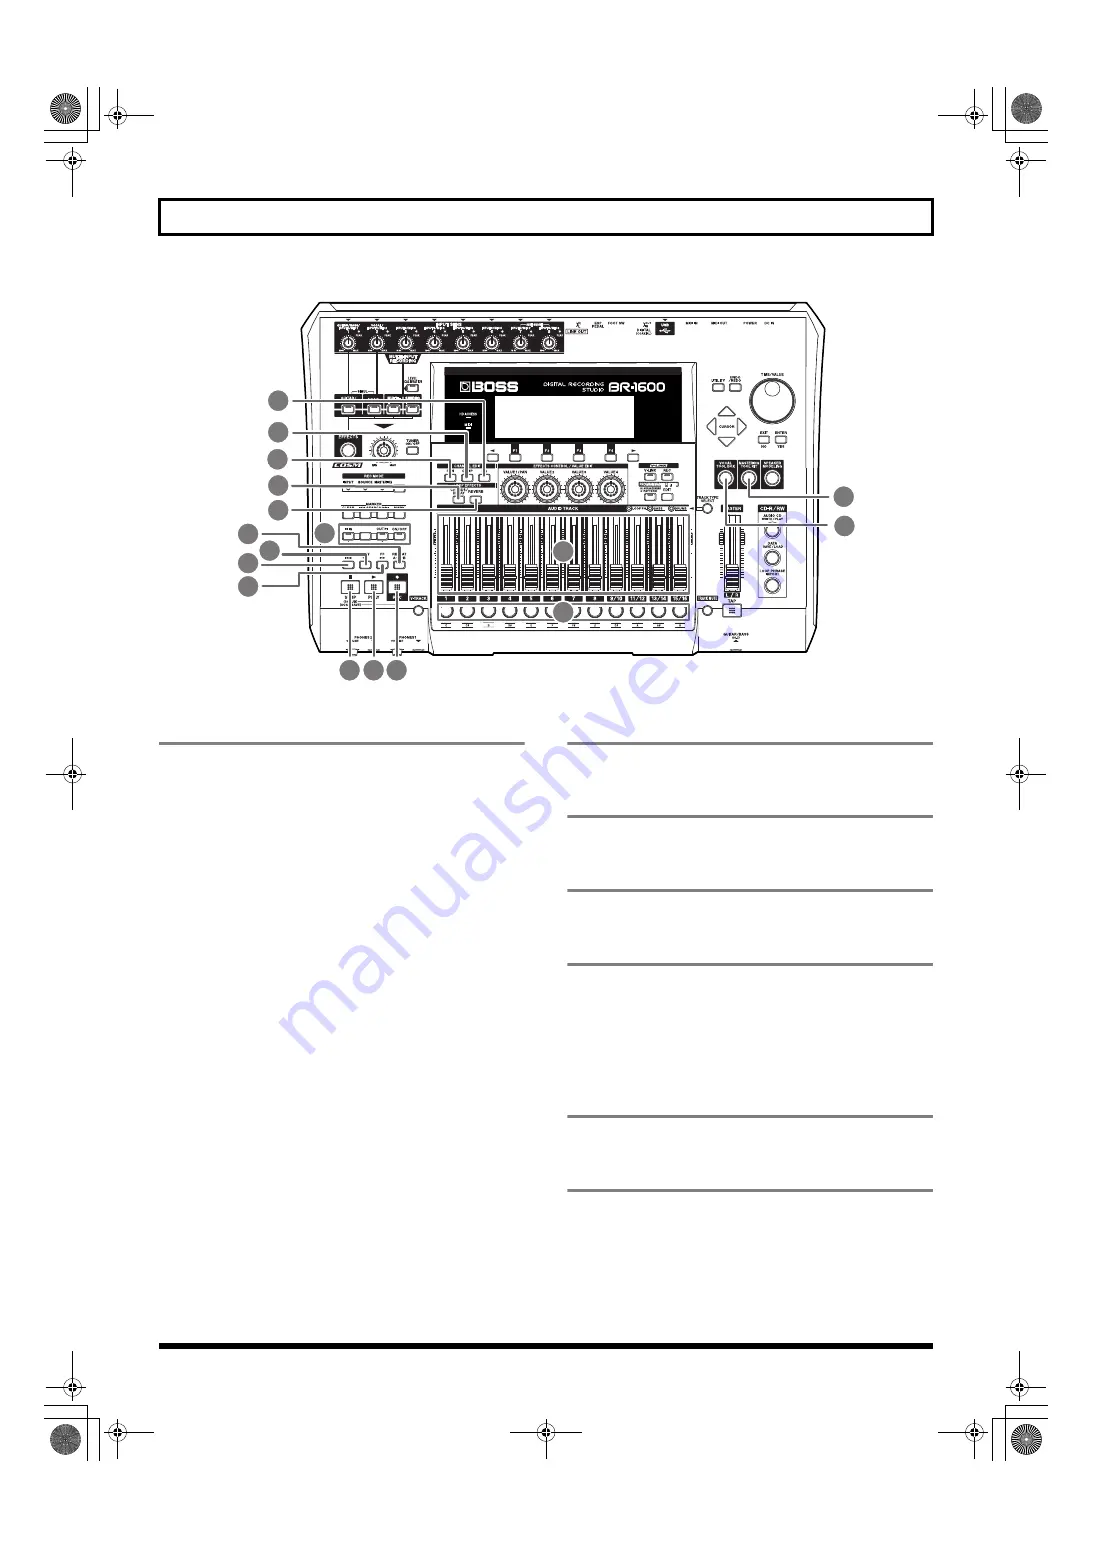
fig.05-01b
11. AUTO PUNCH IN/OUT
The AUTO PUNCH IN/OUT section is used to make settings
for the auto punch in/out function.
ON/OFF button:
This button is used to turn the auto punch function on and
off. The button’s indicator will light up when auto punch is
on.
IN button:
Sets the punch-in position. When pressed, the current
position is registered as the punch-in position and the
button’s indicator lights up. Once a punch-in position has
been registered, you can jump to this position at any time by
pressing [IN].
OUT button:
Sets the punch-out position. When pressed, the current
position is registered as the punch-out position and the
button’s indicator lights up. Once a punch-out position has
been registered, you can jump to this position at any time by
pressing [OUT].
DELETE button:
Deletes the current punch-in or punch-out position. To do
this, hold down [DELETE] and then press either [IN] or
[OUT] to delete the corresponding auto punch position.
When the [IN] or [OUT] setting is cleared in this way, its
indicator will be turned off.
12. ZERO button
Press to jump to the very beginning of the song.
13. REW button
The song will rewind while you hold down this button.
14. FF button
The song will fast-forward while you hold down this button.
15. REPEAT button
Selects a section of your song to listen to repeatedly (“Playing
back repeatedly (Repeat Function)” (Basic Operation; p. 17)).
This function is useful when you want to record several
times using punch-in and punch-out (p. 42) before saving the
best performance.
16. STOP button
This button stops song playback or recording.
17. PLAY button
Starts playback of your song. Alternatively, if [REC] has been
pressed and its indicator is flashing, you can also start
recording by pressing [PLAY]. During playback or recording,
this button’s indicator will light up in green.
11
15
14
12
13
16 17 18
21
22
20
19
23
24
25
26
27
BR-1600_R_e.book 26 ページ 2007年12月6日 木曜日 午前9時52分
Summary of Contents for Digital Recording Studio BR-1600 CD
Page 41: ...41 Section 1 Advanced Use Section 1 Advanced Use BR 1600_R_e book 41...
Page 73: ...73 Section 2 Using Effects Section 2 Using Effects BR 1600_R_e book 73...
Page 145: ...145 Section 3 Using Rhythm Section 3 Using Rhythm BR 1600_R_e book 145...
Page 203: ...203 Section 4 Using the CD R RW Drive Section 4 Using the CD R RW Drive BR 1600_R_e book 203...
Page 220: ...220 MEMO BR 1600_R_e book 220...
Page 221: ...221 Section 5 Using MIDI Section 5 Using MIDI BR 1600_R_e book 221...
Page 239: ...239 Section 6 Using USB Section 6 Using USB BR 1600_R_e book 239...
Page 272: ...272 MEMO BR 1600_R_e book 272...
Page 273: ...273 Appendices Appendices BR 1600_R_e book 273...
Page 309: ...309 MEMO BR 1600_R_e book 309...


