254
Loading WAV/AIFF files in BR-1600CD tracks (WAV/AIFF Import)
4.
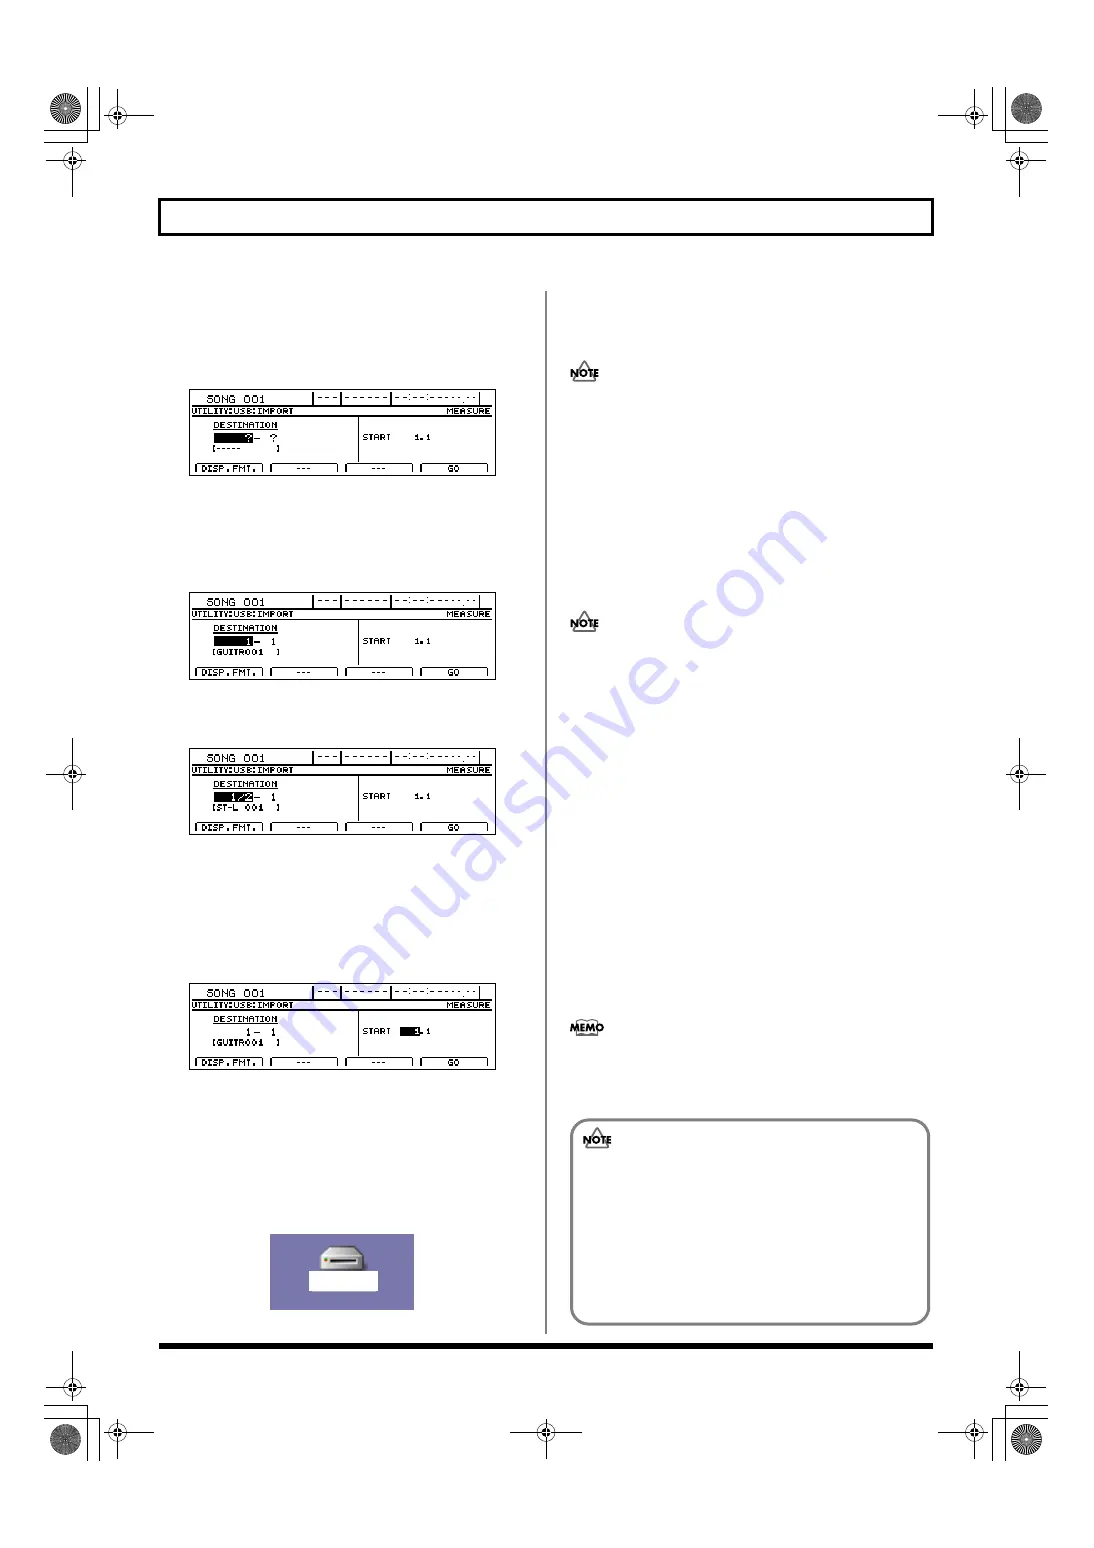
Move the cursor to the IMPORT icon and press
[ENTER/YES].
Alternatively, you can press [F3] (IMPORT).
The USB Import screen will appear.
fig.52-22d
5.
Use [CURSOR] and the TIME/VALUE dial to select the
track to be loaded.
When loading to the tracks in mono
Select the track 1–8.
fig.52-23d
When loading to the tracks in stereo
Select the track combination 1/2–15/16.
fig.52-24d
6.
Use [CURSOR] and the TIME/VALUE dial to specify
the measure or position in the track from which
loading is to start.
Pressing [F1] (DISP.FMT.) at this time will allow you
switch among the specification methods for positions
(i.e., by bar, time, or marker).
fig.52-25d
7.
Press [F4] (GO).
When the connection is complete, the message “Copy 1
Wave File In Computer To BR-1600CD’s USB Folder”
will appear.
After several moments, the BR-1600CD icon will appear
on the PC monitor.
fig.52-07a
8.
Double-click the BR-1600CD icon.
The files and folders from the BR-1600CD's hard disk
will be displayed on the PC monitor.
In some cases, a certain amount of time will pass before
the hard disk is displayed.
9.
Double-click the USB folder.
The USB folder opens.
Confirm that the USB folder is empty. The presence of
any files in the USB folder will prevent proper
importation of WAV and AIFF files, so be sure to delete
any such files.
10.
Drag and drop the WAV or AIFF file to be imported on
the computer to the USB folder.
Only one file can be imported at a time in each import
operation. Do not drag and drop more than one file at a
time. The import procedure cannot be carried out
correctly when two or more files are present in the USB
folder.
11.
Quit the connection to the computer.
Drug the BR-1600CD icon to the Trash.
12.
Press BR-1600CD’s [EXIT/NO].
The WAV and/or AIFF files will be converted into audio
track data.
When this process has been completed, the USB Import
screen will be displayed once again. The WAV and/or
AIFF files will then be automatically deleted.
13.
Press BR-1600CD’S [EXIT/NO] several times to return
to the Top screen.
At this point, you can safely disconnect the USB cable
from the BR-1600CD and the computer.
If you press [EXIT/NO] without quitting the connection
to the computer, “Disconnect USB, OK?” appear. In this
case, press [ENTER/YES].
BR-1600CD
(Ex.)
If the current song contains newly recorded audio
data or newly modified settings, the message “Save
Current?” may be displayed during the import
procedure. If you want to save your song before
starting the import, press [ENTER/YES]; if this will
not be necessary, press [EXIT/NO]. Remember that
if you do not save a modified song at this time, all
newly recorded audio data, edited data, modified
mixer settings, etc. will be lost.
BR-1600_R_e.book 254 ページ 2007年12月6日 木曜日 午前9時52分
Summary of Contents for Digital Recording Studio BR-1600 CD
Page 41: ...41 Section 1 Advanced Use Section 1 Advanced Use BR 1600_R_e book 41...
Page 73: ...73 Section 2 Using Effects Section 2 Using Effects BR 1600_R_e book 73...
Page 145: ...145 Section 3 Using Rhythm Section 3 Using Rhythm BR 1600_R_e book 145...
Page 203: ...203 Section 4 Using the CD R RW Drive Section 4 Using the CD R RW Drive BR 1600_R_e book 203...
Page 220: ...220 MEMO BR 1600_R_e book 220...
Page 221: ...221 Section 5 Using MIDI Section 5 Using MIDI BR 1600_R_e book 221...
Page 239: ...239 Section 6 Using USB Section 6 Using USB BR 1600_R_e book 239...
Page 272: ...272 MEMO BR 1600_R_e book 272...
Page 273: ...273 Appendices Appendices BR 1600_R_e book 273...
Page 309: ...309 MEMO BR 1600_R_e book 309...


