198
Setting tempos and beats for individual measures (Tempo Map/Beat Map)
In addition to setting of a single tempo and beat for an entire
rhythm arrangement, the BR-1600CD can also set these
playback parameters more precisely on a measure-by-
measure basis.
If a single tempo and beat can be used from the
beginning to the end of your rhythm arrangement, there
is no particular need to set up a Tempo Map or a Beat
Map.
Setting tempos for individual
measures (Tempo Map)
The Tempo Map function is used to set tempos for individual
measures. This type of map arranges tempos on a measure-
by-measure basis, and it can be saved together with the
rhythm arrangement.
1.
Make sure that PROGRAMMABLE RHYTHM
[ARRANGEMENT/PATTERN] is lighted (you’re in
Arrangement mode).
If this button’s indicator is off (meaning that you’re in
Pattern mode), press PROGRAMMABLE RHYTHM
[ARRANGEMENT/PATTERN] so it is lighted.
2.
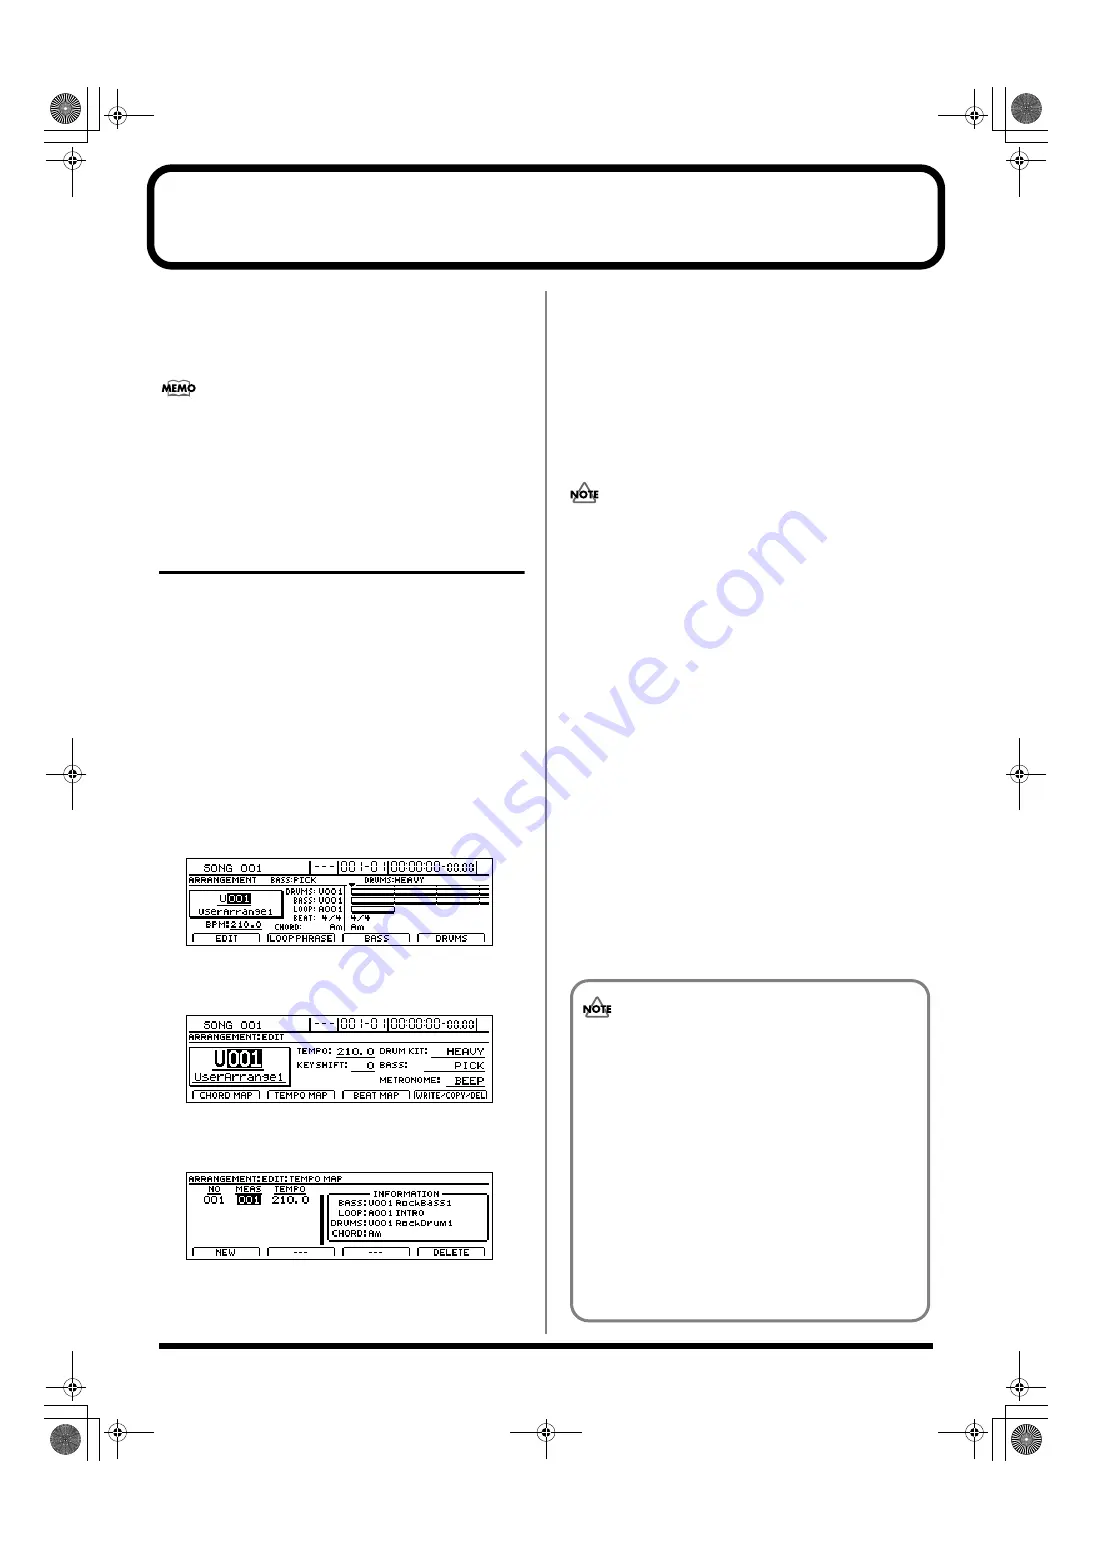
Press PROGRAMMABLE RHYTHM [EDIT].
The Rhythm Arrangement Selection screen will appear.
fig.21-33d
3.
Press [F1] (EDIT).
The Rhythm Arrangement Edit screen will appear.
fig.21-34d
4.
Press [F2] (TEMPO MAP).
The Tempo Map screen will appear.
fig.21-35d
If no tempo map has been set for this song, a single
tempo will be created at the start of the map.
5.
Move the cursor to the tempo map entry to be edited.
6.
Move the cursor to the parameter whose setting you
want to change and select a new value using the TIME/
VALUE dial.
MEAS:
This parameter sets the measure position for the change
in tempo, and it can be set within a range of 1 to 999. The
position of the first tempo map entry is fixed at “1” and
cannot, therefore, be changed.
You can create up to 50 tempo maps.
If the same tempo is used for multiple consecutive
measures, do not set a separate tempo map for each
measure, but make a single setting for the entire group of
measures.
TEMPO:
This parameter sets the tempo as a BPM (beats per
minute) value with a range of 25.0 to 250.0.
●
Adding new tempo map entries
Press [F1] (NEW). A new entry will be added to the
tempo map immediately after the cursor’s current
position.
●
Deleting tempo map entries
Press [F4] (DELETE). The tempo map entry at the current
cursor position will be deleted. Note that it will not be
possible to delete the first entry in a tempo map.
7.
Once you’ve made all the desired tempo map settings,
press [EXIT/NO] to return to the Rhythm Arrangement
Edit screen.
8.
If you wish to store the edited tempo map, save the
current rhythm arrangement (p. 195).
• Unless the song is saved, all of your edited tempo
map data will be lost when a different rhythm
arrangement is selected or a new song is loaded. In
addition, this data will also be lost if you turn off the
BR-1600CD before saving.
• Whenever a fixed tempo is set for an entire rhythm
arrangement, all tempos previously set in the tempo
map will be permanently overwritten with this new
tempo.
• Tempo map settings will be ignored whenever
SYNC TRACK is being used. To ensure that the
tempo map is used, set “SYNC SOURCE” to
“TEMPO MAP.” (“Synchronizing a MIDI device by
recording its tempo changes on the BR-1600CD
(Sync Track)” (Basic Operation; p. 228))
BR-1600_R_e.book 198 ページ 2007年12月6日 木曜日 午前9時52分
Summary of Contents for Digital Recording Studio BR-1600 CD
Page 41: ...41 Section 1 Advanced Use Section 1 Advanced Use BR 1600_R_e book 41...
Page 73: ...73 Section 2 Using Effects Section 2 Using Effects BR 1600_R_e book 73...
Page 145: ...145 Section 3 Using Rhythm Section 3 Using Rhythm BR 1600_R_e book 145...
Page 203: ...203 Section 4 Using the CD R RW Drive Section 4 Using the CD R RW Drive BR 1600_R_e book 203...
Page 220: ...220 MEMO BR 1600_R_e book 220...
Page 221: ...221 Section 5 Using MIDI Section 5 Using MIDI BR 1600_R_e book 221...
Page 239: ...239 Section 6 Using USB Section 6 Using USB BR 1600_R_e book 239...
Page 272: ...272 MEMO BR 1600_R_e book 272...
Page 273: ...273 Appendices Appendices BR 1600_R_e book 273...
Page 309: ...309 MEMO BR 1600_R_e book 309...


