56
Editing a recorded performance (Track Edit)
The BR-1600CD allows you to edit the makeup of your song
using a host of functions such as the copying or moving of
sections of audio within a track or to different tracks.
Precautions when editing tracks
Remember to always save your song if you want to store the track
edits that you have made. In the BR-1600CD, edited track data is
only temporarily stored on the hard disk, and unless the
corresponding song is saved, it will be lost when the power is
turned off or a new song is loaded.
If audio data exists at the copy or move destination, it will be
overwritten.
Be sure to set the length of audio to be copied or moved to more
than 0.5 seconds. If a section of audio of less than this length is
copied or moved, you will not be able to hear it upon playback.
Please ensure that no audio of less than 0.5 seconds in length is left
behind after a move, insert, delete, or erase operation. If a section
of audio of less than this length is created in front of or behind this
type of edit, you will not be able to hear it upon playback.
Copying audio data (Track Copy)
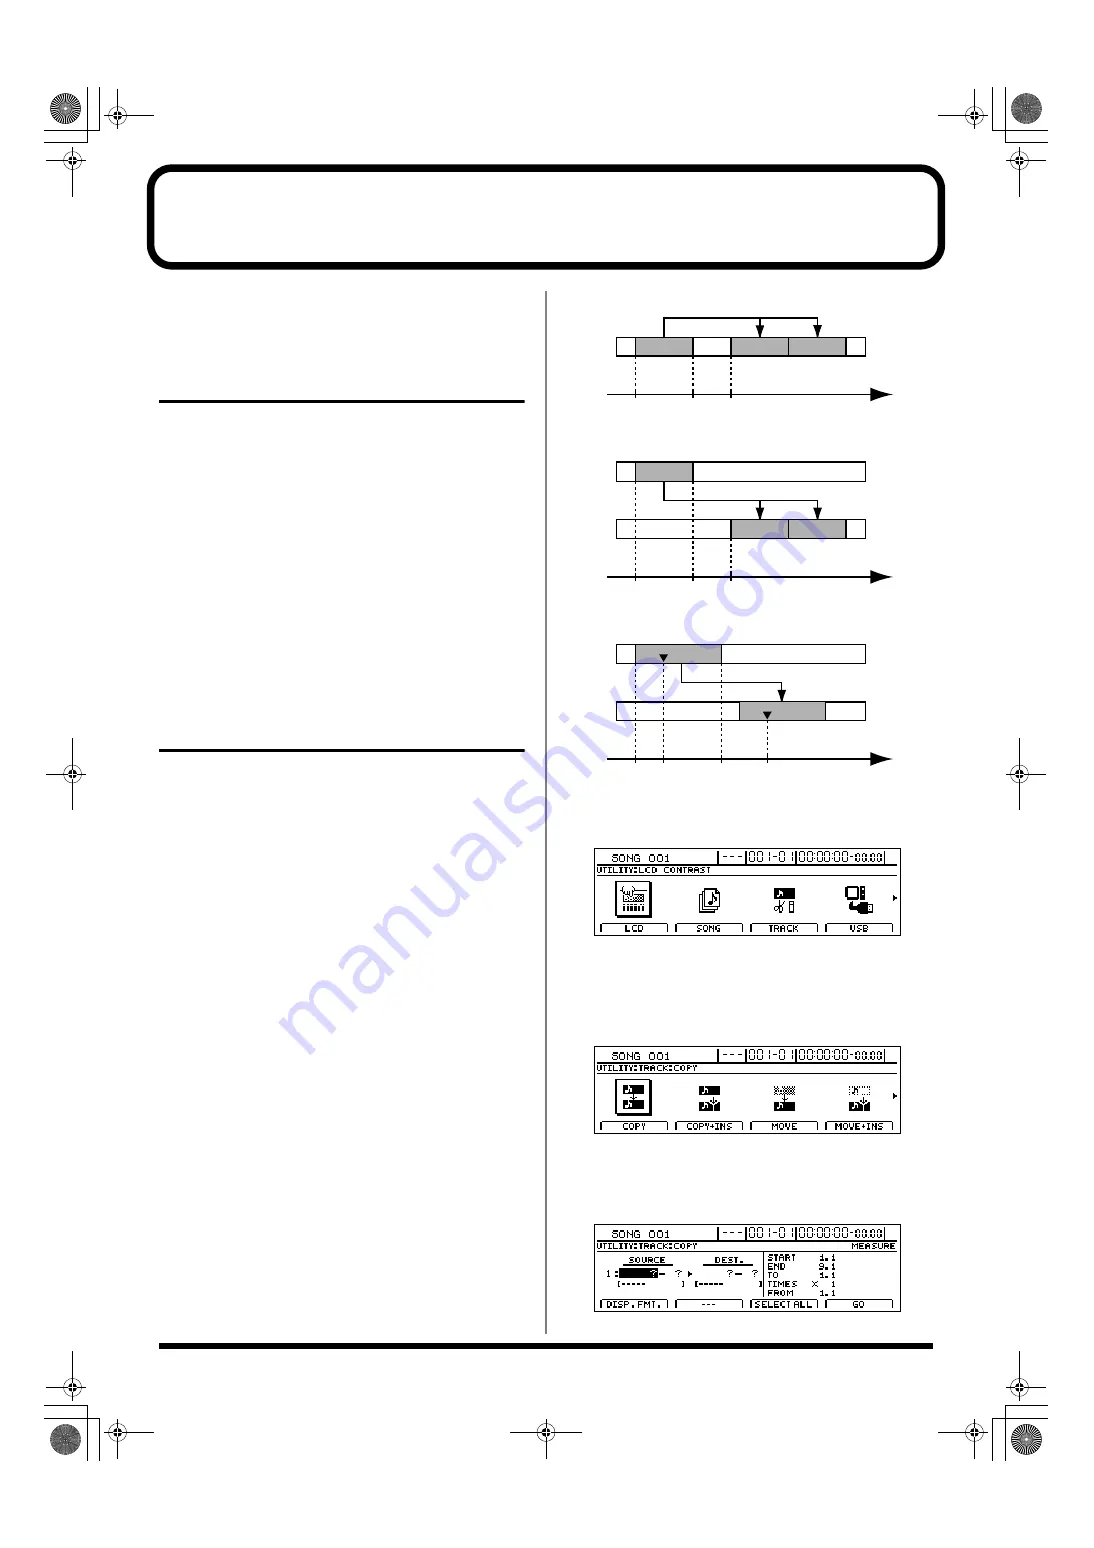
The Track Copy function allows you to copy a specified
section of audio data to a new location.
In addition, you can copy audio data to multiple tracks in a single
operation, and you can also copy data repeatedly, creating a sequence
of identical audio sections starting at the specified location.
This function allows you to create songs quickly and
conveniently when, for example, you want to reuse a
recorded phrase from a certain track or when you want to
repeat the same phrase again and again.
When copying audio data, you will normally want the start
of the copied section to be aligned with the destination that
you specify. However, it may sometimes be necessary to
align a point somewhere along the section of copied audio
data with this destination point. The BR-1600CD allows you
to copy data in this way using the “FROM” parameter.
For example, if you are copying an effect sound comprising a
ticking bomb followed by an explosion, you will probably
want to align the start of the explosion sound with the
specified destination. Normally, you would have to calculate
the length of time from the start of the sound effect until the
explosion before you could determine the correct copy
destination. With this function, however, you can specify the
start point of the explosion in the original data using
“FROM,” and the copy destination where you want the
explosion to be heard using “TO.” As a result, it is easy to
copy the entire sound effect with the explosion positioned
exactly where you want it.
Example 1: Copying to the same track twice
fig.15-01
Example 2: Copying to a different track twice
fig.15-02
Example 3: Copying audio data using “FROM”
fig.15-03
1.
Press [UTILITY].
The Utility Menu screen will appear.
fig.12-12d
2.
Move the cursor to the TRACK icon and press [ENTER/YES].
Alternatively, you can press [F3] (TRACK) button if the
TRACK icon is currently displayed.
The Track screen will appear.
fig.15-05d
3.
Move the cursor to the COPY or COPY + INS icon and
press [ENTER/YES].
COPY
fig.15-06d
A
A'
A"
START
END
TO
Time
B
B'
B"
START
END
TO
Time
START
END
TO
Time
FROM
C
C'
BR-1600_R_e.book 56 ページ 2007年12月6日 木曜日 午前9時52分
Summary of Contents for Digital Recording Studio BR-1600 CD
Page 41: ...41 Section 1 Advanced Use Section 1 Advanced Use BR 1600_R_e book 41...
Page 73: ...73 Section 2 Using Effects Section 2 Using Effects BR 1600_R_e book 73...
Page 145: ...145 Section 3 Using Rhythm Section 3 Using Rhythm BR 1600_R_e book 145...
Page 203: ...203 Section 4 Using the CD R RW Drive Section 4 Using the CD R RW Drive BR 1600_R_e book 203...
Page 220: ...220 MEMO BR 1600_R_e book 220...
Page 221: ...221 Section 5 Using MIDI Section 5 Using MIDI BR 1600_R_e book 221...
Page 239: ...239 Section 6 Using USB Section 6 Using USB BR 1600_R_e book 239...
Page 272: ...272 MEMO BR 1600_R_e book 272...
Page 273: ...273 Appendices Appendices BR 1600_R_e book 273...
Page 309: ...309 MEMO BR 1600_R_e book 309...


