


95
Directory Configurations
After deciding which Directory Option to use, you will need to follow the individual steps for
the corresponding option. Below are listed the instructions on how to configure the various
Directory Options.
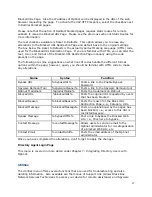
Directory Instructions
Directory Option 1
Install Directory Agent
Create Directory Agent
Create Directory Agent Group
Deploy Directory Client
Create Directory IURs
Directory Option 2
Install Directory Agent
Create Directory Agent
Create Optinet Group
Create Directory Agent Group
Create Directory IURs
Directory Option 3
Install Directory Agent
Create Directory Agent
Create Optinet Group
Create Directory Agent Group
Create Directory IURs
Directory Option 4
Install Directory Agent
Create Directory Agent
Create Optinet Group
Create Directory Agent Group
Create Directory IURs
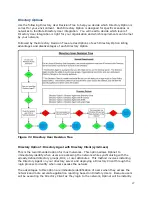
Figure 7.3 Directory Install Sequences
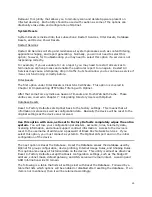
Install Directory Agents
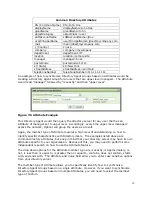
The Directory Agent will allow Optinet to synchronize your Directory groups, OUs, or user
attributes with the Optinet Directory Groups. The Directory Agent will also indicate how to
display user names under Reports.
You can download the Directory Agent under Admin -> Downloads -> Directory Software ->
Download 32-bit Active Directory Agent. The Directory Agent must be installed on a
Windows (2000 or above) Server that has access to the directory, e.g., Active Directory
server, domain controller, etc.
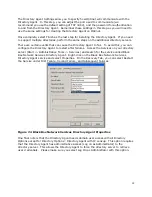
Once downloaded, double-click on the Directory Agent installation package. This will
present you with the Directory Agent Installation Wizard. Follow the steps of the Wizard by
accepting the License Agreement, selecting a destination folder (C:\\Program Files\Black
Box Network Services Directory Agent\ is the recommended placement), and Directory
Agent Settings.
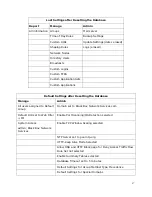
Figure 7.3 Directory Agent Settings


