


LCD SCREEN
G
ettin
g R
ea
d
y
Basic operations
B-31
B
1
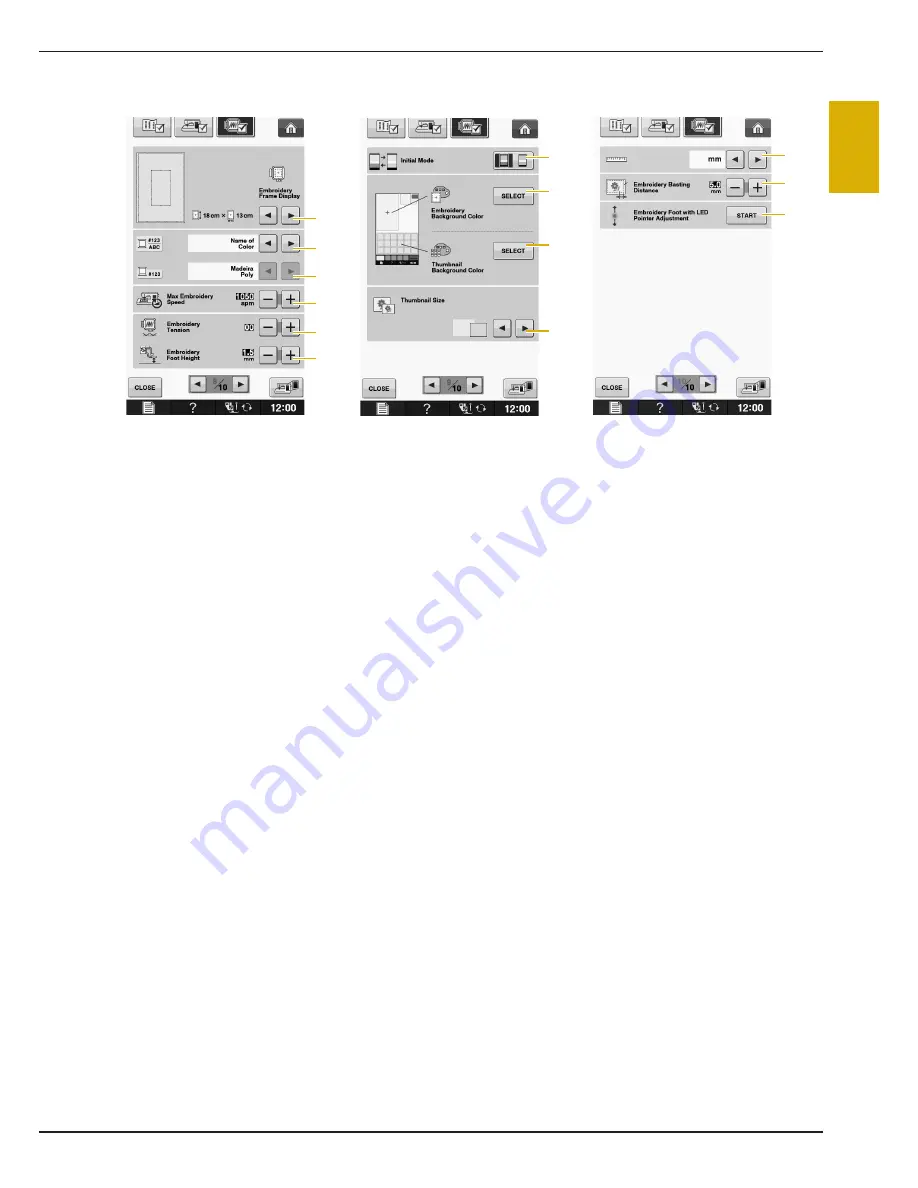
Embroidery settings
a
Select from among 16 embroidery frame displays (see page E-35).
b
Change the thread color display on the “Embroidery” screen; thread number, color name (see page E-34).
c
When the thread number “#123” is selected, select from six thread brands (see page E-34).
d
Adjust the maximum embroidery speed setting (see page E-33).
e
Adjust the upper thread tension for embroidering (see page E-30).
f
Select the height of the embroidery foot “W+” during embroidering (see page E-11).
g
Change the initial mode of the display (Embroidery/Embroidery Edit) (see page E-3).
h
Change the color of the background for the embroidery display area (see page B-33).
i
Change the color of the background for the thumbnail area (see page B-33).
j
Press to specify the size of pattern thumbnails (see page B-34).
k
Change the display units from metric to standard measurements (mm/inch).
l
Adjust the distance between the pattern and the basting stitching (see page E-84).
m
Adjusting the position and brightness of the embroidery foot with LED pointer (see page B-64).
a
d
e
f
b
c
g
j
h
i
m
k
l
Summary of Contents for Urity BLTY
Page 1: ......
Page 109: ...USEFUL FUNCTIONS Sewing Basics Sewing S 19 S 1...
Page 193: ...USING THE MEMORY FUNCTION Character Decorative Stitches Sewing S 103 S 3...
Page 206: ...TROUBLESHOOTING S 116...
Page 224: ...ATTACHING THE EMBROIDERY FRAME E 18 b Pull the embroidery frame toward you...
Page 304: ...TROUBLESHOOTING E 98...
Page 331: ......
Page 332: ...English 882 C41 Printed in Taiwan XF3648 001...


