EDITING PATTERNS
Em
br
oide
ry
Ed
it
Embroidering
E-69
E
2
d
Use
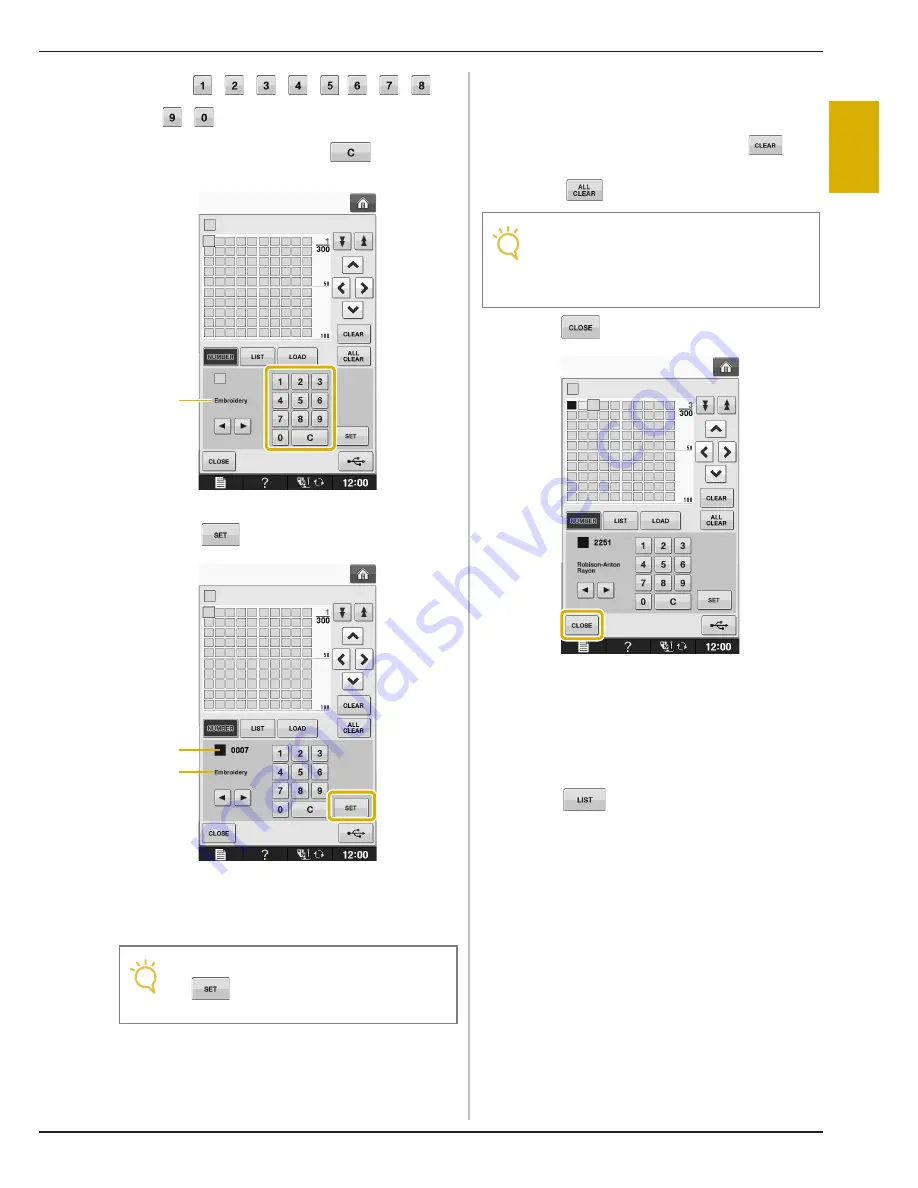
to enter a color’s 4-digit number.
*
If you make a mistake, press
to erase the
entered number, and then enter the correct number.
a
Thread brand
e
Press .
a
Thread brand
b
Entered thread color number
→
The selected thread color is set in the custom thread
table.
f
Repeat the previous steps until all desired
thread colors are specified.
*
To delete a specified color from the palette, select
the color to be deleted, and then press
.
*
To delete all the specified color from the palette,
press .
g
Press
to return to the original screen.
■
Adding a Color to the Custom
Thread Table from the List
a
Repeat the previous steps
a
through
c
on
page E-68.
b
Press
to display the thread list.
Note
• If
is not pressed, the thread color
number will not be changed.
a
b
a
Note
• You can save the created custom thread
table data. Refer to “Saving the Custom
Thread Table to USB media” on page E-70
for the detailed procedure.
Summary of Contents for Urity BLTY
Page 1: ......
Page 109: ...USEFUL FUNCTIONS Sewing Basics Sewing S 19 S 1...
Page 193: ...USING THE MEMORY FUNCTION Character Decorative Stitches Sewing S 103 S 3...
Page 206: ...TROUBLESHOOTING S 116...
Page 224: ...ATTACHING THE EMBROIDERY FRAME E 18 b Pull the embroidery frame toward you...
Page 304: ...TROUBLESHOOTING E 98...
Page 331: ......
Page 332: ...English 882 C41 Printed in Taiwan XF3648 001...


