SEWING THE STITCHES
S-24
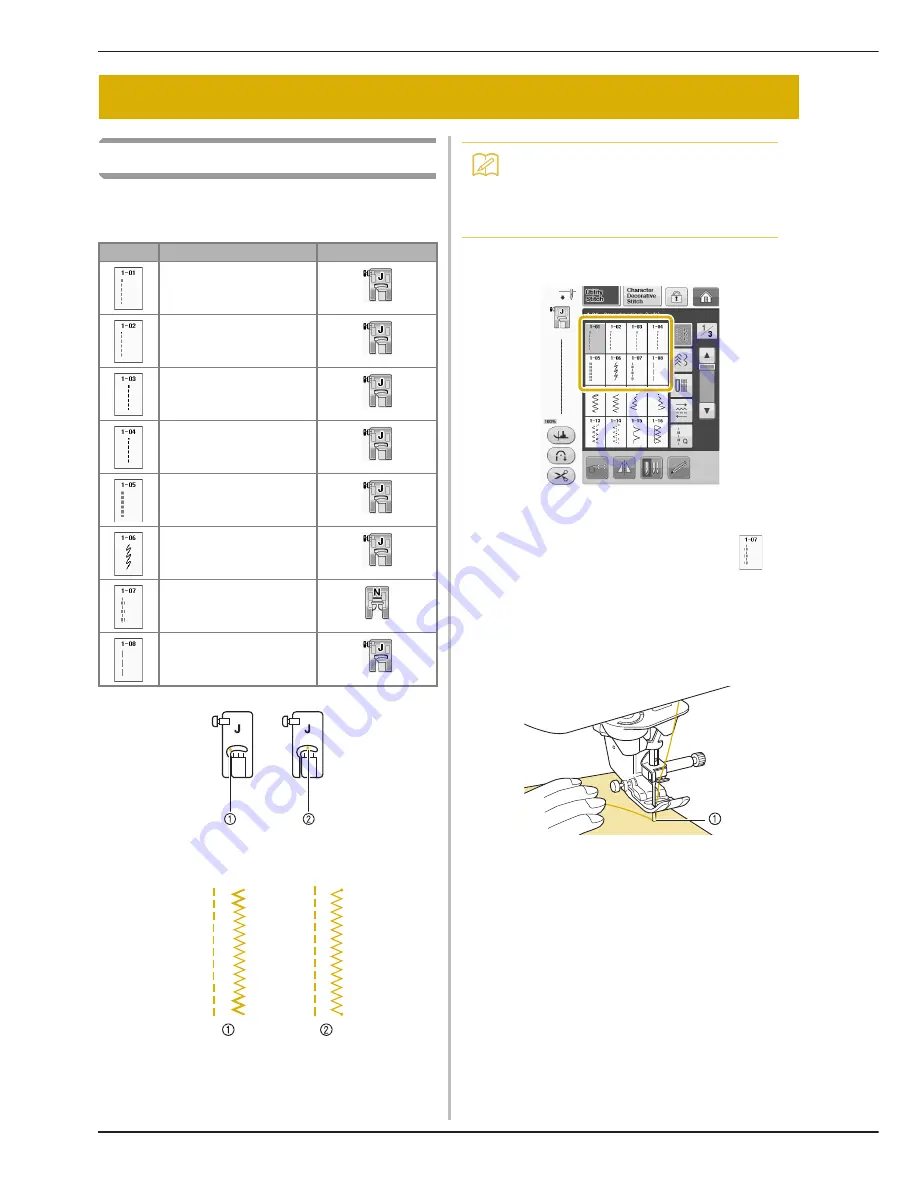
Straight Stitches
See page S-68 for the detailed information of
stitches.
a
Left needle position
b
Middle needle position
a
Reverse stitch
b
Reinforcement stitch
a
Select a stitch.
b
Attach presser foot “J”.
*
Attach presser foot “N” when you select
.
c
Hold the thread tail and fabric with your
left hand, and rotate the handwheel with
your right hand to insert the needle into the
fabric.
a
Sewing start position
d
Lower the presser foot, and hold the
“Reverse Stitch” or “Reinforcement Stitch”
button to sew 3-4 stitches.
→
The machine sews reverse stitches (or reinforcement
stitches).
SEWING THE STITCHES
Stitch
Stitch name
Presser foot
Straight stitch (Left)
Straight stitch (Left)
Straight stitch (Middle)
Straight stitch (Middle)
Triple stretch stitch
Stem stitch
Decorative stitch
Basting stitch
Memo
• Refer to “Sewing Reinforcement
Stitches” on page S-5 for the detailed
information of reverse stitches and
reinforcement stitches.
Summary of Contents for Urity BLTY
Page 1: ......
Page 109: ...USEFUL FUNCTIONS Sewing Basics Sewing S 19 S 1...
Page 193: ...USING THE MEMORY FUNCTION Character Decorative Stitches Sewing S 103 S 3...
Page 206: ...TROUBLESHOOTING S 116...
Page 224: ...ATTACHING THE EMBROIDERY FRAME E 18 b Pull the embroidery frame toward you...
Page 304: ...TROUBLESHOOTING E 98...
Page 331: ......
Page 332: ...English 882 C41 Printed in Taiwan XF3648 001...


