PREPARING FOR BOBBIN WORK
S-108
h
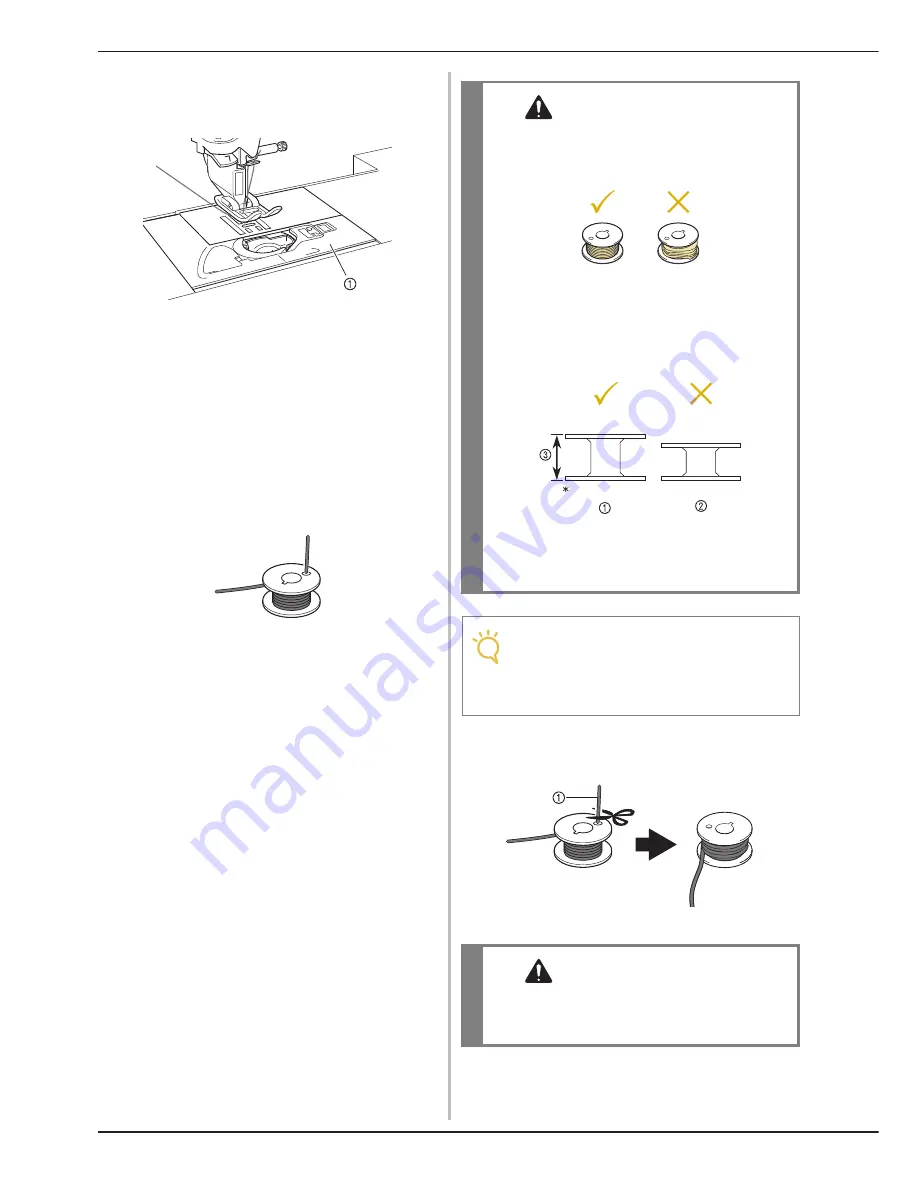
Install the needle plate cover.
For details on installing the needle plate cover,
refer to “Cleaning the Race” of “Appendix”.
a
Needle plate cover
i
Install the flat bed attachment.
j
Insert the thread tail from the spool of
thread through the hole in the bobbin from
the inside to the outside. Hold the thread
tail while winding the thread around the
bobbin by hand. After winding the bobbin
so it is filled as shown below (about 80%),
cut the thread.
k
Using scissors carefully trim the thread tail
as close to the bobbin as possible.
a
Beginning of wound thread
CAUTION
• Use a bobbin thread that has been correctly
wound. Otherwise, the needle may break or
the thread tension will be incorrect.
• The included bobbin was designed specifically
for this sewing machine. If bobbins from other
models are used, the machine will not operate
correctly. Use only the included bobbin or
bobbins of the same type (part code:
X52800-150).
*
Actual size
a
This model
b
Other models
c
11.5 mm (approx. 7/16 inch)
Note
• Slowly and evenly wind the thread around
the bobbin.
• For best results, wind the bobbin so the
thread is snug and not twisted.
CAUTION
• If thread extends beyond the top of the bobbin
too much, the thread may become tangled or
the needle may break.
Summary of Contents for Urity BLTY
Page 1: ......
Page 109: ...USEFUL FUNCTIONS Sewing Basics Sewing S 19 S 1...
Page 193: ...USING THE MEMORY FUNCTION Character Decorative Stitches Sewing S 103 S 3...
Page 206: ...TROUBLESHOOTING S 116...
Page 224: ...ATTACHING THE EMBROIDERY FRAME E 18 b Pull the embroidery frame toward you...
Page 304: ...TROUBLESHOOTING E 98...
Page 331: ......
Page 332: ...English 882 C41 Printed in Taiwan XF3648 001...


