


K-Series Loom User Manual
Loom Assembly
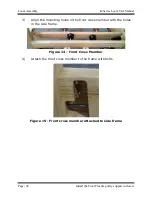
Install the Rear Cross Member
Page | 19
included with the side frames and there are cables running between the right
side frame and the rear cross member. Follow these instructions to remove
the loom safely from the crate.
Note:
To remove the side frames and associated parts from the boxes safely and
easily, please have two people working together.
1)
Remove the packing material around the side frames.
2)
Remove the manual, hardware packet, and power box.
3)
Remove the left side frame. Place it out of the way for now.
WARNING:
The right side frame with the Compu-Dobby weighs about 140 pounds. Please
have two people remove and hold it using safe lifting techniques.
4)
Carefully remove the right side frame with the Compu-Dobby and
the attached rear cross member. There are Styrofoam blocks
between the side frame and the cross member.
5)
DO NOT remove any wrapping, tape, or bags from the loom until
told to do so. Do not remove the wrapping from the side frame and
cross member until you have found the hardware and are ready to
attach them together.
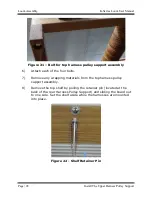
Note:
The weights at the bottom of the Compu-Dobby are held in place for shipping
with a metal rod. Leave the rod in place while you are assembling the loom.
Remove the rod before using the loom for weaving. Keep the rod safe so that
it can be used if you need to move or ship your loom or Compu-Dobby.
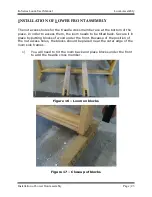
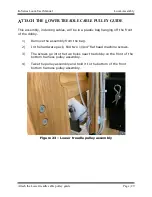
I
NSTALL THE
R
EAR
C
ROSS
M
EMBER
1)
Please locate the Hardware Pack for the cross members.
2)
Sort the hardware. Select four 1/4x2-3/4” hex bolts, with square
nuts. Remove the nuts.
Note:
The Lower Rear is connected to the Right Side Frame with cables, but it is not
yet securely attached with bolts so be careful when moving and positioning.
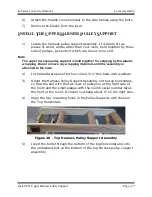
3)
The right side frame and rear cross member are held together with
packing tape and cellophane. Find the end of the tape. There should


