K-Series Loom User Manual
Weaving Instructions
Threading, Sleying, & Tying On
Page | 107
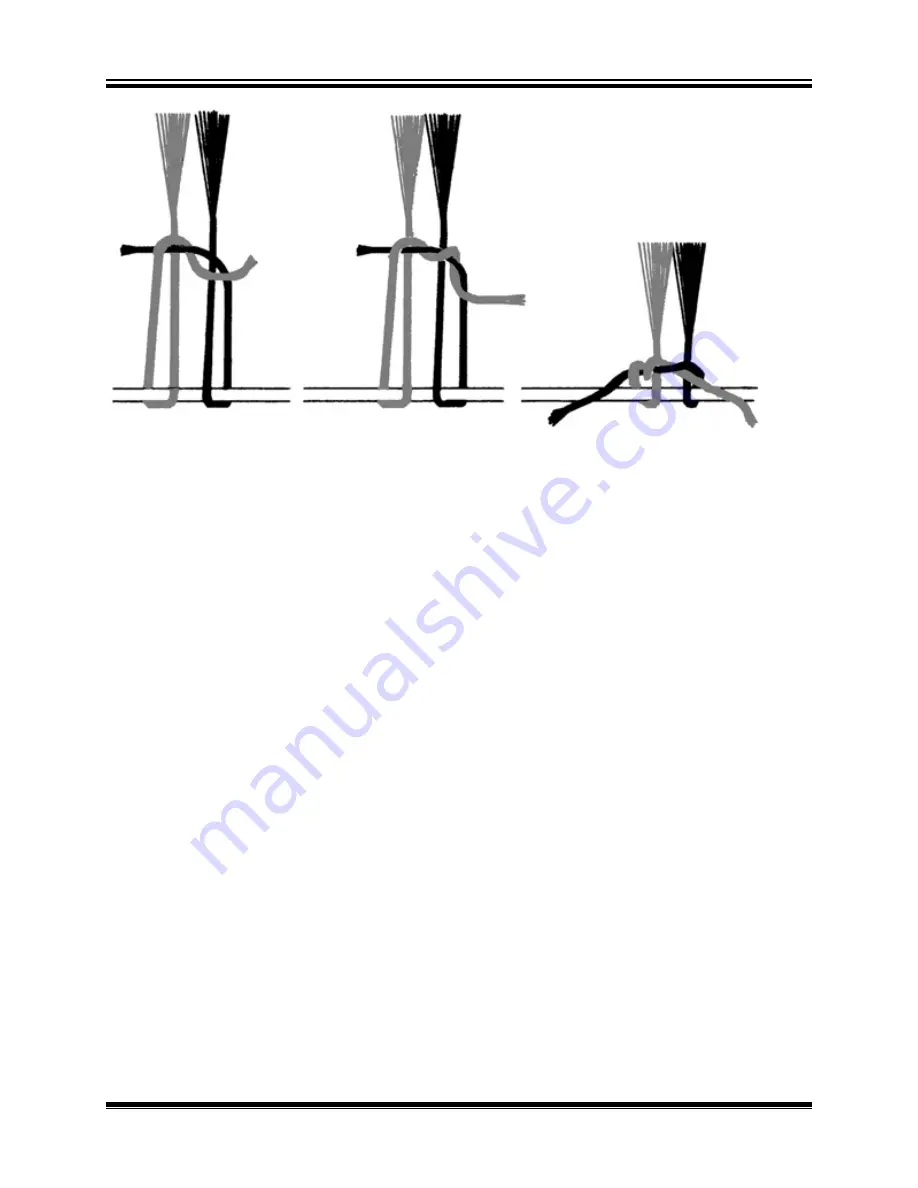
Figure 102 - Surgeon's Knot
Start with one section in the middle, then the far right and the far left
outside ones. Work your way in. After tying the knot, pull only until you feel
some resistance and tighten the knot and proceed to the next section.
By now, the sections that were tied first maybe quite a bit looser than the
ones tied last. To correct this, you do not need to untie the knots, simply
grasp the ends and pull them away from you, then re-tighten the knots,
remembering to only pull until you feel, what is now, a uniform resistance at
each group. Repeat this until all of the sections are at approximately the
same tension. It is important to remember at this point, that you are not
trying to achieve weaving tension, only
uniform
tension across the width of
your warp.
As directed in the preceding warping instructions, you’ll secure the front of
your warp to the Cloth Storage Beam via the apron.
Tying On To An Old Warp
A new warp can be tied on to an old warp, thus eliminating the threading
and sleying process, if the new warp introduced into the loom uses the same
threading pattern and E.P.I. as the last warp. This process is especially good
for production weavers as it saves time. It also takes less concentration and
there is less chance of making mistakes in threading.
The tying on process starts when you are finishing the last warp on the
loom. Before you cut off the fabric from the old warp, make sure to leave
enough unwoven warp to extend one foot behind the harnesses, through the


