Resource Manager User's Guide
Multimedia Queue Administration - Page 15
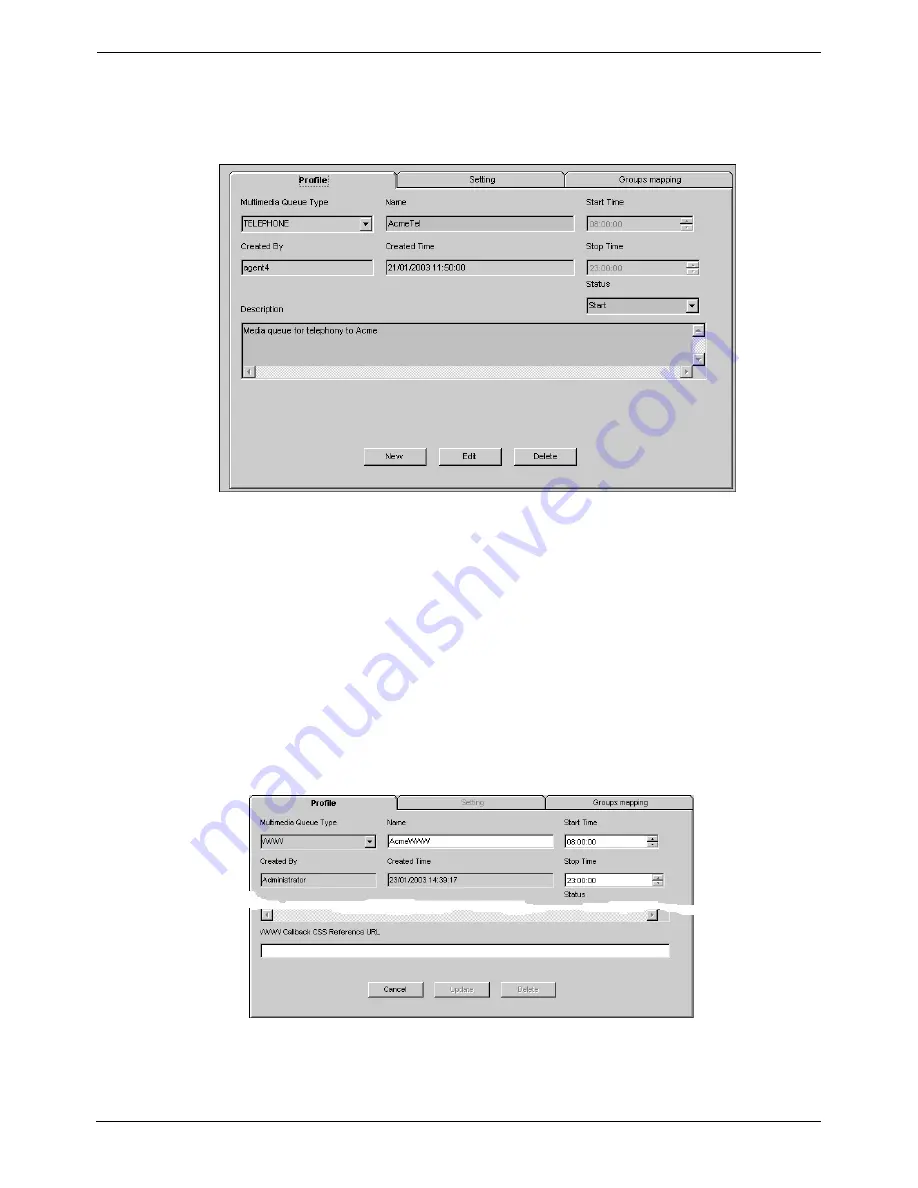
Stage 1 - Adding a Media Profile
With the resource Manager opened, right-click the Multimedia Queues Icon in
the tree and select New Multimedia Queue from the pop up menu, or click New
Multimedia Queue from the File menu. The Profile tab fields will open. These
are similar for Telephone, Email, Chat and Proactive as show below:
1. Click
Edit
and select the Multimedia Queue Type from the dropdown menu.
2. Enter
the
Multimedia
Queue
Name
.
3.
Created By
and
Created Date
and
Time
are automatically inserted by the
system.
4. Enter
a
Description
, giving a brief description of the new Multimedia Queue.
5. Enter
Start Time
, setting the time when the queue will be in operation.
6. Enter
Stop Time
, setting the time for the queue to close operations.
7. Select the 'Start' option for
Status
to begin the flow of contacts to the users’
desktops. The 'Pause' and 'Stop' options are both used to close the queue.
'Stop' terminates all contacts in progress. 'Pause' allows users to complete
the contacts in which they are engaged before closing the application.
8. The Profile field tab for WWW is shown below. Enter the URL in
WWW
Callback CSS Reference URL.
9. When all information is entered, click the
Add
and open the Settings
Window. Proceed from Stage 2 - Settings.
MultiMedia Module Administrator's Manual
Resource Manager User's Guide - Page 15
40DHB0002USEB – Issue 1a (05/29/2003)
Multimedia Queue Administration


