background image

Answering Calls

28


Syn248 SB35020 Deskset User’s Guide

Back to Contents

Intercom Auto Answering

You can set your Deskset to answer Intercom calls automatically, without your having to 
touch the phone to answer. When you enable Intercom Auto Answer, 

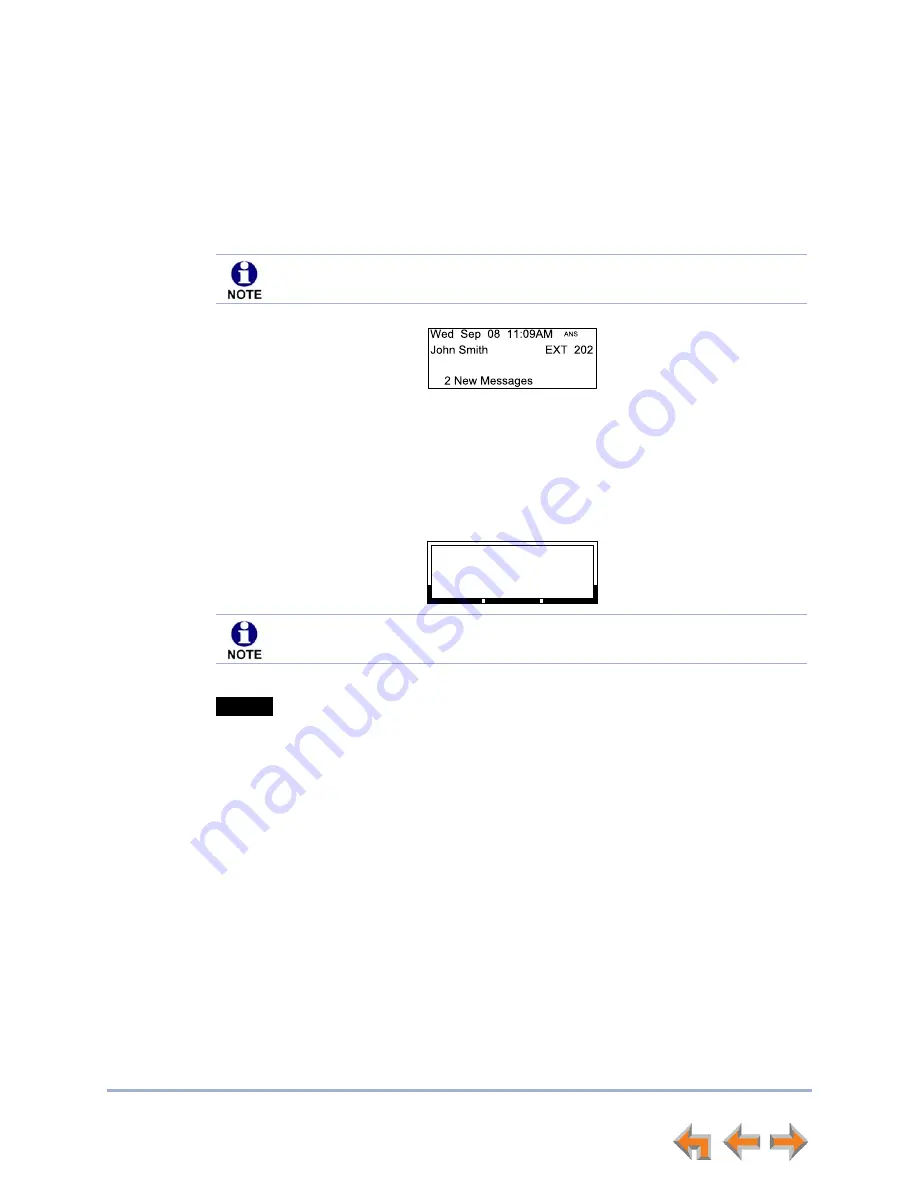
ANS

 appears at 

the top of the Deskset screen as shown in Figure 13 unless 

DND

 is active, since Auto 

Answer is disabled when DND is on.

Figure 13.  Intercom Auto Answer Enabled

To respond to an Auto Answered Intercom call:

After the call rings for the amount of time specified in the Auto Answer Delay (See 

“Intercom Auto Answer” on page 76)

, a two-second notification screen appears, and you 

hear a warning tone. Speak after the tone.

If you do not want the Deskset to automatically answer the call, press 

CANCEL

 or 

 while the call is ringing to send the call to the Intercom Call Forward–No 

Answer target. See 

“Call Forward–No Answer” on page 28

.

If there are multiple incoming Intercom calls, Auto Answer applies to the first call.

Call Forward–No Answer

Call Forward–No Answer is a setting that redirects incoming calls. The Syn248 system 
has two types of Call Forward–No Answer settings.

Phone Line Call Forward–No Answer

 can only be set by the system administrator. 

This setting determines the destination for unanswered calls on each line. After a call is  
forwarded, the call cannot be answered at the Deskset. Calls can be forwarded to:

an extension

an extension’s voicemail (without ringing the Deskset)

an external phone number

Auto Attendant (default destination). See 

“About the Auto Attendant” on 

page 29

.

Intercom Auto Answering applies only to direct Deskset-to-Deskset calls. Auto 
Answering does not apply to forwarded calls that use your Intercom line(s).

0:05
Graham  Bell
9-800-216-2007

Transfer

Conf

Park

1

AA

Call Answ ered.

Speak after the tone.

If the Intercom Auto Answer Delay is set to zero, you hear no ring. Instead, the 

Call Answered

 screen appears and you hear the warning tone.

Ignore

Summary of Contents for Syn 248 SB35020

Page 1: ...Reserved AT T and the AT T logo are trademarks of AT T Intellectual Property licensed to Advanced American Telephones San Antonio TX 78219 Syn248 TM is a trademark of Advanced American Telephones Issu...

Page 2: ...croll Indicators 12 Deskset Status Indicators 13 Call Indicators 14 Call Status LEDs 14 Call Status Icons 15 Programmable Feature Keys 16 Programmable Feature Key LEDs 17 Dial Pad Entry 18 Using the S...

Page 3: ...Using the Dial Pad 41 Accessing the Held Calls List 42 Directory 43 Using the Directory 44 Viewing and Calling Directory Entries 45 Creating a New Personal List Entry 46 Editing a Personal List Entry...

Page 4: ...n 85 Auto Attendant Settings 86 Using Do Not Disturb DND 86 Web Interface 87 Accessing the Web User Interface WebUI 88 Error Handling 89 Basic Settings 90 Personal Directory 91 Quick Dial 93 Help 94 T...

Page 5: ...ature usage Before using this AT T product please read Appendix D Important Safety Instructions on page 114 Please thoroughly read this user s guide for all the feature operations and troubleshooting...

Page 6: ...ument Text Conventions Table 1 lists text formats and describes how they are used in this guide Go back to the last page viewed Go to the previous page Go to the next page Table 1 Description of Text...

Page 7: ...siness grows your phone system can too The Syn248 Business Phone System provides simplicity without sacrifice it s simple to install manage and use without sacrificing any of the features you need and...

Page 8: ...he Syn248 System Syn248 differs from conventional telephone systems in that calls are not coordinated by a central controller Instead Syn248 uses a distributed control system over a Local Area Network...

Page 9: ...t 2 Soft Keys Three keys that produce different actions depending on the LCD labels 3 Handset Traditional 2 conductor wiring FXO Foreign Exchange Office Ports 4 Hard Keys Fixed function keys See Progr...

Page 10: ...Table 3 Deskset Function Keys 1 VOL VOL Increases decreases the ringer and voice volume 2 HEADSET Routes audio to corded headset Can be used to go off hook 3 HOLD Puts the current active call on hold...

Page 11: ...ringing busy or on hold The Line keys are used for receiving and making calls to external numbers To call another extension in your office you must use an Intercom key By default the Intercom key is...

Page 12: ...displayed if you are making a call See Appendix A Soft Keys on page 110 for an alphabetical list of the labels that appear above the soft keys The top example shows the soft key labels for the soft ke...

Page 13: ...own in Figure 6 and as described in Table 4 Figure 6 Sample Status Indicator Table 4 Status Indicators Icon Status 1 2 3 Indicates the number of the associated Line key Ringer volume set to zero The r...

Page 14: ...15 for a complete description of the available icons The Call Timer displays the duration of the current call status such as how long the call has been held If you subscribe to caller ID Call Informa...

Page 15: ...cription Table 6 Call Status Icons Icon Status Icon Status Off Hook Indicates that you have lifted the handset pressed SPEAKER or HEADSET or you are on a phone call Conference On Hold Indicates you ha...

Page 16: ...Quick Dial entries Table 7 lists the default functions for the Programmable Feature keys Your key assignments may be different Table 8 on page 17 has a complete list of possible Programmable Feature...

Page 17: ...Flash GREEN Call held at your Deskset Steady ORANGE Active call at another Deskset Flash ORANGE Held call at another Deskset Page Off No page Steady GREEN Making page Quickly Flashing GREEN Receiving...

Page 18: ...1 Pressing a key numbered 2 to 9 enters characters in the following order 1 Upper case letters 2 Key number 3 Lower case letters For example pressing 2 cycles through A B C 2 a b c Pressing 7 cycles...

Page 19: ...tive call if you are using the handset or a corded headset pressing SPEAKER switches audio to the speakerphone If the handset is not hung up pressing SPEAKER switches audio between the handset and the...

Page 20: ...umber You can make a call at any time by choosing an off hook method then dialing a number This is referred to as Live Dialing You can also predial or live dial using phone numbers from lists such as...

Page 21: ...call External calls only Simulates a hook flash which signals your telephone service provider to activate a feature For example hook flash may switch you to another incoming call when you hear a call...

Page 22: ...two second pause into the phone number to delete the last digit entered CANCEL to cancel predial 2 Lift the handset or press SPEAKER HEADSET or press a Line key to go off hook and call the number Liv...

Page 23: ...1 Access the desired list entry For example to view the Directory press MENU then 1 and then 5 The Directory screen appears See Accessing Items in Lists on page 37 2 Press or until the desired entry a...

Page 24: ...ator can configure additional Intercom keys to give you more Intercom lines Figure 10 Intercom Key To make an intercom call 1 With the Deskset in Idle mode go off hook by lifting the handset pressing...

Page 25: ...umber if available If there is more than one incoming call the new calls are assigned to Line keys while the oldest call remains on the screen You can answer or ignore each call The following sections...

Page 26: ...someone at another Deskset answers an outside call your Deskset returns to Idle mode If your company has caller ID the Incoming Call screen displays caller information If the caller ID information is...

Page 27: ...re an incoming call by pressing to silence the ringer The silenced ringer icon appears If you are on an active or held call after the incoming call has been ignored the screen returns to the call you...

Page 28: ...Answer on page 28 If there are multiple incoming Intercom calls Auto Answer applies to the first call Call Forward No Answer Call Forward No Answer is a setting that redirects incoming calls The Syn24...

Page 29: ...menu that can guide callers to the desired extension or extension s voicemail The user at the Operator extension can set the Auto Attendant to one of three menus a default menu a Day menu and a Night...

Page 30: ...scribes the call management features of the SB35020 Deskset The Deskset enables you to put calls on hold transfer calls and create conference calls Call Management on page 31 Putting a Call on Hold on...

Page 31: ...n Figure 14 The Call Status icons are described in Call Status Icons on page 15 Figure 14 Active Call Screen Table 11 Active Call Screen Description Key Description Begins transfer of a call Begins a...

Page 32: ...n press the flashing orange Line key to take the call off hold making it an active call on their Deskset All Desksets including those that are not assigned that line can view and take your call off ho...

Page 33: ...tem configuration transferring calls to an outside line may be disabled take a held call off hold call a number from a list For example press and select an extension to call transfer the call directly...

Page 34: ...n appears 2 Establish a second call You can dial the second call normally or you can select a held call and take it off hold or you can start the second call from a list When the second call has been...

Page 35: ...Line key to start a new call Answer an incoming call To take a conference call off hold 1 Press a corresponding Line key Ending a Conference To end a conference From the Conference screen you can pre...

Page 36: ...the jack on the back of the Deskset The cordless headset must provide its own wireless radio To use a Headset From Idle mode or during a call press the HEADSET key If you have a headset connected and...

Page 37: ...elsewhere in this guide In this chapter you learn how to access an individual item in a list All instructions start from the Idle screen The Deskset may provide access to the following lists Director...

Page 38: ...nsion List using the soft key that appears To access the Extension List 1 Lift the receiver or press SPEAKER then press the Intercom key The Dialing screen appears 2 Press The Extension List appears 3...

Page 39: ...d then 7 The Redial list appears 2 Press or until you see the desired entry 3 Press SELECT to redial the number or press to redial the number by pressing Table 12 Redial List Function Key Description...

Page 40: ...an delete a single Redial entry from the Redial list or all Redial entries Ensure the entry you wish to delete is displayed To delete a single entry 1 In the Redial list press or until you see the des...

Page 41: ...r an exact match or the closest match For example If you press 4 once the Deskset searches for names beginning with G If you press 7 three times the Deskset searches for names beginning with R See Dia...

Page 42: ...ing orange Line key is the easiest way to retrieve a held call However this is not always possible because all Desksets in the system may not have the same lines assigned to them For example your depa...

Page 43: ...y at your extension System This public directory is created and maintained by the system administrator You can view and sort this directory but you cannot modify it Extension This is a list of all ext...

Page 44: ...Directory Table 13 Directory Screen Description Key Description Creates a new entry in the Personal list Allows you to change previously entered information Switches between first and last name sortin...

Page 45: ...n the alphabetical list To view and call Directory entries 1 Press MENU then 1 and then 5 The Directory list appears 2 Press or to show the desired entry 3 Press SELECT to dial the displayed phone num...

Page 46: ...ast Name and Phone fields using the dial pad See Dial Pad Entry on page 18 The name text fields are limited to 20 characters each and the number field is limited to 32 digits When editing the entry yo...

Page 47: ...d See Dial Pad Entry on page 18 The name text fields are limited to 20 characters each and the number field is limited to 32 digits When editing the entry you have the following options Press or to mo...

Page 48: ...delete a Personal list entry 1 Press MENU then 1 and then 5 The Directory appears 2 Press or to display the entry to be deleted 3 Press so that appears 4 Press The confirmation screen appears 5 To con...

Page 49: ...onal list The Personal Entry screen appears The Deskset automatically fills in the name and number if available If necessary edit the name and number Press to move the cursor to the Last Name and Phon...

Page 50: ...st names When you use the dial pad to search the system searches for the names in the sort order To sort Directory entries 1 Press MENU then 1 and then 5 The Directory appears 2 To sort the entries by...

Page 51: ...page 52 lights up when there is at least one new message Each message can be up to 2 minutes long The Personal Mailbox at your Deskset has 30 minutes of recording time The following sections describe...

Page 52: ...ress or Pressing or displays the soft keys described in Table 14 Figure 18 Messages Screen Table 14 Voicemail List Description Key Description Key Description Plays message Deletes displayed message D...

Page 53: ...l Greetings menu 2 Press or to highlight the Primary or Alternate greeting You cannot record over the Pre Set greeting 3 Press The message review screen appears The and soft keys do not appear if a gr...

Page 54: ...lternate greeting see To record a Primary or Alternate greeting on page 53 Accessing Your Messages To access an entry from Voicemail 1 Press MENU then 1 and then 3 If necessary use the dial pad to ent...

Page 55: ...r message To play all messages 1 On the Messages screen press or to display the soft key 2 To play all messages press The system starts with the oldest and ends with the most recent There is a short b...

Page 56: ...e person who left the message 1 In the Messages list press or until the desired entry is on the screen 2 Press The Call Back screen appears Press or to view the dialing options Press to dial the numbe...

Page 57: ...es 1 On the Messages screen press or until the desired entry is on the screen 2 Press to delete the message The system deletes the message and displays call information for the next message OR To dele...

Page 58: ...k a message as new or old at any time To clear and restore new Message indications 1 On the Messages screen press or until the desired entry is on the screen 2 Press or to display the soft key 3 Press...

Page 59: ...ear your voicemail greeting If the Auto Attendant allows you to reach your extension s voicemail directly press the star key twice when you hear your voicemail greeting If the Phone Line Call Forward...

Page 60: ...ten to new messages press 1 To listen to old messages press 2 To change Voicemail options press 8 Once you press 1 or 2 and the messages start playing you have the following options To stop message pl...

Page 61: ...m in Figure 20 you have the following options To record a primary greeting press 1 To record an alternate greeting press 2 To choose the Primary or Alternate greeting press 7 2 Begin recording after t...

Page 62: ...Log Entries on page 67 You can view the Call Log by pressing MENU then 1 and then 6 from the Idle screen This system has a caller ID feature that works with the caller identification service offered...

Page 63: ...sent because it is unavailable UNKNOWN NAME and UNKNOWN NUMBER appear If the caller chooses not to send the information PRIVATE NAME and PRIVATE NUMBER appear 1 Current Call Log entry number total num...

Page 64: ...ired entry Press to access dialing options before calling a number and to dial the displayed number The Call Back screen appears Press to dial the on screen number Call Log entries may not be in the p...

Page 65: ...desired entry is on the screen 2 Press The message playback screen appears If necessary use the dial pad to enter your password and press SELECT 3 Press Delete while the message is playing to delete t...

Page 66: ...Name and Number fields 3 If necessary edit the name and number Press to move the cursor to the Last Name and Phone entries Press to erase the highlighted character if there is one or else the characte...

Page 67: ...entries 1 From a Call Log entry press The displayed entry is removed from the list and the next entry appears OR To delete all Call Log entries press or to display the soft key a Press The confirmati...

Page 68: ...Paging 68 Syn248 SB35020 Deskset User s Guide Back to Contents C H A P T E R 9 PAGING Paging allows you to broadcast what you say to more than one extension...

Page 69: ...one and the Page screen appears OR Press CANCEL to return to the idle screen 4 Speak into the speakerphone or pick up the handset to speak 5 When finished press or CANCEL hang up the handset or press...

Page 70: ...u or your system administrator can customize your Deskset at the Deskset using the following menus and features Deskset Menu on page 71 Features on page 72 User Settings on page 73 Admin Settings on p...

Page 71: ...Features menu These features are discussed throughout this User s Guide See Features on page 72 for appropriate links Press 2 to display the User Settings menu See User Settings on page 73 for further...

Page 72: ...es 54 Play delete or forward messages 4 Do Not Disturb 86 Turn Do Not Disturb on and off 5 Directory 44 View and make calls from the Directory 6 Call Log 63 View and make calls from the Call Log 7 Red...

Page 73: ...menu 2 If you have set a user password the User Password screen appears before the User Settings menu appears Enter your password and press SELECT To correct errors press To cancel your changes on th...

Page 74: ...se the Greetings menu as shown in Figure 24 and described in Table 18 to record greetings Figure 24 Greetings Menu Table 18 User Settings Greetings Menu Function See page Description 1 Voicemail Greet...

Page 75: ...istent with recordings at other extensions in the system To record and play a personal name 1 Press MENU then 2 then 1 and then 2 to display the Name Recording menu The and soft keys do not appear if...

Page 76: ...ng To set Auto Answer 1 Press MENU then 2 and then 2 The Intercom Auto Answer screen appears 2 Press or to select either Disabled or Enabled 3 Press then or to set the delay before the Deskset automat...

Page 77: ...25 Deskset Settings Menu Table 19 Deskset Settings Menu Function See page Options 1 Display 78 1 Contrast 1 9 2 Backlight Lo Hi Off 2 Sounds 79 1 Ring Volume 0 9 2 Ringtones 1 9 3 Key beeps On Off 3 V...

Page 78: ...trast and backlight To use the Display menu 1 Press MENU then 2 then 3 and then 1 The Display menu appears 2 Press or to adjust the Contrast level from 1 to 9 The default is 5 3 Press to set the Backl...

Page 79: ...appears 2 Press or to adjust the Ring Volume from 0 to 9 The default is 3 A ringer sample plays You can also set the ring volume by pressing VOL and VOL To turn off the ringer decrease the volume to...

Page 80: ...o use the Volume Settings menu 1 Press MENU then 2 then 3 and then 3 The Volume Settings menu appears 2 Press or to set the Speaker Volume from 1 to 9 The default is 4 3 Press and then or to set the R...

Page 81: ...et takes first priority in all instances You can set the audio preferences to Headset or Speaker by using the Preferred Audio menu To use the Preferred Audio Mode menu 1 Press MENU then 2 then 3 and t...

Page 82: ...ress MENU then 2 and then 4 The Directory Settings menu appears 2 Press or to Hide or Show the Personal Directory This Directory holds your personal Directory entries See Directory on page 43 3 Press...

Page 83: ...the dial pad to enter a password of up to six digits To correct errors press To start over press 4 Press and enter the new password again 5 To accept the change press The Password Saved screen appear...

Page 84: ...ter the Admin password before you can view the Admin Settings menu For more information about these settings see the Syn248 Installation and Configuration Guide available from www telephones att com s...

Page 85: ...e used by your system administrator or the installer Figure 26 Deskset Information To display the Deskset Information 1 Press MENU and then 4 The Deskset Information screen appears The model number de...

Page 86: ...for the operator The system administrator can customize the Day menu and Night menu with your own company s greeting message and instructions to callers For more information see About the Auto Attenda...

Page 87: ...s the Web User Interface WebUI that resides on your Deskset See Accessing the Web User Interface WebUI on page 88 After you log in to the WebUI you can configure the following features Basic Settings...

Page 88: ...r open an Internet browser AT T recommends Internet Explorer 7 or higher 5 Type the Deskset IP address in the browser address bar and press ENTER on your computer keyboard 6 A Login page appears 7 Und...

Page 89: ...lds and click the page is not saved The WebUI displays an error message at the top of the page The field with the incorrect value is highlighted in yellow as shown in Figure 27 You can view a more det...

Page 90: ...fy the Basic Settings 1 If Intercom Auto Answer is enabled on your Deskset see Intercom Auto Answer on page 76 you can a Disable Intercom Auto Answer b Set the Intercom Auto Answer Delay from 0 to 45...

Page 91: ...also view and edit Personal Directory entries using the Deskset See Directory on page 43 To add an entry to the Personal Directory 1 In the navigation menu at left click Personal Directory The Direct...

Page 92: ...ation 4 Click to accept your changes or to reject the changes To sort and delete Personal Directory entries 1 In the navigation menu at left click Personal Directory to display the Directory List 2 To...

Page 93: ...able Feature Keys page appears You can add or edit Quick Dial entries for any keys that the system administrator has set up as Quick Dial keys All other Programmable Feature Keys are unavailable 2 Ent...

Page 94: ...48 SB35020 Deskset User s Guide Back to Contents Help To access WebUI Help 1 In the navigation menu at left click Help A PDF Help file opens 2 To view a topic click the link for that topic The page fo...

Page 95: ...Troubleshooting Procedures on page 96 Display Messages on page 97 Calls Generally on page 99 Incoming Calls on page 102 Outgoing Calls on page 104 Voicemail on page 105 Other Deskset Features on page...

Page 96: ...n the device The system devices are not immediately active when powered up and after a power interruption Allow at least 30 seconds for the device to boot up If your Deskset uses Power over Ethernet P...

Page 97: ...the network cable from the Deskset before restoring factory defaults by pressing the RESET button more than five seconds Probable Cause Corrective Action The network cable is unplugged Ensure that one...

Page 98: ...ress for more than five seconds Reconnect the Deskset The device software version is different than the rest of the system Ask your system administrator to update all devices to the current software v...

Page 99: ...to your extension while you were on a call that call is dropped Maximum Call Duration was exceeded None Outside calls that are forwarded or transferred to an outside phone number use two outside lines...

Page 100: ...not connect a network server PC to the PC port on the Deskset Make sure the network cable is solidly plugged in If you tug on the cable the plug should remain inserted Probable Cause Corrective Action...

Page 101: ...to an outside phone number Ensure that a valid outside number is shown in the to Phone field this setting is part of the Deskset Admin Settings All phone lines may be in use If so try again later Pro...

Page 102: ...the top right corner of the Deskset display Press MENU then 1 then 4 to turn Do Not Disturb off The ringer volume is too low Press the key to increase ringer volume Probable Cause Corrective Action Yo...

Page 103: ...ithout filters installed Caller ID is a subscription service You must subscribe to this service from your local telephone service provider for this feature to work on your phone The caller must be cal...

Page 104: ...back of the Deskset Probable Cause Corrective Action You predialed a phone number with an area code that matches an extension number then you pressed the Intercom key After predialing an outside phon...

Page 105: ...he Call Forward No Answer setting Calls may be forwarding to another phone number instead of Voicemail Voicemail memory is full Delete messages Probable Cause Corrective Action Recording interrupted b...

Page 106: ...ntering your remote access code user password If you have no password press star star then pound Confirm you are calling from a touch tone phone When you dial a number you should hear tones If you hea...

Page 107: ...before the second dot match the IP addresses of the other Desksets or that the subnets are set up to communicate with each other Press MENU 4 at a Deskset to find the IP address If the other Desksets...

Page 108: ...e third line of the information Ensure that there is a network cable attached to the port on the Deskset and to the LAN If a PC at the same workstation is sharing the LAN connection attach a network c...

Page 109: ...le Cause Corrective Action A computer connected through the Deskset will be limited to 100 Mbits s Use separate network connections for the Deskset and the computer so that the computer can take advan...

Page 110: ...ls the on screen entry Allows dialing options before calling a number Clears the current entry Clears NEW indication from a message Initiates a conference call Deletes all records Deletes a record Del...

Page 111: ...ns a recording Saves a setting Sends a Voicemail message Stop recording Stores the name and number into the Directory Initiates transfer of a call Displays a list of extensions to which you can transf...

Page 112: ...et Table 21 Technical Specifications Feature Specification Size 6 9 7 9 8 1 H W D 57 angle 7 9 7 9 7 1 H W D 41 angle Weight 35 59 oz 1009 g including adapter Power Requirements 5 1 V DC 1700 mA 48 V...

Page 113: ...tall the equipment near a sink bathtub or shower Electrical Storms Electrical storms can sometimes cause power surges harmful to electronic equipment For your own safety exercise caution when using el...

Page 114: ...to an authorized service facility Opening or removing parts of the unit other than specified access doors may expose you to dangerous voltages or other risks Incorrect reassembling can cause electric...

Page 115: ...your Deskset Cat 5 wiring A twisted pair data cable commonly used in offices for computer communication CO Central Office An office to which subscriber home and business lines are connected The centra...

Page 116: ...isplay that presents status information Idle The mode of a device when it is not involved in call or call setup activity Intercom call internal call A phone call made from a Syn248 system extension to...

Page 117: ...dialing for frequently called phone numbers reboot Restart a device Redial Accesses the log of outgoing calls soft key The Deskset features keys below the LCD screen The bottom of the screen displays...

Reviews: