Chapter 6: Installing the Power Supplies
122
Section II: Installing the Chassis
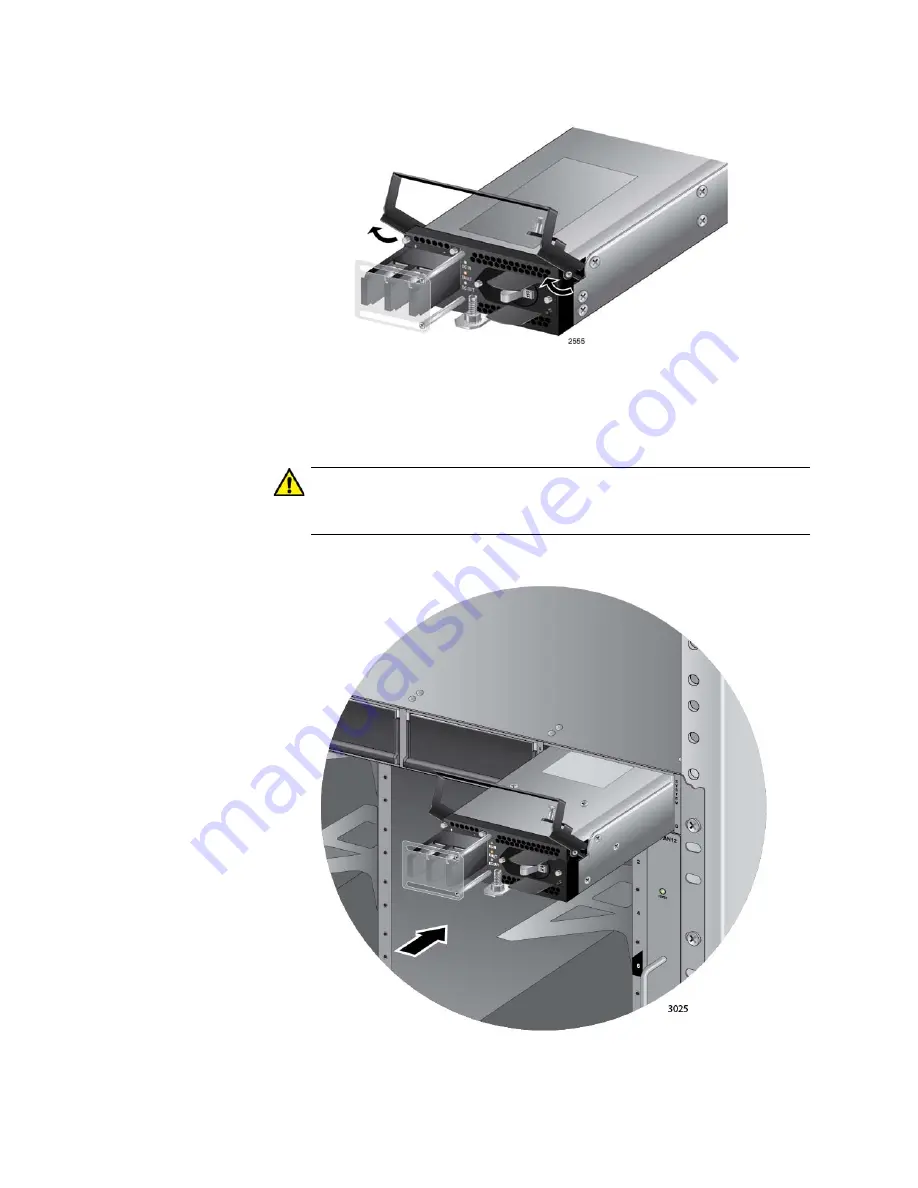
Figure 56. Raising Handle on the AT-SBxPWRSYS1 DC Power Supply
7. Align and insert the AT-SBxPWRSYS1 Module into slot C or D.
Figure 57 shows the power supply installed in slot D.
Caution
The AT-SBxPWRSYS1 DC System Power Supply will not work in
slot A or B.
Figure 57. Inserting the AT-SBxPWRSYS1 DC System Power Supply
Summary of Contents for AT-SBx81CFC960
Page 14: ...List of Tables 14...
Page 20: ...20...
Page 34: ...Chapter 1 Chassis and Power Supplies 34 Section I Hardware Overview...
Page 80: ...80...
Page 104: ...Chapter 5 Installing the Chassis in an Equipment Rack 104 Section II Installing the Chassis...
Page 124: ...Chapter 6 Installing the Power Supplies 124 Section II Installing the Chassis...
Page 262: ...Chapter 12 Replacing Modules 262 Section II Installing the Chassis...
Page 270: ...Chapter 13 Upgrading the Controller Fabric Card 270 Section II Installing the Chassis...
Page 272: ...272...
Page 286: ...Chapter 14 VCStack Plus Overview 286 Section III Building a Stack with VCStack Plus...


