


FS3 Frame Synchronizer/Converter v1.1r1 35 www.aja.com
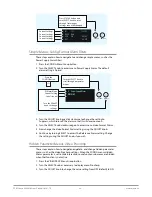
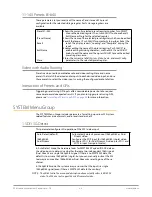
Turn SELECT knob to scroll
to menu 12.0 ProcAmp On/Off.
Use ADJUST to turn On. Turn
SELECT again to select/adjust
Gain, Black, Hue, and Sat.
SELECT
ADJUST
12.0 ProcAmp
On
SDI 1 UHD59.94
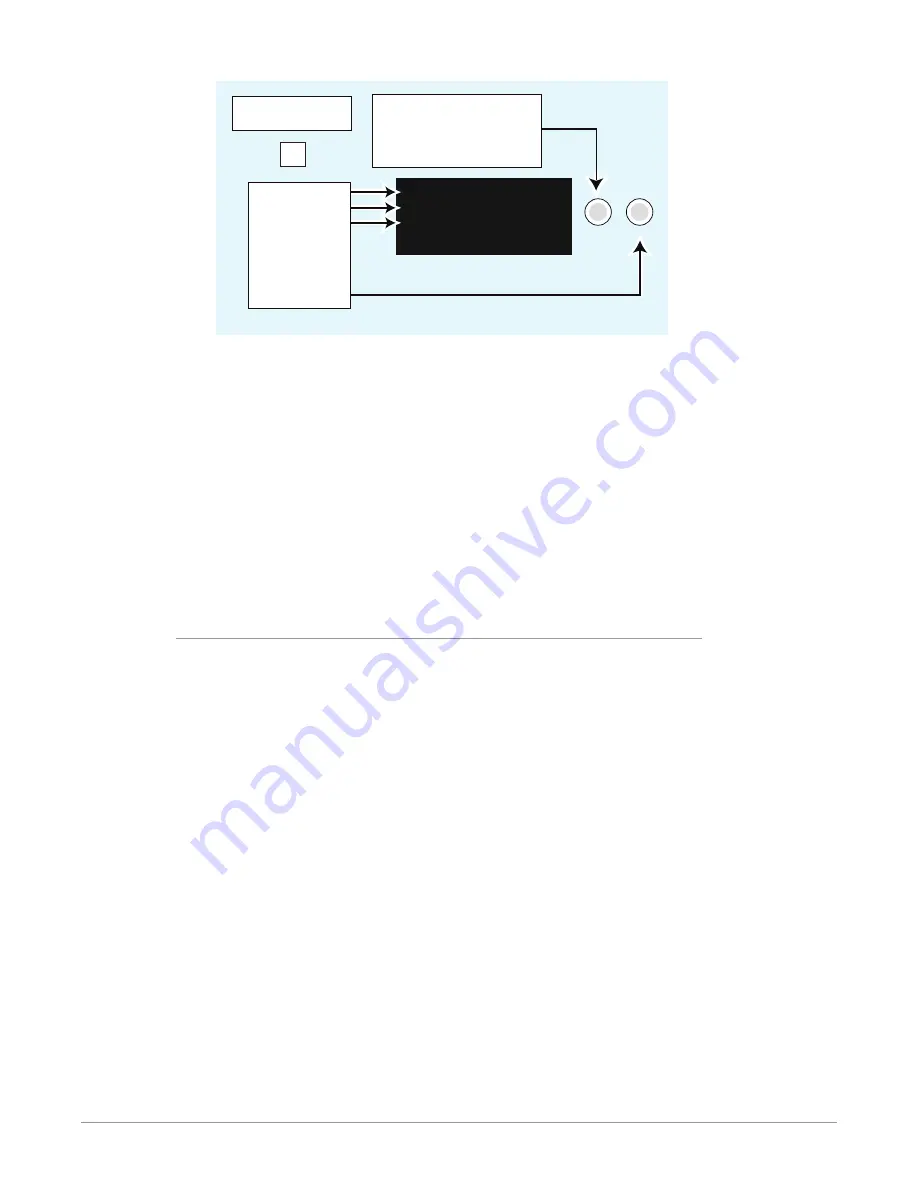
Press the
VIDEO PROC button
Parameter Menu
Current Settings
Labels
Change setting
by turning the
ADJUST knob.
VIDEO
PROC
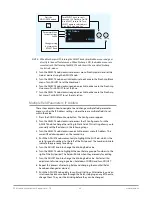
NOTE: When ProcAmp is OFF, turning the SELECT knob skips hidden menus and goes
directly to the next feature menu. When ProAmp is ON, the hidden menus are
revealed, such that turning the SELECT knob shows the associated ProAmp
control sub-menus.
4. Turn the SELECT knob clockwise to access menu ProcAmp Gain and set the
Gain as desired using the ADJUST knob.
5. Turn the SELECT knob one click clockwise to advance to the ProcAmp Black
menu. Turn ADJUST to set the black level.
6. Turn the SELECT knob clockwise again one click to advance to the ProcAmp
Hue menu. Turn ADJUST to set the hue.
7. Turn the SELECT knob clockwise again one click to advance to the ProcAmp
Sat menu. Turn ADJUST to set the saturation.
Multiple Field Parameters: IP Address
These steps explain how to navigate to and change multiple field parameter
menus, such as the IP Address settings, where there are multiple fields to set
within the value.
1. Press the CONFIG Menu Group button. The Config menus appear.
2. Turn the SELECT knob clockwise to access the IP Config menu. Turn the
ADJUST knob to change the setting to Static Addr. This setting allows you to
manually set the IP address in the following steps.
3. Turn the SELECT knob clockwise one click to access menu IP Address. The
current IP address appears on the second line.
4. Push the ADJUST knob momentarily to highlight the first field, which is the
octet (group of numbers) to the left of the first period. The numbers blink to
indicate they are ready for editing.
5. Turn the ADJUST knob to change the blinking field value.
6. Turn the SELECT knob to highlight the next field, a group of numbers to the
right of the first period. The field will blink when they are ready for editing.
7. Turn the ADJUST knob to change the blinking field value. For faster (10x)
adjustment of wide-ranging values, hold down CONFIG and turn ADJUST.
8. Repeat this process of selecting fields and changing them until all fields
have been changed as desired.
9. Push the ADJUST knob quickly to confirm all settings. Alternatively, you can
scroll counterclockwise back through the fields, stopping on any of them to
change them. They must be blinking before they can be changed.