14-3
SERVICING
SM CKDDCI 2-A.3 GB
14.1.6
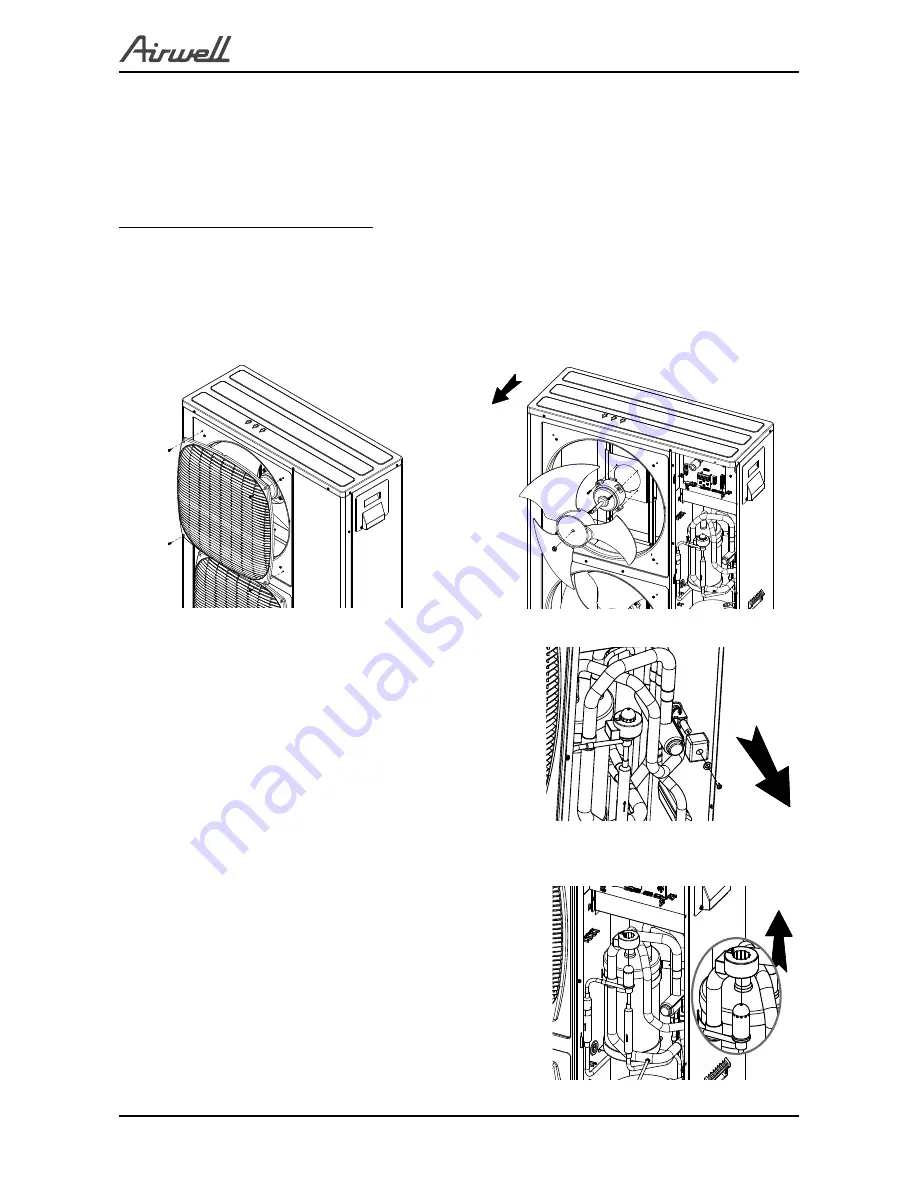
Removing Outdoor Fan Motor
1. Remove the outdoor fan according to
14.1.5.
2. Disconnect the motor connector from the main board.
3. Cut the nylon ties holding the motor cable.
4. Remove the four (4) fixing screws for the motor.
NOTES for re-assemble the motor:
1. When mounting the motor, ensure the cables point downwards.
2. Fix the protection tube edge downward to ensure the water may not keep in it.
3. Fix the motor wires with a nylon ties to prevent them obstructing the propeller fan.
4. When connecting the motor wire, check to ensure that the labels on the connectors match the
PCB connectors.
5. Fix back the air outlet grille.
Removing Air Outlet Grille
Removing Outdoor Fan & Motor
14.1.7
Removing Reversing Valve coil
1. Remove the service front panel according to
14.1.1
.
2. Check to ensure that LEDs and display board are OFF.
3. Disconnect the RV connector from the main board.
4. Remove the RV wires from the cable holders along the
electronics box.
5. Remove the fixing screw from the reversing valve coil
and take the coil out.
Removing Reversing Valve coil
14.1.8
Removing Expansion Valve coil
1. Remove the service front panel according to
14.1.1
.
2. Check to ensure that LEDs and display board are OFF.
3. Disconnect the EEV connector from the main board.
4. Remove the EEV wires from the cable holders along the
electronics box.
5. Pull up the EEV coil.
In some cases the EEV coil is to be rotated and than
pulled up for removal.
Removing Expansion Valve coil


